
It’s all about these fun improv birds this month for members of Bee 7. No don’t worry I’m not expecting you to make numerous birds it’s just I found these so addictive and fun to make I couldn’t stop! I would love 1 bird block from everyone but if you have time for a second that would be fab.
They are also wonderful for using scraps for the birds themselves at least.
Now for those who find improv not their thing then there is a free pattern on the website Blocklotto which gives all the measurements and how to assemble the bird. If you like to cut everything out to begin with and to precise measurements then this is the method to choose. They look just as charming and will come out at a block around 6″ by 9″ the pattern is here
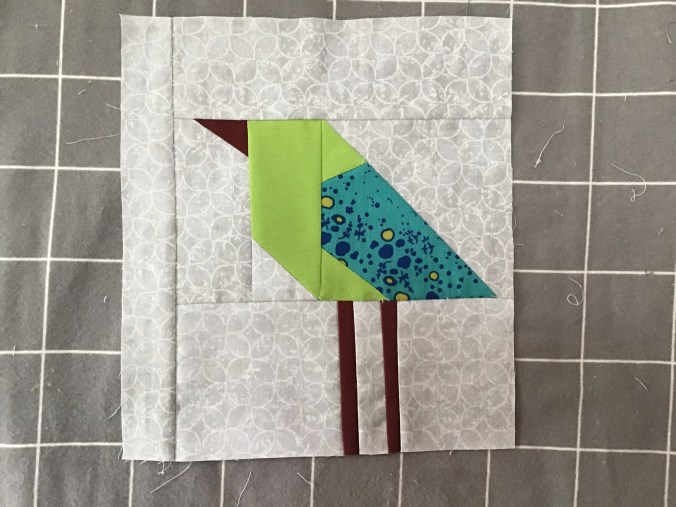
However if you fancy doing this in an improv way then be my guest. I have to say it’s a perfect block for improv because the bird itself can be made to really any dimension and in fact the more variety the better. You will see I’ve got long legs, fat beaks, thin beaks, at least one wing that went wrong when I snowballed the wrong corner but it really doesn’t matter! I’ve added extra strips where I fancied!
I know many of you in this Bee are very experienced and can easily work out from the picture above how to make this block. To those bee members the only thing I’d say is the finished block needs to be no more than 10″ by 14″ (portrait or landscape) and any variant down to a min 6″ by 9″. And if you could consider doing one facing to the right that would be great. But for those who’d like a pointer as to the dimensions and some tips along the improv way please see below.
You will need 3 coloured fabrics, one for the wing, one for the body and one or two different fabrics for the beak and legs and any colours you fancy (and I don’t say that often!). You will also need around a half of a fat quarter of the neutral background which can be any grey/beige/white patterned or solid neutral as long as it is a good contrast to the bird fabrics you choose.
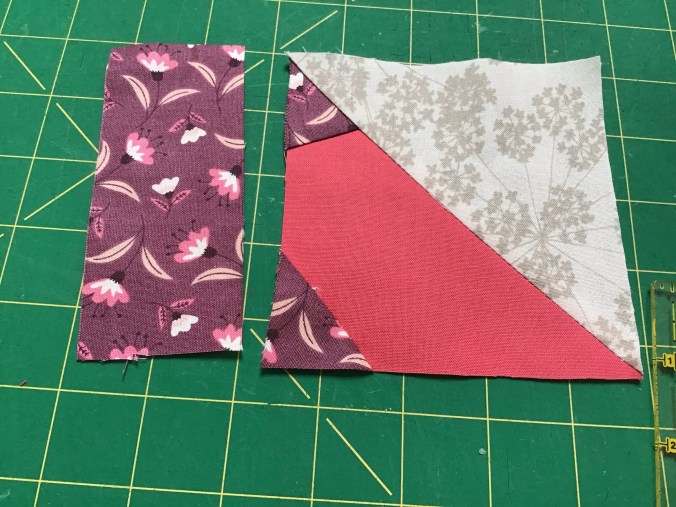
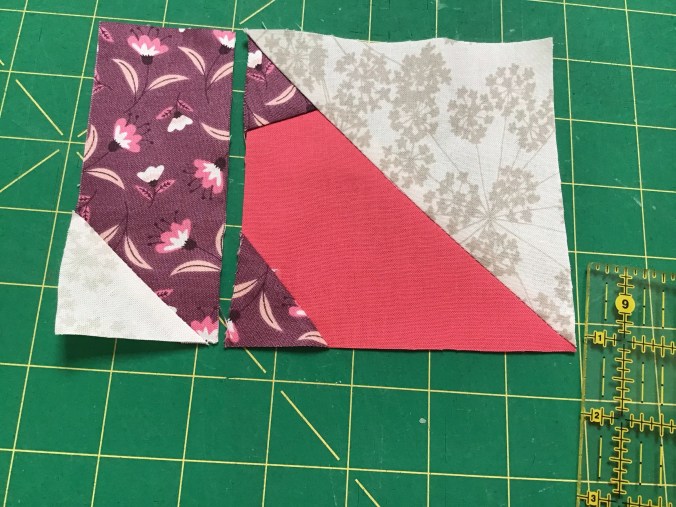
So to start cut out two right hand triangles that when sewn together will make a square (but don’t sew them together just yet!). One right handed triangle in the neutral and another in coloured fabric. This coloured fabric will be the bird’s wing. The sides can be anything from 4″ to 6.5″. The example given is 5″ and makes a medium sized bird.
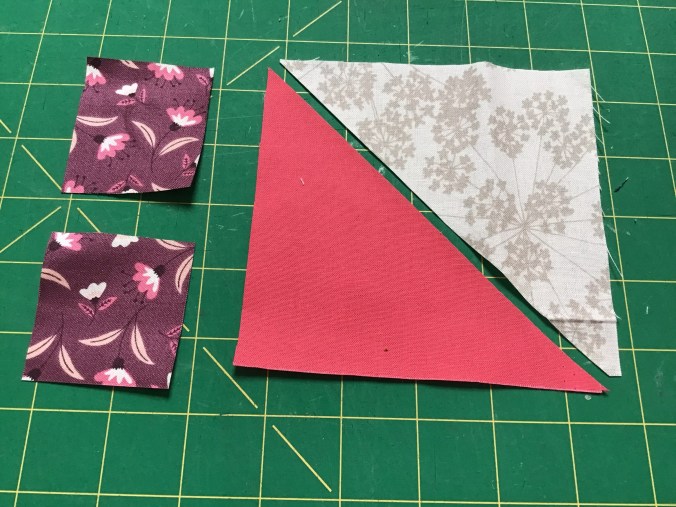
Now you want the wing triangle to have two corners of the body fabric so it looks like this.
 To do this you need to snowball scraps of the body fabric onto two corners of the wing triangle. If you are familiar with this method just skip the next few pics.
If you are new to this then the method for doing this is shown in the pictures below.
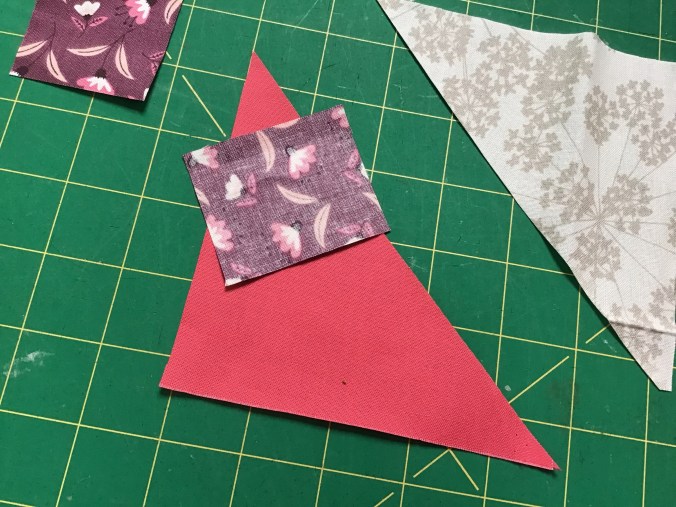
Using pretty much any size of body fabric just make sure that when you flip up the fabric it will cover the corner completely. Now sew it across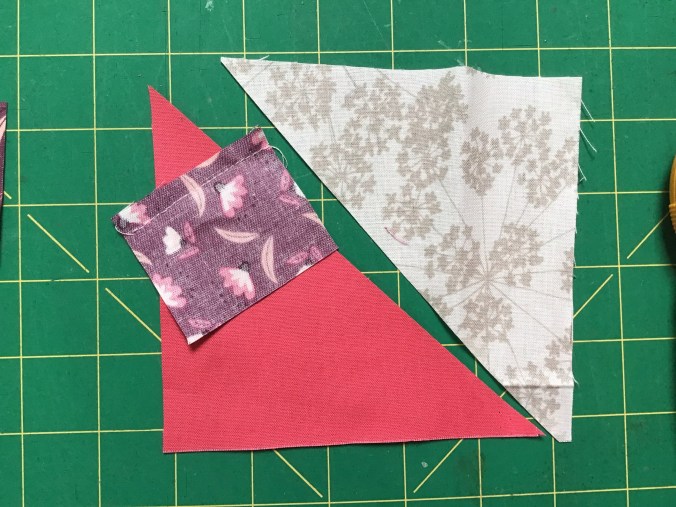
Flip up the triangle of the body fabric,

turn it over and ….
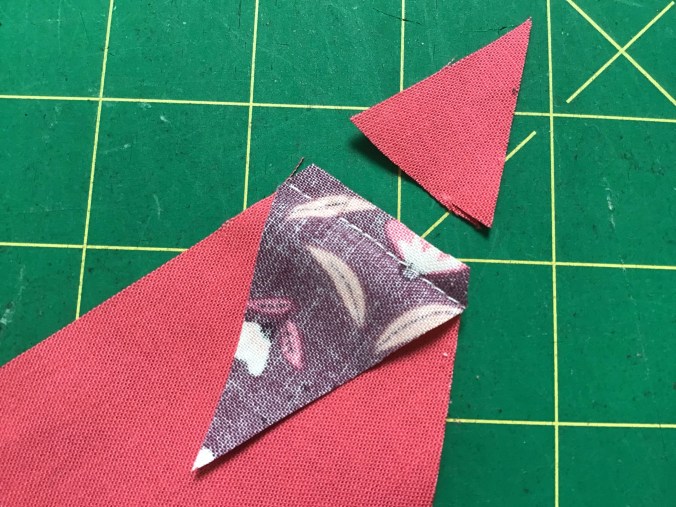
…. cut off the surplus body fabric using the existing corner as a template
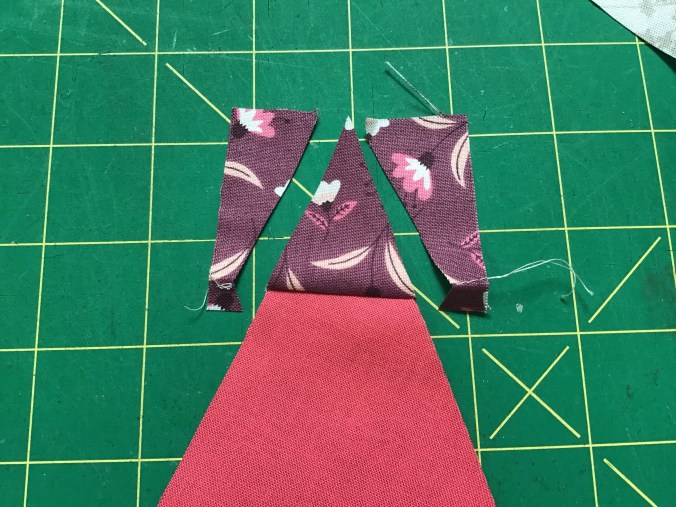
Now trim off the excess fabric behind. Now be careful here, the number of times I have cut off the wrong corner….
Next step is to snowball the other triangle corner using the same method so it looks like this and again any size will do.

Now sew this modified wing triangle to the neutral background right hand triangle to make a square. Trim the square, mine came out at 4.5″, then cut out a body strip the length of the square and around 2″ or 3″ wide. This is the bird’s breast.
Using the snowball method add a corner of background fabric to the bottom of the body strip. Again this can be any size really.
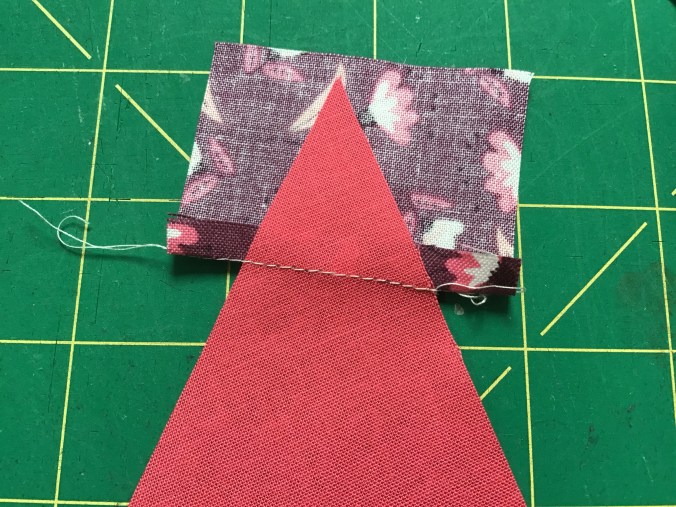
Now prepare the beak section. Cut a strip of the background fabric the same length as the square and snowball the beak onto the top. This beak fabric strip can be any width.
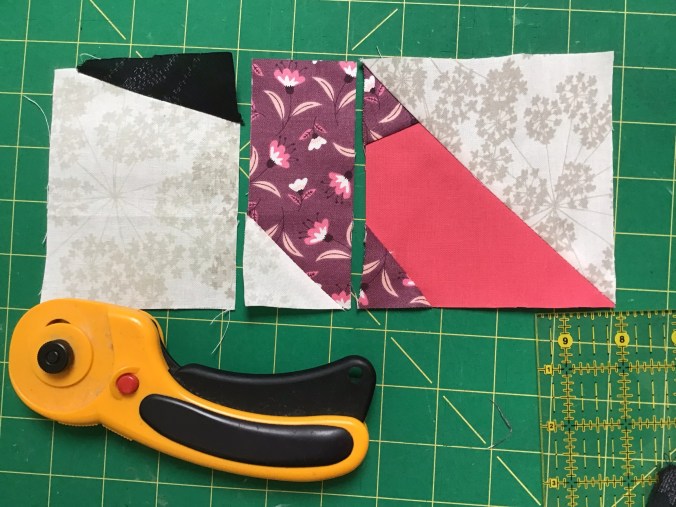
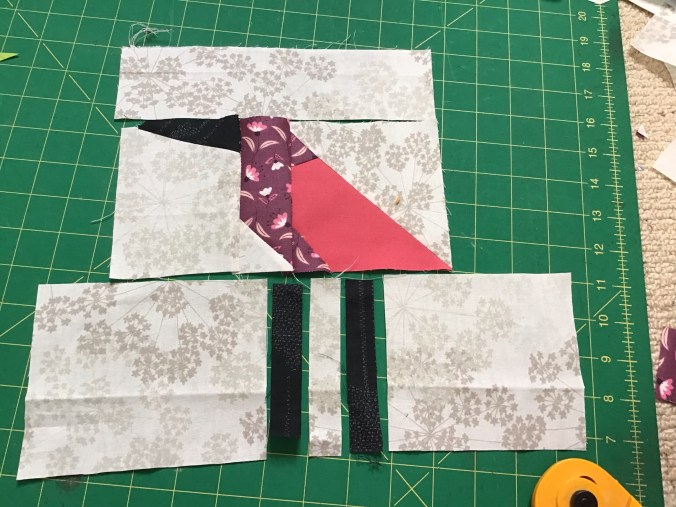
Now sew all theses pieces together. Then cut and add a strip to the top the width of the pieced block. Then cut a piece the width of the block plus a couple of inches for the bottom of the block

With bottom piece make two cuts for the legs and insert the legs so they measure around 1/4″wide. You also need to ensure the legs, when pieced, will be under the body. Having that much extra length in the width of this fabric will give you that wriggle room.
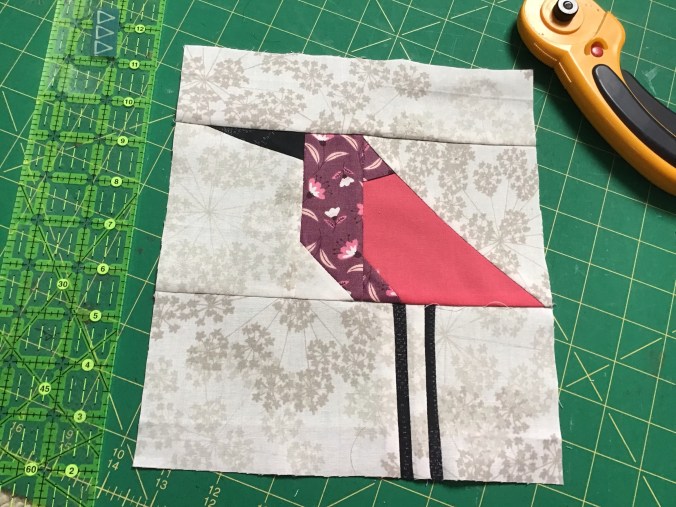
Now sew together and voila!!
I hope the pictures have helped but if you have any queries please let me know.
