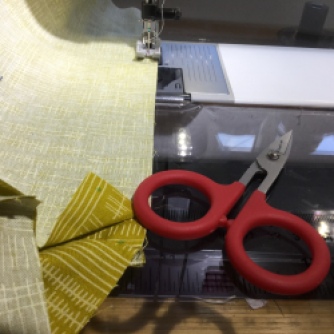
 Yes I thought I would confess straightaway. Maybe its my prostestant work ethic but on one hand I feel I have to defend myself for my profligacy. But on the other hand I think well its my money and no one will starve because of this purchase. And in the scheme of things paying £28 for a metre of fabric is hardly the stuff of banking crises. But for me it seems a lot. But of course its for the lovely Kirstine in Wild Rose from Outback Wife by Australian Gertrude Made. It has a quaint backstory that each fabric line is named after a real life ‘outback wife’ in rural Australia. Continue reading
Month: October 2017
Fabric trays and a riveting experience

I mentioned in my blog post a week or so back that I had tackled my sewing room, well more specifically my WIP drawer and made a batch of see through project bags – 19 no less. I’m afraid there are still more drawers to sort and the bookcase, but a start is a start. One thing that struck me when I was making my production line of WIP bags was how disorganised my sewing process was as well as storage. Sewing was fraught with trying to find things all the time. Essential tools like rotary cutters, markers, scissors etc would get caught up in fabric and the general mess so I seemed to spend as much time looking for things, than actually sewing. Then there were the heaps of scraps that were generated when cutting, some for scraps, some for the cushions for the cat home – I needed a better process.
When I’m sewing, the tray at the front of my bionic gear bag serves to coral things like seam rippers, pin cushion etc and I try hard to make sure I put everything back in the tray so it’s easy to find.

I needed the same for when I’m cutting and assembling. This, in the absence of a big enough standing height cutting bench (in my dreams…), is done on the floor. For big cutting jobs I use the island unit in the kitchen but for the odd pieces for blocks, assembling things etc it’s down on the floor. I struck upon the idea of fabric trays. A quick google search and it was a toss up between Aneela Hoey’s zip up tray, her stacking trays or the free pattern byAnna Graham Noodlehead Robert Kaufmann. I settled on the latter.

These were fun and quick to make. It’s a very clever design and I presume given that the pattern piece refers to Kaufmann’s Essex line, its a showcase for that product. This is a linen cotton mix so a lovely texture and with some heft to it. So for the first couple I stuck with linen mixes including the Essex Yarn Dyed range and this gorgeous screen print on that fabric from Carolyn Friedlander’s Euclids range.
 I’d found a very helpful post on making these by Sophie of Luna Loves Quilts. I enjoy her blog, she has a lovely fresh take on quilting and she writes it in both French and English….. bilingualism isn’t going to be happening any time soon on this blog I’m afraid given that I barely scraped through my French ‘O’ level much to the surprise of my French teacher and me! Sophie gave some excellent tips on changing up the construction which worked very well. I don’t want to steal her thunder and repeat them here so suffice to say the only change I didn’t do was make bias binding. She’s right it would be easier with those curved corners but I hate taking a lovely half yard of material then slicing it in two on the diagonal then having two awkward pieces left.
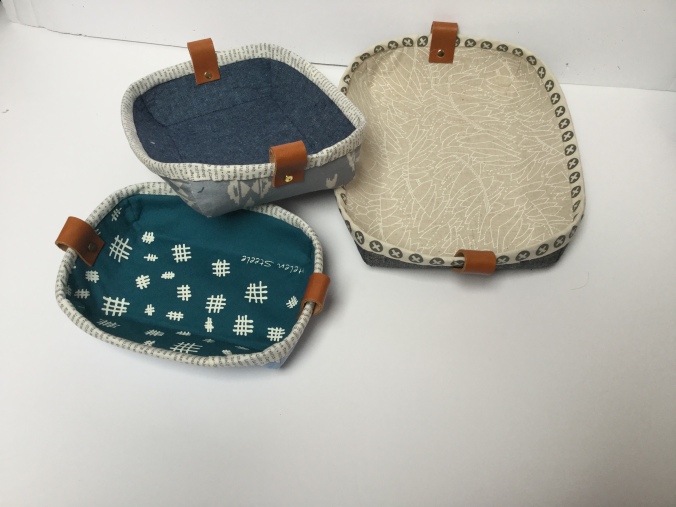
I made a number of sizes. The one in the pattern is on the small side made from a pattern piece 8.5” by 11”. I increased those sizes by 10%, rounded down to the nearest 1/4”, to get a set of three stacking trays.

Using Essex yarn dyed fabric and other linen mixes in my stash worked very well. Couldn’t decide whether it was better to put the stiff fusible interfacing on the exterior or interior piece. Pluses and minuses to both.
I then tried with quilting cotton…. not so successful.

Fusing this onto the stiff interfacing made it very wrinkly when folded up as the inside of the tray, it was better as an exterior but not much. I presume the much greater wrinkliness (is that a word?) is because the fabric is a tighter weave than the linen mix even more so as this is an AGF fabric. But I had a play and came up with the fact that if you add a fusible wadding to both pieces of fabric in addition to the stiff interfacing then it seems to work but only if the stiff interfacing is on the exterior piece. This tray features Helen Steele’s lovely new screen print designs, as I know her in real life I’ve left her name on there.

 The riveted leather pieces have absolutely no purpose other than being decorative. I’ve been putting off learning how to do rivets despite the fact that I think they look very slick and make a totebag look professional and well finished. I just knew it wouldn’t be easy. And having bought leather, a hole punch and a variety of rivets this very much proved to be the case! I had a success rate of around one rivet per 4! It looks very simple on YouTube videos and I think the knack is doing it in one hammer blow. I had to order more rivets as I quickly worked through the relatively small number sent with the sample pack. But aside from gnashing teeth when they didn’t work, when they did they looked good.
And have these trays helped with organisation? Well let’s put it this way as I made successive trays I used the finished ones to help me be more organised with the latest trays and a lot less things got lost.
They will also make great gifts so at watch out family and friends…..
So for future reference
1. In terms of sizes an increase of 10% but then down to the nearest 1/4” makes them stack nicely.
2. With linen mix fabric I found the stiff interfacing can go on either the exterior or interior pieces.
3. With quilting cotton the exterior needs to firstly have a low loft fusible wadding like Pellon 430 fused on to it and then the stiff interfacing. The interior also benefits from a layer of low loft fusible wadding.
Linking up with Lorna of Sew Fresh Quilts
Quarter Log Cabin Quilt

This might be my favourite Siblings Together quilt I’ve made yet. Mindyou I always say that! Many of you will know that Siblings Together is a charity that brings together siblings separated in the UK care system. The many events they run include camps and the highlight is being gifted a quilt, often the first handmade item the children have ever received.

We have been having a recruitment drive and there are now 4 Bees up and running full of keen and generous quilters who make blocks and some of whom then take them and make them into quilts. We need a 100 quilts a year…This beauty is the work of Bee 2 although many of the new volunteers who went on to form the new Bee 4 also made blocks. Altogether I reckon there are over 20 contributors to this quilt. There was even a block making ‘factory’ down at Hever quilt show where Heather Hasthorpe and Jackie Norris were manning the Modern Quilt Group section of the Quilters Guild and brought with them a vintage sewing machine and were sewing blocks. Always a good ruse I think to draw people in because who can resist seeing what someone else is making!
I had seen the Lake Cabin Quilt pattern on Rachel’s Stitched in Color blog in the Summer and thought it would make a good charity quilt using up blue and green strings. With Rachel’s kind permission I shared the quarter log cabin design with Bee members but of course the tricky bit with this pattern is the sashing and the fact it is set on point. But of course that’s what makes it different and attractive. I hadn’t quite appreciated how much extra work there would be taking into account those two features but it was well worth it.
I went with a dark greeny blue solid having done an IG vote. Democracy ruled that a blue background was required but the initial choice was I agree a bit loud. So I toned it down from the girl guide blue of the bottom of the picture to Mineral, a Free Spirit solid, which is this lovely greeny blue.

When I’m sewing something big I tend to do that in the kitchen and when I’m sewing at the weekend the children moan slightly less than if I’m tucked away in the sewing room. I couldn’t work out why every time I returned to the sewing machine my thread had become unthreaded. Dreadful mother that I am I began to suspect the children of playing a joke until I caught the culprit red handed! Felix loves playing with a full spool as he can flick it up and chase after it so a proffered empty spool was ignored.

Skye played her part in delaying progress by curling up and going to sleep on the quilt mid quilting. Any cat lovers out there, I’m ashamed to say she was pushed off and offered another quilt but that wasn’t good enough! She hopped straight back on…
There will be more quarter log cabins in my future as I had a bumper crop sent by Bee members. I pulled out all the plain masculine blocks and will make up another quilt for an older teen. The rest went on the back.

Linking up with aLorna of Sew Fresh Quilts, Kelly My Quilt Infatuation and Amanda Jean Crazy Mom Quilts
This is a Q4 FAL finish as per my targets
Project bag Kondo style
One blogger, Rachel of Stitched in Color I think, mentioned she’d reviewed her annual plan recently to see how she was doing against what she had set herself for 2017. It made me recall I’d done some targets for 2017 and thought I’d amuse myself and review mine knowing full well there’d be some New Year enthusiasm in there. Yes some targets have been met, but others have fallen dramatically by the wayside. One such was to be more organised both in my sewing room and sewing process. This has been a major fail.
My sewing room had become an absolute mess, to the point of disorganisation and chaos. I can live wth mess provided there is some method to the madness. Now when I say chaos I am not talking teenage boy room disaster zone of which sadly I have a great deal of experience but just dust, bits and pieces on the floor and heaps and heaps of random stuff.
So what to do. It needed more than just a tidy and clean, it needed a rethink.
In theory I’m lucky with storage. I have a lovely chest of drawers, another less lovely but perfectly functioning set of drawers and a large book case. All of course absolutely rammed full. Some sort of vague organisation at the heart of it but generally a mess.

The main culprit was the innocent Hobbycraft tote. The sun may be shining down on it but it is evil…..

I use these to hold projects either WIPs or material bought for a specific project in mind. They are great in the sense they are cheap, they squash down and are sizeable enough for even the largest project but they look ugly but worst of all when you are searching you have to open each bag and when they are squashed with loads of other identical bags that’s easier said than done. I did experiment with a clear vinyl window but they just looked tatty as you can see in the picture below

My bottom drawer not a pretty or particularily well functioning drawer
As the drawer was full these bags were everywhere, hanging behind the door, dumped on the bed and floor, snooked into corners. In fact rather worrying all the tricks of the trade my children use to hide mess.
Then I remembered my foray into Maria Kondo’s book The Life Changing Magic of Tidying. I had throughly embraced this in a major sort through of my clothes and bedroom storage ahead of a refurbed bedroom last year. I know her style is not for everyone ie the concept of only holding onto things that give you joy but the ruthless approach worked for me as did storing things vertically which seemed to create so much more space.
So to apply that to these project bags as they most certainly did not give me joy but the contents did. I just needed better project bags. I needed to be able to see into them, be different sizes and crucially they needed to be able to stack upright. I knew there were vinyl project bags out there. I couldn’t find any patterns for what I had in mind. I could find flat project bags and pouch types but not cube see-through bags.
So to do my own….
I started with this version. I did a straight copy of a see through bag that held toiletries I use for air travel. Oh what a disaster and so difficult to get that binding on. Ugly ugly….
Rethink needed so went for prototype 2…. a box construction with zip on top…… better…

It then dawned on me if I wanted to stack them vertically then having a see through side wasn’t very clever so why not make the same construction but put the vinyl on top so to prototype 3.

Functional but the zipper sewn directly to the vinyl wasn’t attractive and needed fabric strips either side so to prototype 4.

Success!! This was just what I was after….. so a cottage industry was born and I churned these out. They were surprisingly quick to make once you got into a rhythm and what a difference so much more space efficient let alone convenient.

and look at that drawer now….

If you fancy making your own I’ve done a tutorial
This project bag is a simple construction but I should make it clear at the outset that it is unlined and floppy which works for me in that there is less bulk for storage. If you want a lined box pouch with more structure then another pattern is probably the answer.
As a see through bag I used vinyl. If you’ve not sewn with vinyl before here are just a few tips.
- flatten the vinyl by a gently pressing under a piece of fabric (can’t empahsise that enough) and then let it cool for a couple of minutes under the fabric overlay so its nice and flat
- do a few practice pieces on scraps just to see how your machine/machine foot behaves. I have a Pfaff with a built in walking foot and although I used a teflon foot it didn’t make any difference. I found it relatively easy to sew through, less easy to position hence….
- use glue if you find it too slippy to use
- Try and sew with fabric side down. If you can’t do that then lift the fabric/vinyl up so that the only sticky bit is under the needle and being pulled along by the feeddogs
For a finished project bag size bag 9” length, 3 1/2” deep and 7” then the fabric requirements are listed below. This is a medium size bag but will hold a fair amount. The one I’m making in the tutorial holds pieced blocks and spare fabric for a lap sized quilt but not the backing. For that you need the largest size. Dimensions for a large and small size bag are given below. But the beauty of this design is you can make them any size to fit your storage. The height of my drawers is 7” so that’s why mine are that height. All seams 1/4″.
you will need
1 x 11” by 6” clear vinyl (large size 14″ by 7″, small size 8″ by 5″)
2 x 10” by 7” large side panels (large size 13″ by 7″, small size 7″ by 7″)
2 x 4” by 7” narrow side panels (large size 4.5″ by 7″, small size 3.5″ by 7″)
2 x 1.75” by 11” strips (large size 1.75″ by 14″ strips, small size 8″ strips)
1 x 10” by 4” bottom panel (large size 13″ by 4.5″, small size 7″ by 3.5″)
1 x 12” zip (large size 14″, small size 8″)
Equipment
Fabric glue
Non permanent fabric marker pen
Prepare the strips and zip
1. Prepare the strips by folding and ironing in half lengthwise. Starch for crispness. Then fold the long sides to meet at fold line. Finally fold in half to make a strip, iron and glue it to hold it together.
2. Glue the vinyl piece to right side of zip but not too close to zip itself.

3. Glue one of the strips onto the vinyl/zip unit so it sits on top of the vinyl close to the zip teeth and then sew down both sides of the fabric strip using a zipper foot (or not I never bother!). It should look like the picture under 4. below
4. Cut the vinyl by placing the zip teeth on a line on your cutting mat and cut 2” from the zip teeth

5. With the remaining strip of vinyl repeat on the other side of the zip and then sew down the fabric strip and trim as above.
6. Move the zip pull to midway on the zip and then trim the zip to 10”.

7. Sew across the ends on the zip to ensure the zip pull doesn’t get pulled off the zip. I’ve done this so many times 😢. You now have the zip unit.

Sew side panels onto zip unit
8. First mark all the pieces 1/4” in on all corners of side panels and the bottom. The gauge below is a lie , I just eyeballed it and it was fine !
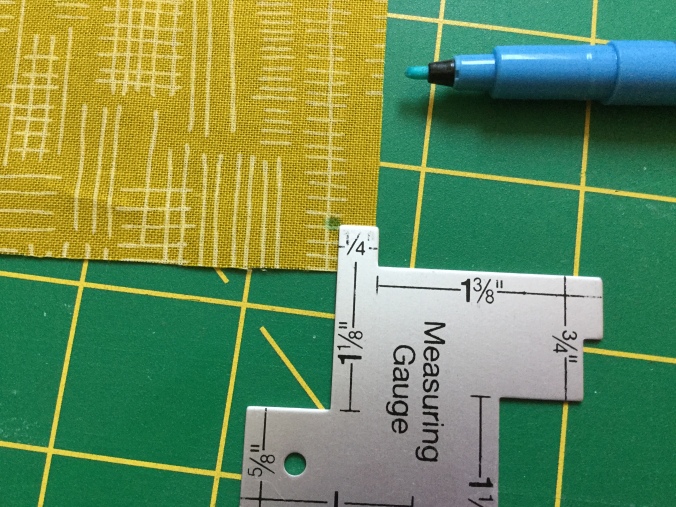
9. Sew the long side panels rightsides together to the zip unit. On the sewing machine put the fabric on the bottom, you will easily be able to see the 1/4” marks through the vinyl and ONLY sew between your 1/4” marks.
Repeat on the other long side panel.
10. Now sew the shorter side panels by placing them rightsides together with the short side of the zip unit again fabric side down and only sewing between the marks. It should like this when you’ve sewn it.

11. and when all panel sides have been sewn on the rightside should look like this.

12. Now turn it over so the underside of the zip unit is showing and then trim the vinyl from the corners to reduce bulk. . 
13. Next we need to sew the side seams rightsides together again sewing between the 1/4″ marks. Undo the zip (important!) and now by pinching the corner of the zip unit, position the two sides rightsides together and sew down to the bottom of the bag but only up to the 1/4″ mark and repeat on all 4 sides. 

13. The bottom of a side seam should look like this.
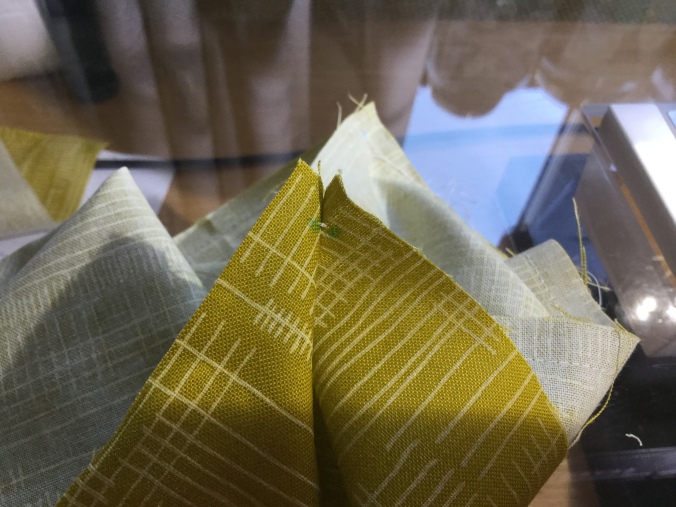
14. Place the bottom piece right sides together on the bottom seams, matching the 1/4” marks and sew from 1/4″ mark around the bottom swivelling at each corner by leaving the needle down. Make sure that the rest of the bag is tucked away while you are sewing.
14. Turn it inside out and press the fabric seams. Finger press the seams with the vinyl and finish off the inside seams if you like a neat finish.

Now fill with your project…

Do let me know if you try this and if there are any glitches in the instructions or a better way.
Linking up with Crazy Mom Quilts
Q3 Finish Along round up and Q4 targets
A brief catch up on what I’d hoped to achieve over Q3.

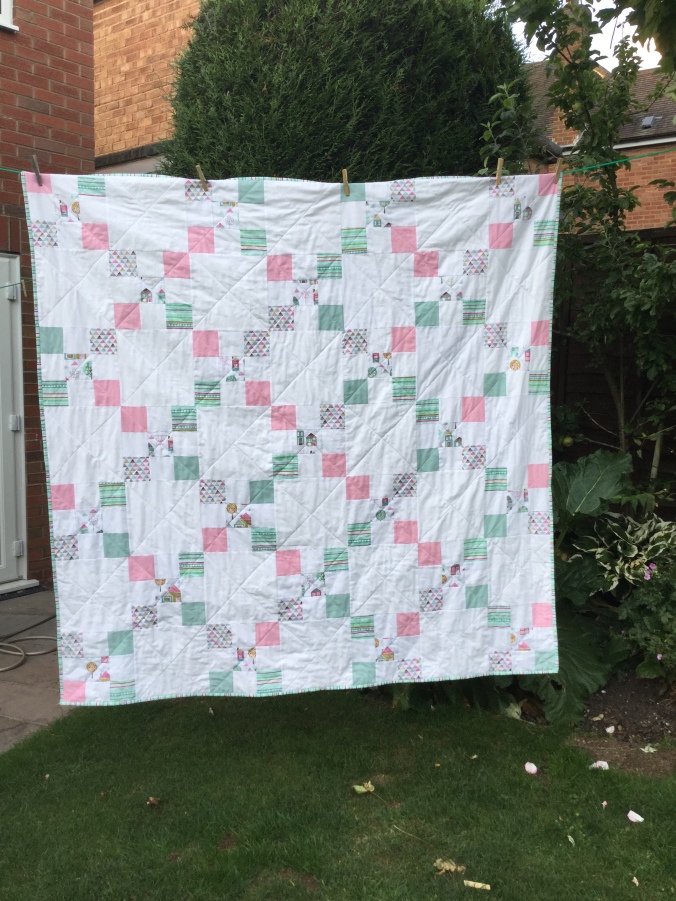
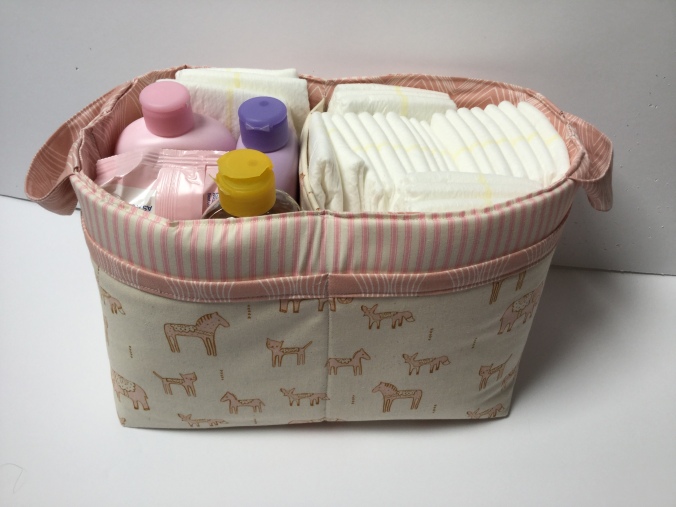
Not too bad…. 5 out of 6. In summary the finished projects looked like this…
1.  2. Fail but I’ve gone off this project for the moment.
3.  4.
4.  5.
5.
6.
 Now to the next Quarter. Here’s the usual montage….
 So in order…
1. These are Bee blocks from Bee 2. These need sashing and then putting on point. Quite a bit of work is involved but I want this done by year end so it’s ready for me to take to the Threadhouse Retreat so I can give this Siblings Together quilt to Nicky who collects them all in.
2. I’ve purchased this book with the intention of making some of the sewing organisers in there. Not sure this really counts as a proper FAL item but as something I’d like to finish this quarter then it counts fo me
3. Another Siblings Together quilt, the first block for the newly formed Bee 4. Again I want this ready to take to Nicky.
4. Hopefully this beautiful Soulful fabric by Maureen Cracknell quilt for the lounge will get finished. Cold weather, well what classifies for cold weather in mild temperate U.K., is coming and this will be lovely to snuggle up with!! I’ve already bought a flannel backing, cream not the disastrous deep red flannel used on another quilt here
5. These will hopefully become see through project bags to contain my WIPs. This one is started but I have a lot of WIPs so need a lot of bags….
6. Another hourglass quilt for ST -see the pattern here so I can hand it over in the New Year
7. A beautiful ombré screen print from Karen Lewis to be made into something but can I cut into it ?
I’m cautiously optimistic of at least a 50% success rate……but don’t hold me to it.


