Square scrappy block – Tutorial


image

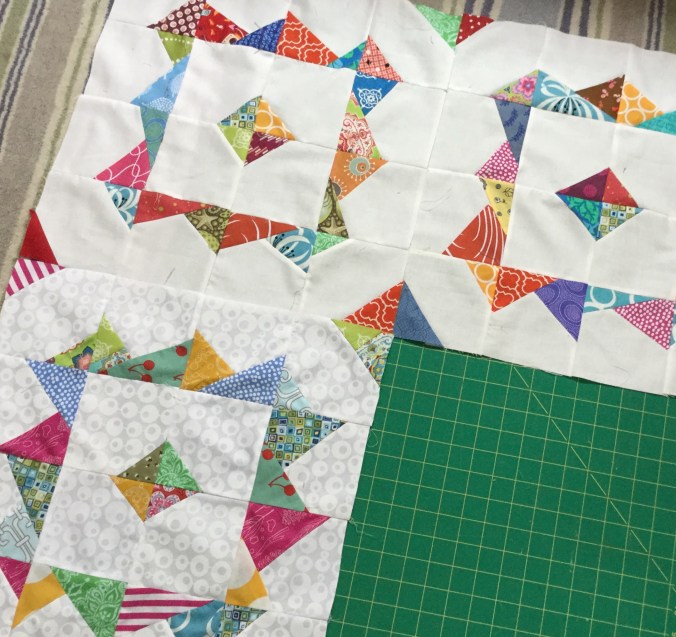
I’m bee mama for October for  the Siblings Together Bee 2 so it’s my turn to come up with a block for my fellow bee mates. Last time I was mama our joint efforts produced these beauties.


Siblings Together is a wonderful charity that brings together separated siblings in the UK care system for a holiday. Given the typical cool of a UK summer evening the idea came up that a quilt should be given to each child as a momento of their holiday. Enter quilters from all over the world who make blocks and quilts and altogether annually over 100 quilts are made and given.

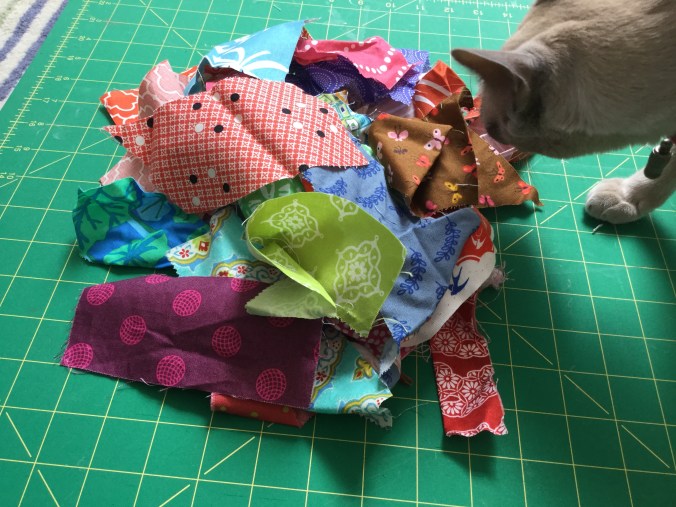
In wracking my brains for a block idea my aim was to deplete my ever crammed scrap jars which are full of those awkward  sized scraps.  I also remembered this wonderful scrappy quilt by Katie Pedersen. Whilst this version is simpler and not on point those controlled squares with scrappy points are similar.*

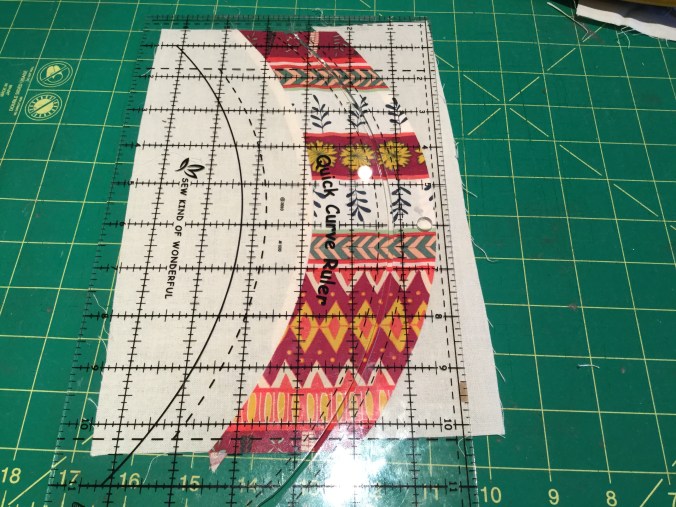
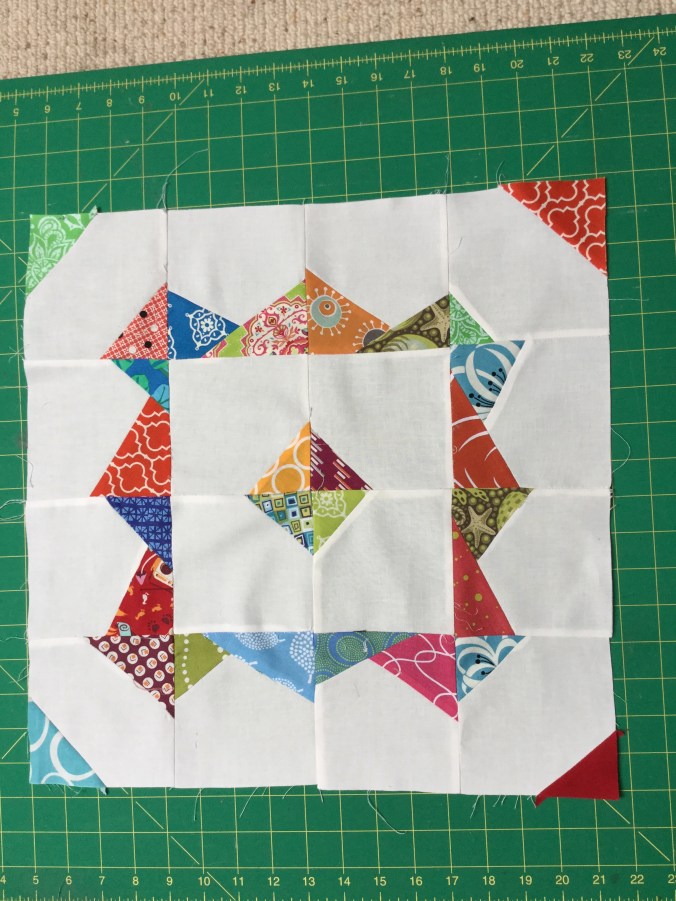
You can probably work out what to do from the picture of the block but if you want to see how I did it then follow the details below.  The only thing I’d ask is that the background is a  solid white or white on white print  not cream/grey/other low volume (I used Kona Snow and a white on white print) and the scraps are on the bright side.

image.jpeg


So here goes.

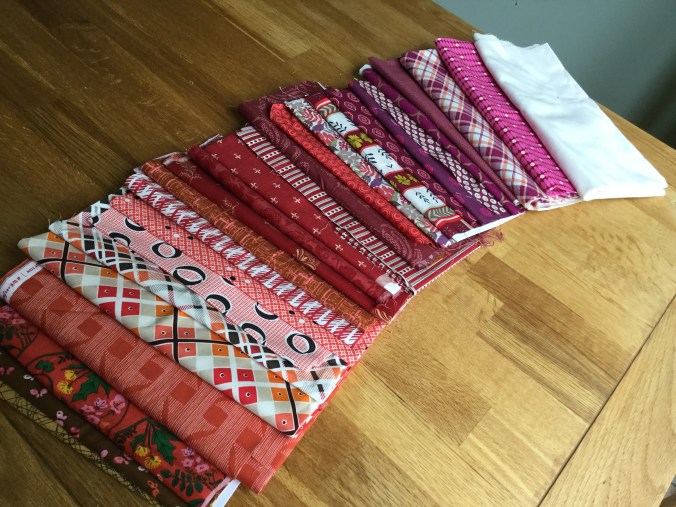
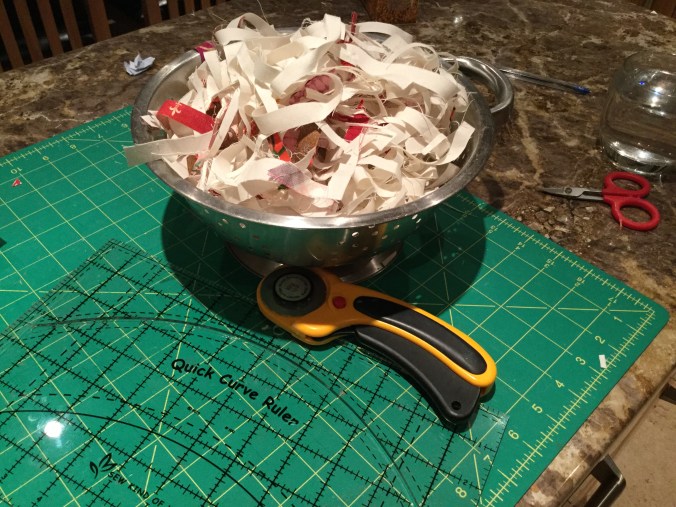
You will need 16 white 5 inch squares and a bunch of bright scraps, minimum width 2.5″. I’m pleased to say making 3 of these blocks made visible space in my scrap jars.  Yay!!  (Mind you I did these blocks a few weeks back and the jars are full again –  how does that happen?)

image


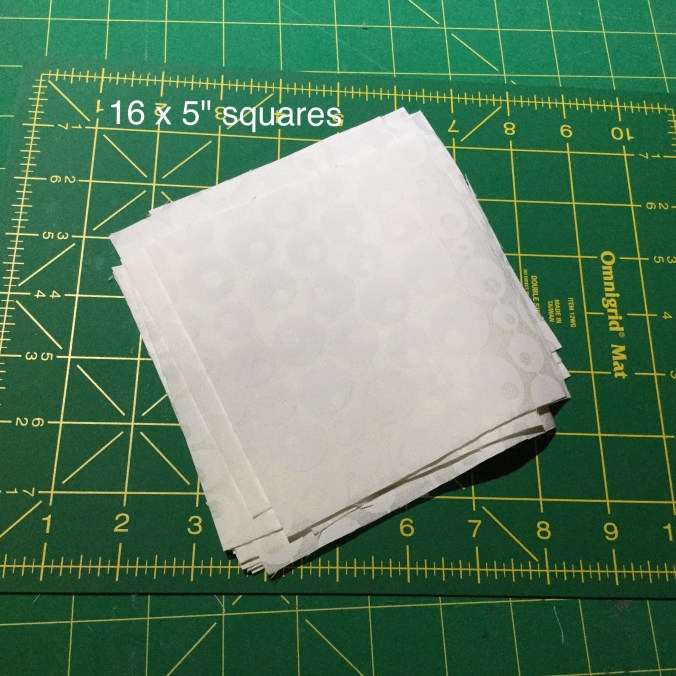
To make one block, which should end up 16.5″ square, you will need to make the following. If you have a 4.5″ square ruler it will make life easier.

image

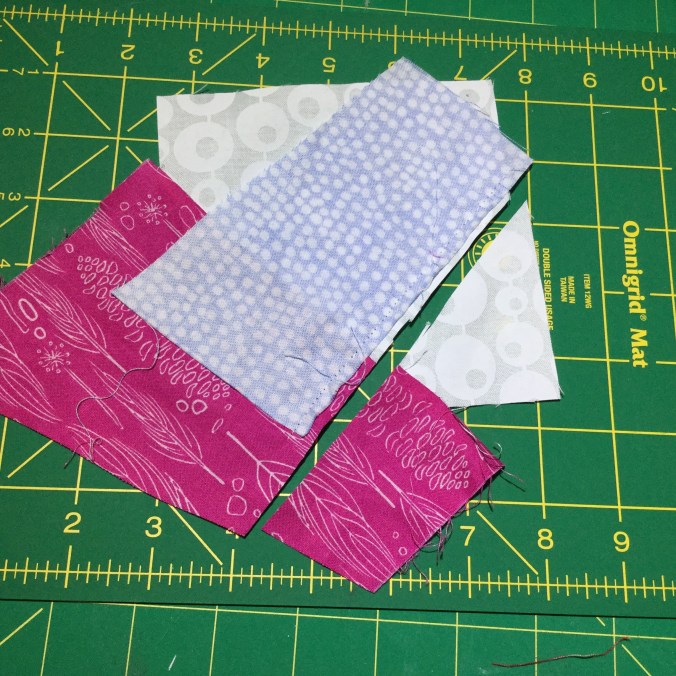
Firstly for the left hand pieces in the photo. Choose some bright scraps that will fit – triangle shaped pieces are perfect but they need to be minimum width 2.5″.

image

Select a couple of scraps  making sure they will fit ….

image

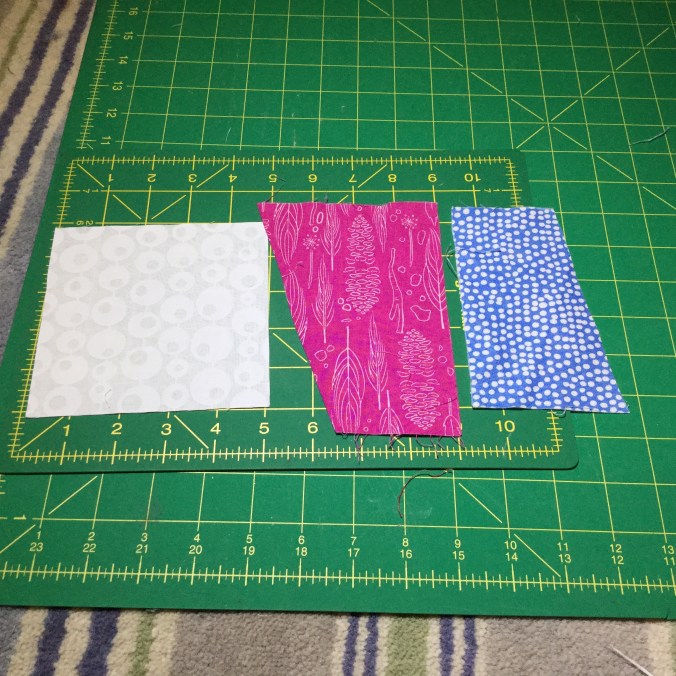
Whilst not bothering to measure precisely aim for them to be in the range of 2″ – 4″ up each side of the white square. And where they meet there should be at least 1″ between the crossover point and the bottom of the square as below.

image

Then stitch down one of them and  roughly trim

image

image

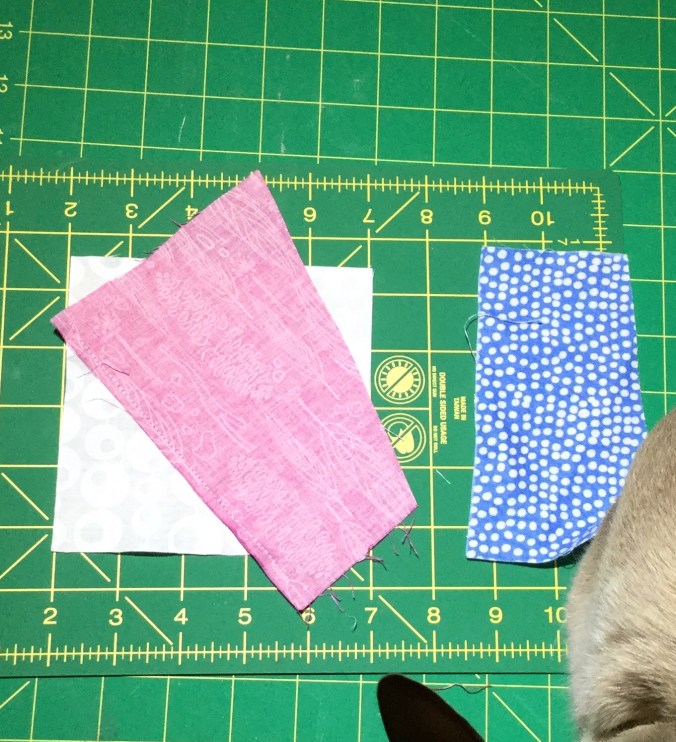
and flip over and iron or finger press ….

image

Add the next piece, again no precise measurement needed other than to ensure the crossover point is a min 1″ from the bottom. Stitch down…

image

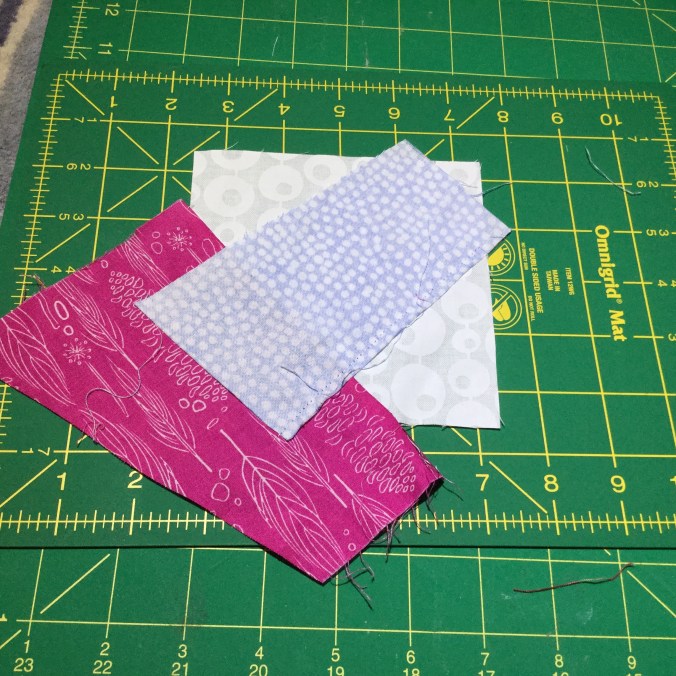
Again roughly trim …..

image

Flip over,  press and trim to 4.5″

image


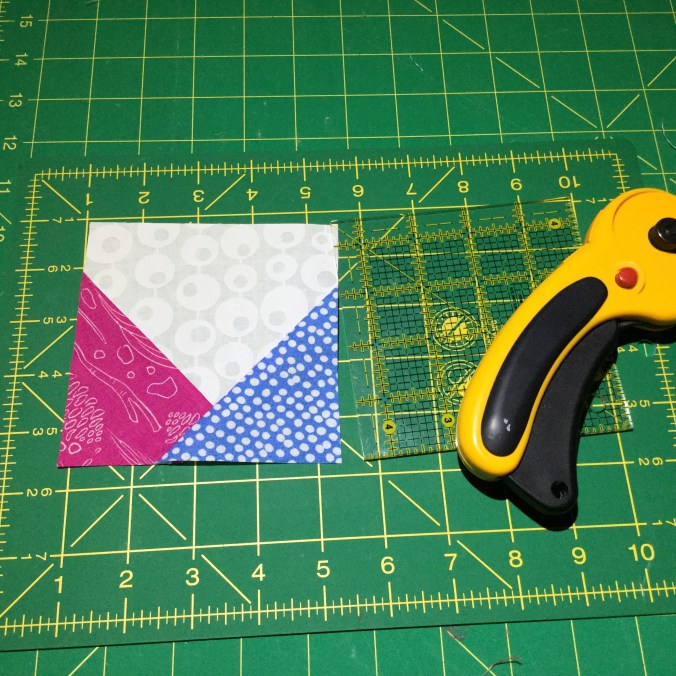
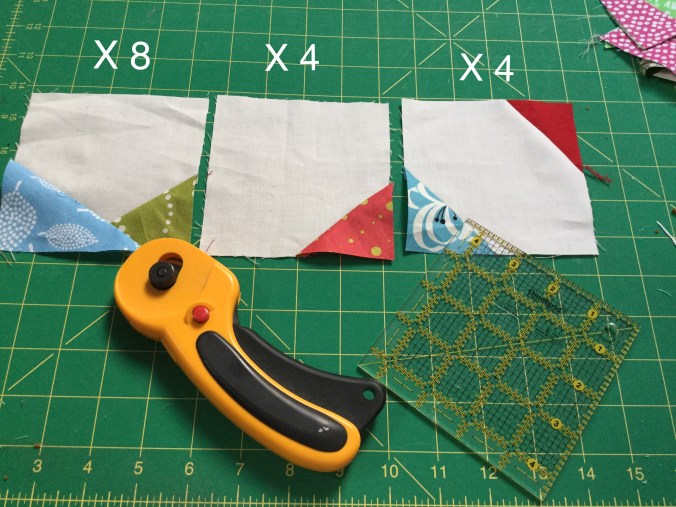
For the other 2 types of blocks just do one corner on 4 of the 5″ white squares and 2 opposite corners on the remaining 4 of the 5″ white squares using the same method. Finally trim all down to 4.5″ inches.

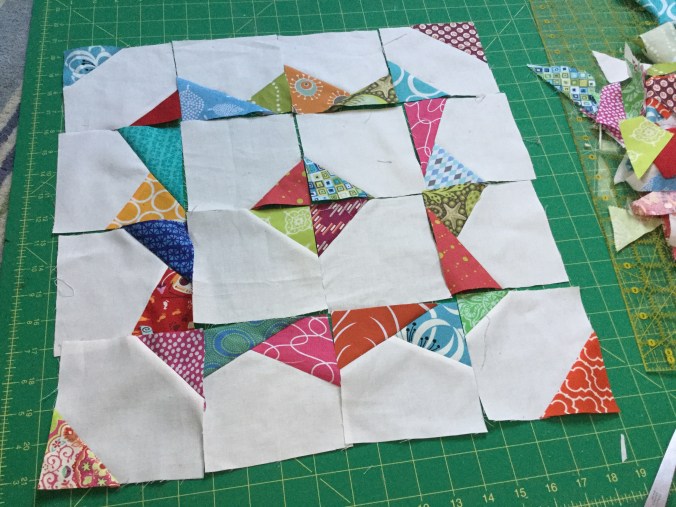
Assemble the pieces as below and sew together and then trim to 16.5″ square. Best to use a scant 1/4″.

imageIf my bee mates could make 1 block each that would be fab. If you feel like you can make 2 that would be wonderful. I will need 20 for a smallish quilt or 25 for a bigger quilt  and 3 have been done.

Many thanks everyone.  Any queries please do get in touch. For speedy response please email me on thelilaccat@yahoo.com

* Some of you may be following the current debate within the Modern Quilt Guild about derivative quilts  and the need to always see permission if you are inspired by a particular quilt, not so much for personal use, but certainly  for quilts that end up in more public settings like a quilt show. I touch on it here. The MQG  in fact have withdrawn their original post which caused such a furore but I still believe in attribution and just in case I checked with Katie Pedersen. She is the sort of generous quilter that believes her designs derive from techniques that are open to anybody. Having read some of the debates and posts about this topic not all quilters take that stance and are much more precious about their designs. Thanks Katie.

Linking up to Nicky of Mrs Sew and Sow for Scraptastic Tuesday


Quilters’ Blog Festival 2016 – second entry (but am I cheating?)

image

I’ve decided for my second entry, after much cogitation, to enter my favourite quilt I’ve made this year, this beauty….. The original post is here

image


But there lies the rub, it’s not really my quilt in that aside from assembling it by adding the sashing and making a few of the blocks and of course doing the quilting it is in large part, certainly the beautiful scrappy part, the result of the hard work of my fellow bee members of the Siblings Together Bee 2.  This wonderful charity provides quilts for children at special camps which bring together children in the UK care system who are separated from their siblings.  The holiday gives them a chance to bond and create happy memories and the quilt is a reminder of that time….and because we have such chilly evenings even in Summer!!!

I’ve seen other bee quilts in the festival so I don’t think I’m breaking any rules but be assured any prizes will be used for the charity.

I’m entering it into the scrappy category because it is just that, wonderfully scrappy. There are over 50 fabrics in this quilt, some beautiful, some well not so beautiful but when they come all together the magic happens and it becomes something really special.

image

It was my first time as mama and I had great fun picking on a quilt design and block. I found this free pattern called Fieldcrossing by Cloud Nine. It had the perfect bee block really simple to make and ideal for scraps. Blues and greens always work for me and is my teens’ favourite colour combination so has universal appeal, I hope!

image

I love to think that somewhere in the UK some child or young person is tucked up with this and feel it’s theirs as children in care often have very little that is exclusively their own and certainly not hand made. Being part of is bee with its lovely people and making a contribution to this charity is a privilege.

Thanks again to Amy of Amy’s Creative Side for all the organisation and hard work of running the festival. It is such  a celebration of quilting and a highlight of this weekend for me, when the entries are closed, is catching up on all those quilts. I hope my children don’t expect me to cook, clean and chauffeur this weekend – they are going to be disappointed!!!


Quilters’ Blog Festival 2016 – first entry and first time entering…

image.jpeg


I’ve been quilting for two years now and an absolute favourite of mine has been the twice yearly quilters’ blog festival.  This is a virtual quilt show where bloggers can enter two quilts under various categories. It’s run by Amy of Amyscreativeside

Running the festival must be a vast undertaking – marshalling categories, organising voting and then finding prizes for winners but Amy seems to blend this in with everything else she does. It’s a well oiled machine I tell you. But of course the real fun is seeing everyone’s quilts, finding out how the voting goes (its not easy to call at all!) and that wonderful inspiration and eye candy all in one place. Just great fun.

In fact this year Amy changed things up to reflect the fact that there are fewer bloggers and more Instagrammers so the Spring festival went on Instagram and there was a wonderful response. But the autumn is just for bloggers which means you get the eye candy but also the background to the quilts and its construction. It’s well worth a view particularly when all the quilts have linked in which is at the end of this week.

Ah so which quilt to chose and then which category?  I’m still agonising about my second quilt but my first entry is this sumptuous  red quilt, all mine and very warm it is too. The obvious category is large quilt and at 75″ by 85″, it’s certainly on the larger side.

image

I’ve blogged about it here but you may recognise this as the Urban Candy Quilt by Sew Kind of Wonderful.  I wanted a scrappy look so picked out just about every warm toned fabric I possessed and then was understandably compelled to buy a few more…. I was after more prints and fancied some of the warm small scale prints of Denyse Scmidt’s older ranges so the search was on.

image

Using the Quick Curve Ruler really lived up to its name. In no time did I have a mound of warm toned pieces and the corresponding plain Kona Oyster. The sewing was easy too but the trimming…..that was more tricksy. If the quilt was to be gifted I’d have resewn a fair few but perfection isn’t my bag.

image

It took a fair bit of trial and error to get the right mix of prints depending on scale, colour and tone but we got there. The quilting was a relatively easy on my Pfaff 4.2. and I used the forgiving  ‘loop the loop’.


But my main requirement was that it would be warm and cosy and big enough. It’s getting chilly here in the UK and I wanted one that was more than just a token quilt like a bed runner. It’s an ample size for me  and best of all with a wool batting and cosy flannel backing it’s lovely and warm. Just what I wanted.

image

Do pop by the festival, I know it’s only the first day but there are already some stunning quilts. If you go down towards the bottom of this post the categories in the grey boxes take you straight to the quilts in that section of the festival. Enjoy!

Charity begins at home …. and with scraps

image

You get the impression that some charity quilts are regarded as second best, to be considered when a quilt hasn’t worked out as planned.  Whilst I’ve tried hard with the gifted quilts to produce quilts I’d like to keep this one I fully admit was a long standing WIP made from the left over strips from a jelly roll of Marrakesh by Irene and Lewis about which I had my doubts….

imageimage

I’d extracted the pinks and greys from the jelly roll for a quilt for one of the children’s teachers who had got No. 1 son through a crucial maths exam. For that very significant achievement I would have cheerfully made her a king-size quilt but as a baby was on the way this seemed a rather more practical gift. It uses the Three Dudes pattern which is one of the many excellent video tutorials by Jenny Doan at the Missouri Star Quilt Company. The pinks work well together and the rather soft palette is suitable for a baby girl when you don’t know the nursery colours or preferences of Mum and Dad

image

But for the ‘left over’ quilt which mostly came  together at a Project Linus quilt day run by Joy Edgington who, aside from the dubious pleasure of being my go-to quilting teacher, is the local coordinator, I really wasn’t sure about it. The strong yellow and blue just seemed to be overpowering it. Thanks to ironing fairy Lynn and Mariana who sewed some it with me much of the top was finished by the end of day.  But now it’s quilted and bound the magic has happened and I rather like it.

I have to say that I wouldn’t recommend this pattern for a quick quilt finish. There are a lot of seams which take up fabric of course and per block it’s quite fiddly. This is in contrast to the quilt I made it last years Project Linus day which was chosen specifically because it looked to be a very efficient design and perfect for a jelly roll that got rejected for being too pink! Designed by Amy Friend, who I think is one of the most talented and original quilters out there, it’s called Interlock.

The next Project Linus quilt is this smaller cot quilt that was originally a FMQ practice piece for a FMQ course I went on led by Joy at New Pastures Quilting.

image

I’ve been on some excellent quilting courses run by Joy and they have been so useful. Poor Joy is however is quite used to me having a slightly different approach in her sessions as I like to make what I want to make but she’s fab and very flexible. This was supposed to be a charm square sewing machine cover with us practicing motifs in the squares. But a baby quilt it became …..  I used available scraps, mostly Horizon by Kate Spain, a range I love and a batch of  Kona ash squares I miscut for another project. Obviously I’ve not been listening well enough in Joy’s quilting classes!!

I’m not sure you can make out the motifs but there are unintentionally grumpy cats at the top, some hearts in there, the word love and finally upside cars on the bottom. I guess you  can see why I need quilting classes!

image

Linking up with Nicky for Scraptastic Tuesday. And Nicky again for the FAL Q3 2016 linkup as the smaller of the quilts was a proposed finish for this quarter – see here for my FAL list of targets

Selfish sewing

image
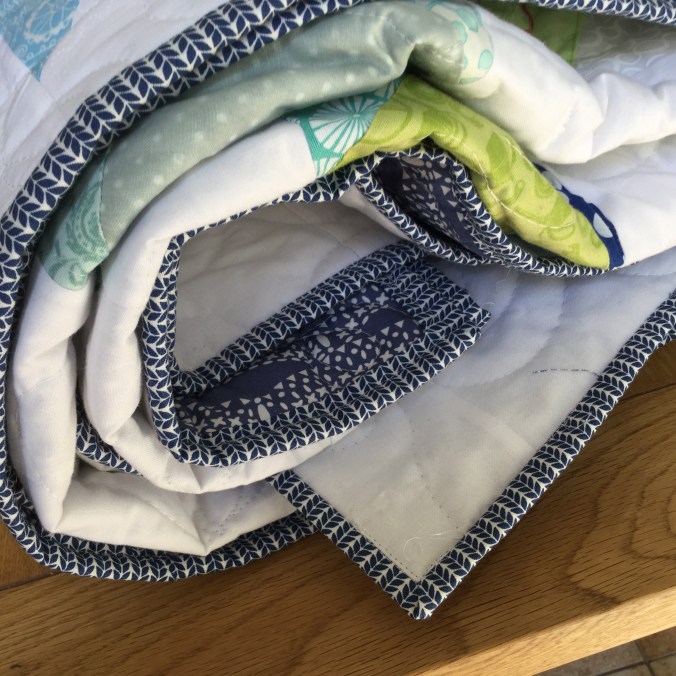
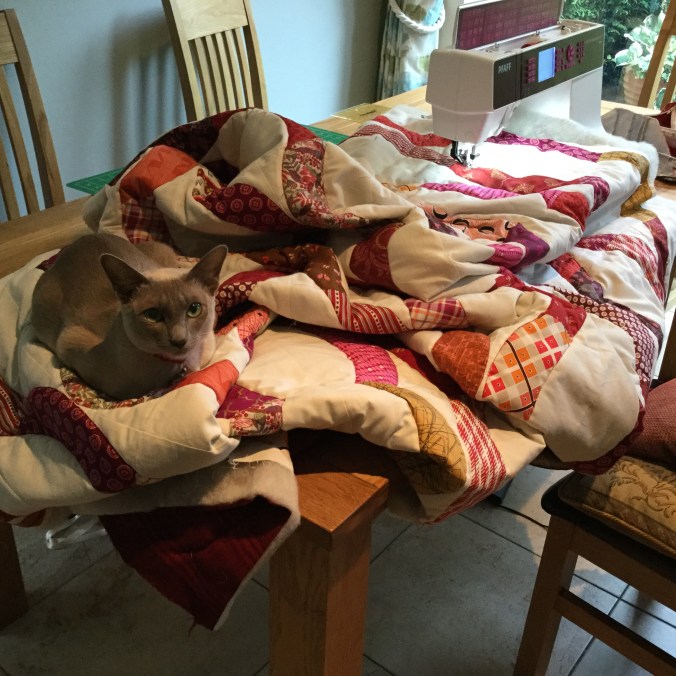
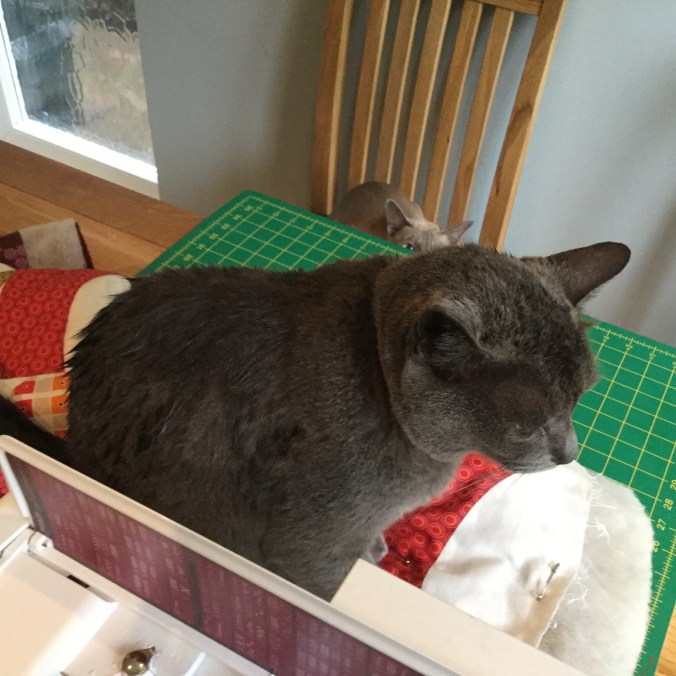
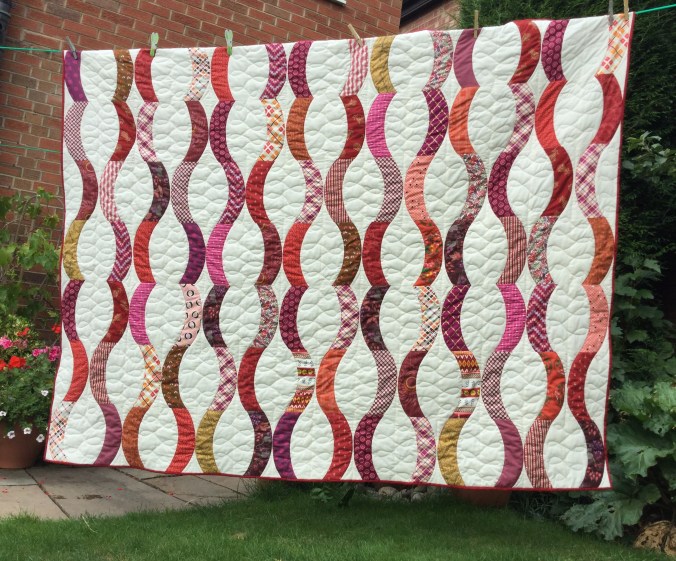
This is an entirely selfish quilt! It was made for my newly decorated bedroom and replaced  a very tatty bed runner that was made by me years ago  from spare curtain material and used an old blanket as wadding. This was before I started quilting proper. It looked okay but of course the cats’ claws have been working on it and pulling threads so a new one was needed. After all everyone else in the house, including the two cats, have their own quilts.

image

The Quick Curve Ruler (QCR) made by Sew Kind of Wonderful, has been one of those rulers I bought ages ago and it has just been gathering dust.  I doubt very much if I’m the only one who does that! But I had bought the Urban Candy pattern at the same time having  seen quilts on line in this design which appealed to me. My main requirement was for a large, warm and cosy quilt that had rich warm colours, plenty of contrast and frankly not too much work.

I’d been much influenced by the very scrappy nature of a quilt for which I’d been Mama Bee for the charity Siblings Together.  The blocks contained over 50 fabrics, many of which, if I’m honest, were not that attractive but together, what a quilt.  The scrappiness gave it a depth and level of interest  that I wanted to try and recreate. So I pulled all the fabrics in warm tones I had, eliminated some because they were too samey or I truly didn’t feel they fitted, then did a bit of shopping….I was particularly keen to get some Denyse Schmidt fabrics in her older Franklin and Katie Rope Jump fabric ranges which had the blend of colours and scale I was after.  In the end I had this collection, not quite 50, but over 25 as a few more might have snooked in…. For the background, given the fact all the warm fabrics were prints, I went for a plain off white, Kona Oyster to be precise, to go with the very neutral tone of my room.

image


In fact the QCR lived up to its name because you really do cut those curved pieces very quickly. I have heard of some cutting disasters with the QCR but as long as you follow the very clear instructions  then its fine. The assembly was pretty easy too and I’ve done a fair few curved quilts now so sewing curves isn’t too scary. Mind you I do like using the curve master sewing foot which helps. In fact these curves are really very slight compared to some  I’ve done but maybe pride comes before a fall as when it came to trimming them it was a very different matter!

Sewing curves particularly when you’re not starting on the straight  like you would do with the drunken path block invariably leads to a little bit of distortion which then needs trimming. Whilst reasonably clear instructions are given and there is even a video which makes it look very easy, try as I might I could not get my curves sewn accurately and/or trimmed well enough to achieve joins that were always smooth. The ones below went pretty well. Trust me they didn’t always end up like this! But as it was a quilt for me and perfectionism has never been my thing and really who is going to be judging the quilt in my bedroom anyway (! ) then I didn’t bother to resew many.

image

I was bemoaning the fact in a recent post that my quilts have a tendency to be too small and too thin. And I certainly wanted to rectify that with this quilt. So instead of cotton I used a woollen  batting for the first time and a flannel backing. To cut to the chase I’m really pleased with this combination. It has made a really cosy quilt and just the right weight for a Autumn/Winter quilt.  It’s got a lovely drape and good loft so that FMQ shows up beautifully.

Mindyou when I come to wash it I may well rue the day I chose that combination! Hobbs’ instructions are a delicate cool wash and low spin, OK I can do that and I will add numerous colour catchers first time round (all those reds….) then apparently it needs to be aired dryed. With the existing cats’ flannel quilts they go straight into the dryer but they have a fleece background and come out soft and cosy every time but they’ve no wool in sight. I’m hoping when the quilt is almost dry a quick tumble in a coolish dryer will be enough to soften the flannel. As a precaution whilst I didn’t pre wash the batting I did pre-tumble dry it just to check nothing dreadful happened.  It didn’t. I’m going to wait until it needs washing rather than do a preemptive wash!!

Other than the usual basting challenge, quilting it proved to be reasonably easy. Even if my quilt helpers were doing anything but helping with quilting! Indeed Minty the grey cat, although you can’t see it too clearly, at the point he was sitting on the quilt was absolutely sodden from a very wet afternoon out!

imageimage

It was a bit of a marathon session to hand sew the binding but I was determined to sleep under it that night! And a very warm sleep it was until the alarm went off…

Linking up to Heidi at Red Letter Quilts as this is my September One Monthly Goal. Also linking to Amanda at Crazy Mom Quilts and Sarah at Confessions of a Fabric Addict  

Linking up to Nicky at Mrs Sew and Sow as this is also a 2016 Q3 FAL finish – see here for my FAL list of targets 

image

One Monthly Goal – September

I’m afraid the August OMG , run by Heidi at Redletter Quilts, rather passed me by partly because we were away up in the Rocky Mountains for the critical link up and with no wifi, no cell and amazingly no moans from my teens it wasn’t going to happen! But also it was a no goer because my sewing room looked like this….

image

This is what happens when you agree with your daughter she can put stuff in your sewing room whilst she is redecorating her room.  The proviso was I still had to have space to sew.  Well unless I learned to levitate that wasn’t going to happen! Anyway her room is now finished, loads of junk has been chucked  and her room looks great but best of all I have my sewing room back so no excuse for my September OMG which is to complete the Urban Candy quilt by Sew Kind of Wonderful using the Quick Curve Ruler.

The curves were easy to do but the trimming was not. Maybe my curve sewing wasn’t accurate enough. Just as well I’m not a perfectionist as there are quite a few less than smooth joins.

image

Here it is at the block laying point. This was my quick and fun submission for the pets on a quilt competition over at Lilypads Quilting. As you can see I’ve gone for the scrappy look, all warm colours but different colour values and scale. The sharp eyed will see a mistake in this layout.  I always love it when quilters show mistakes and then let you seek and find…

image

Fortunately I found the mistake as the top was being assembled so it was easy to correct.

Apologies for night photo but it’s biggish and will be chunky because it will have a wool batting and flannel backing so basting will be a pain.  But I’m so looking forward to having it on my bed because this one’s all mine….and our nights are getting decidedly cooler.

image