A rather late review of 2019

No I’m not going mad! I know I’ve just done a review of 2020….. but this was in my draft posts but it never got published! This happens so many times with emails, the phone rings or I get distracted so drafts sit in my emails/texts never to be sent but with me having the very firm conviction I have sent it. Anyway as this blog is as much a personal Crafting diary indulge me and let me post this, for the record albeit out of sequence! So casting myself back a year…..

‘While the blog posts haven’t been that regular, sewing continues……. and looking back over the past years, I’ve got into the habit of reviewing  the previous year under the headings of the good, the bad and the ugly. There is always more good than bad or ugly but a bit of reassessment of what has gone well and what hasn’t is no bad thing. Nor is having a plan, however vague, going forwards.

So to the good of 2019

The items I have enjoyed making the most

IMG_9602


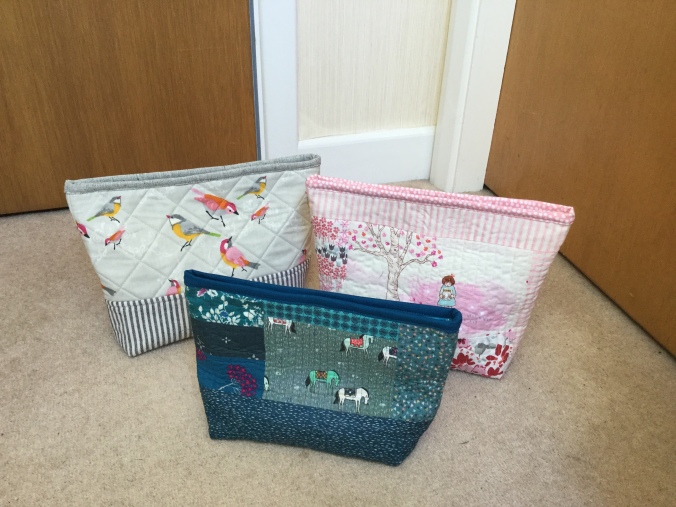
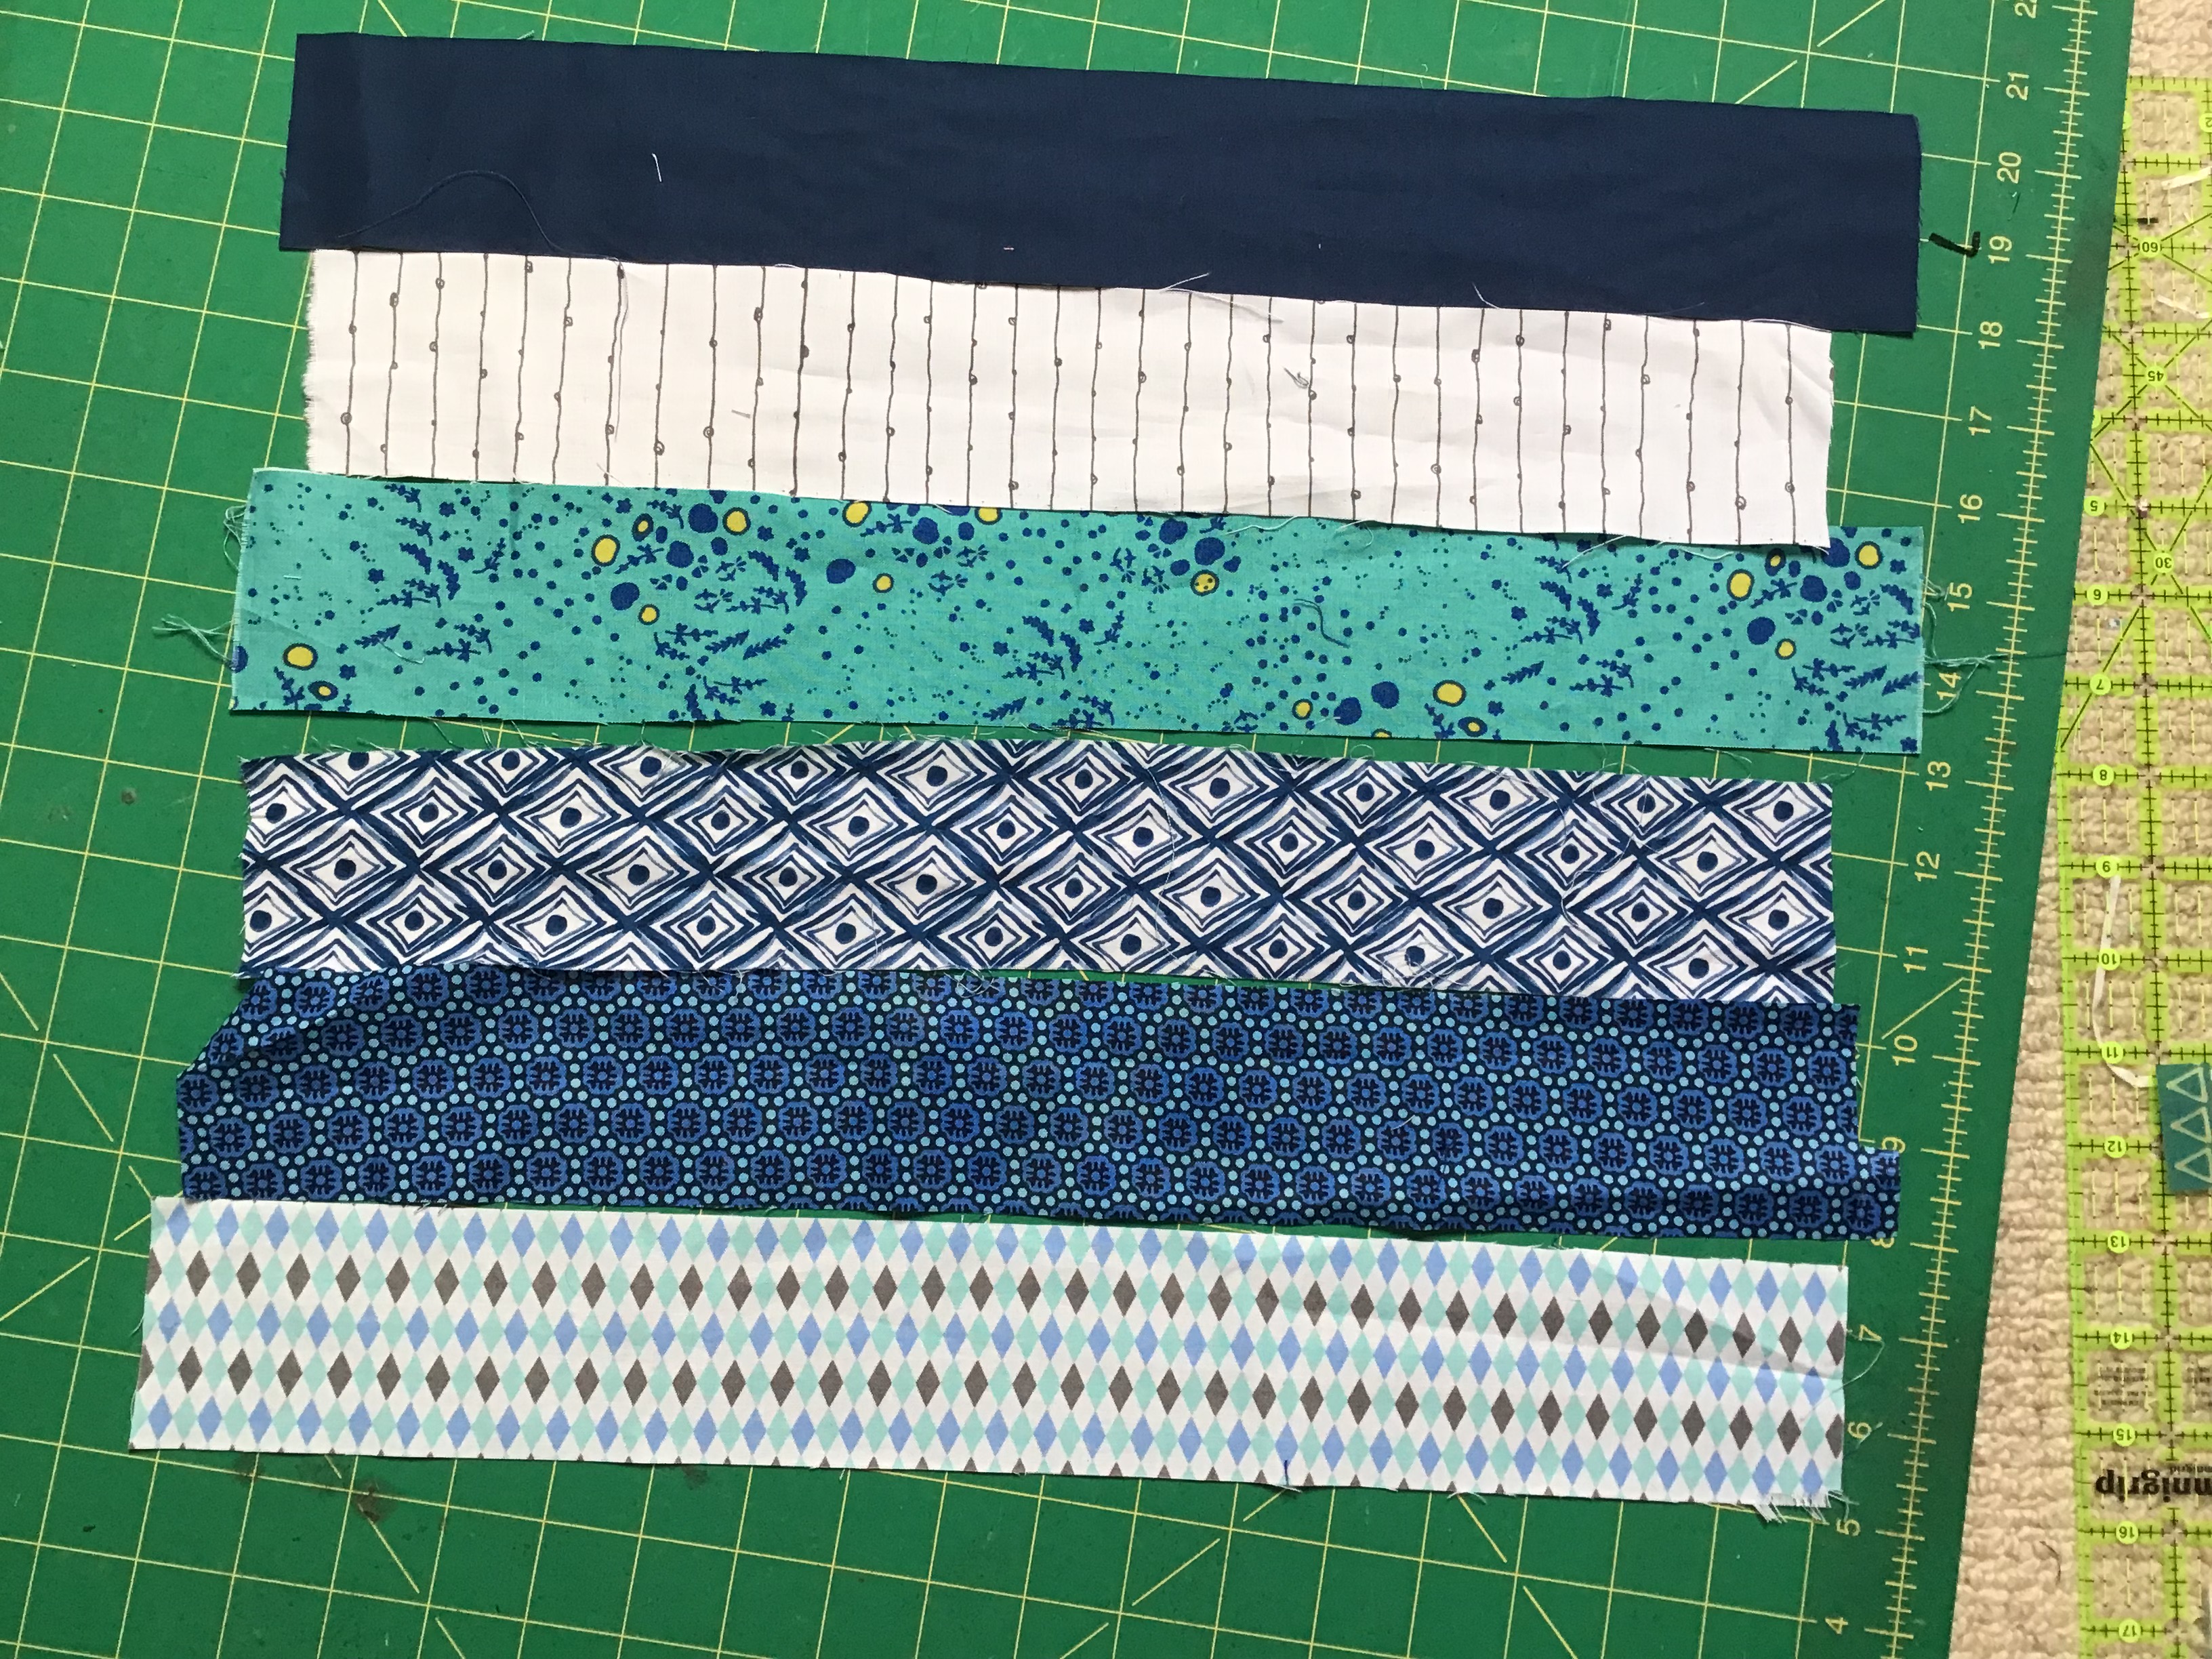
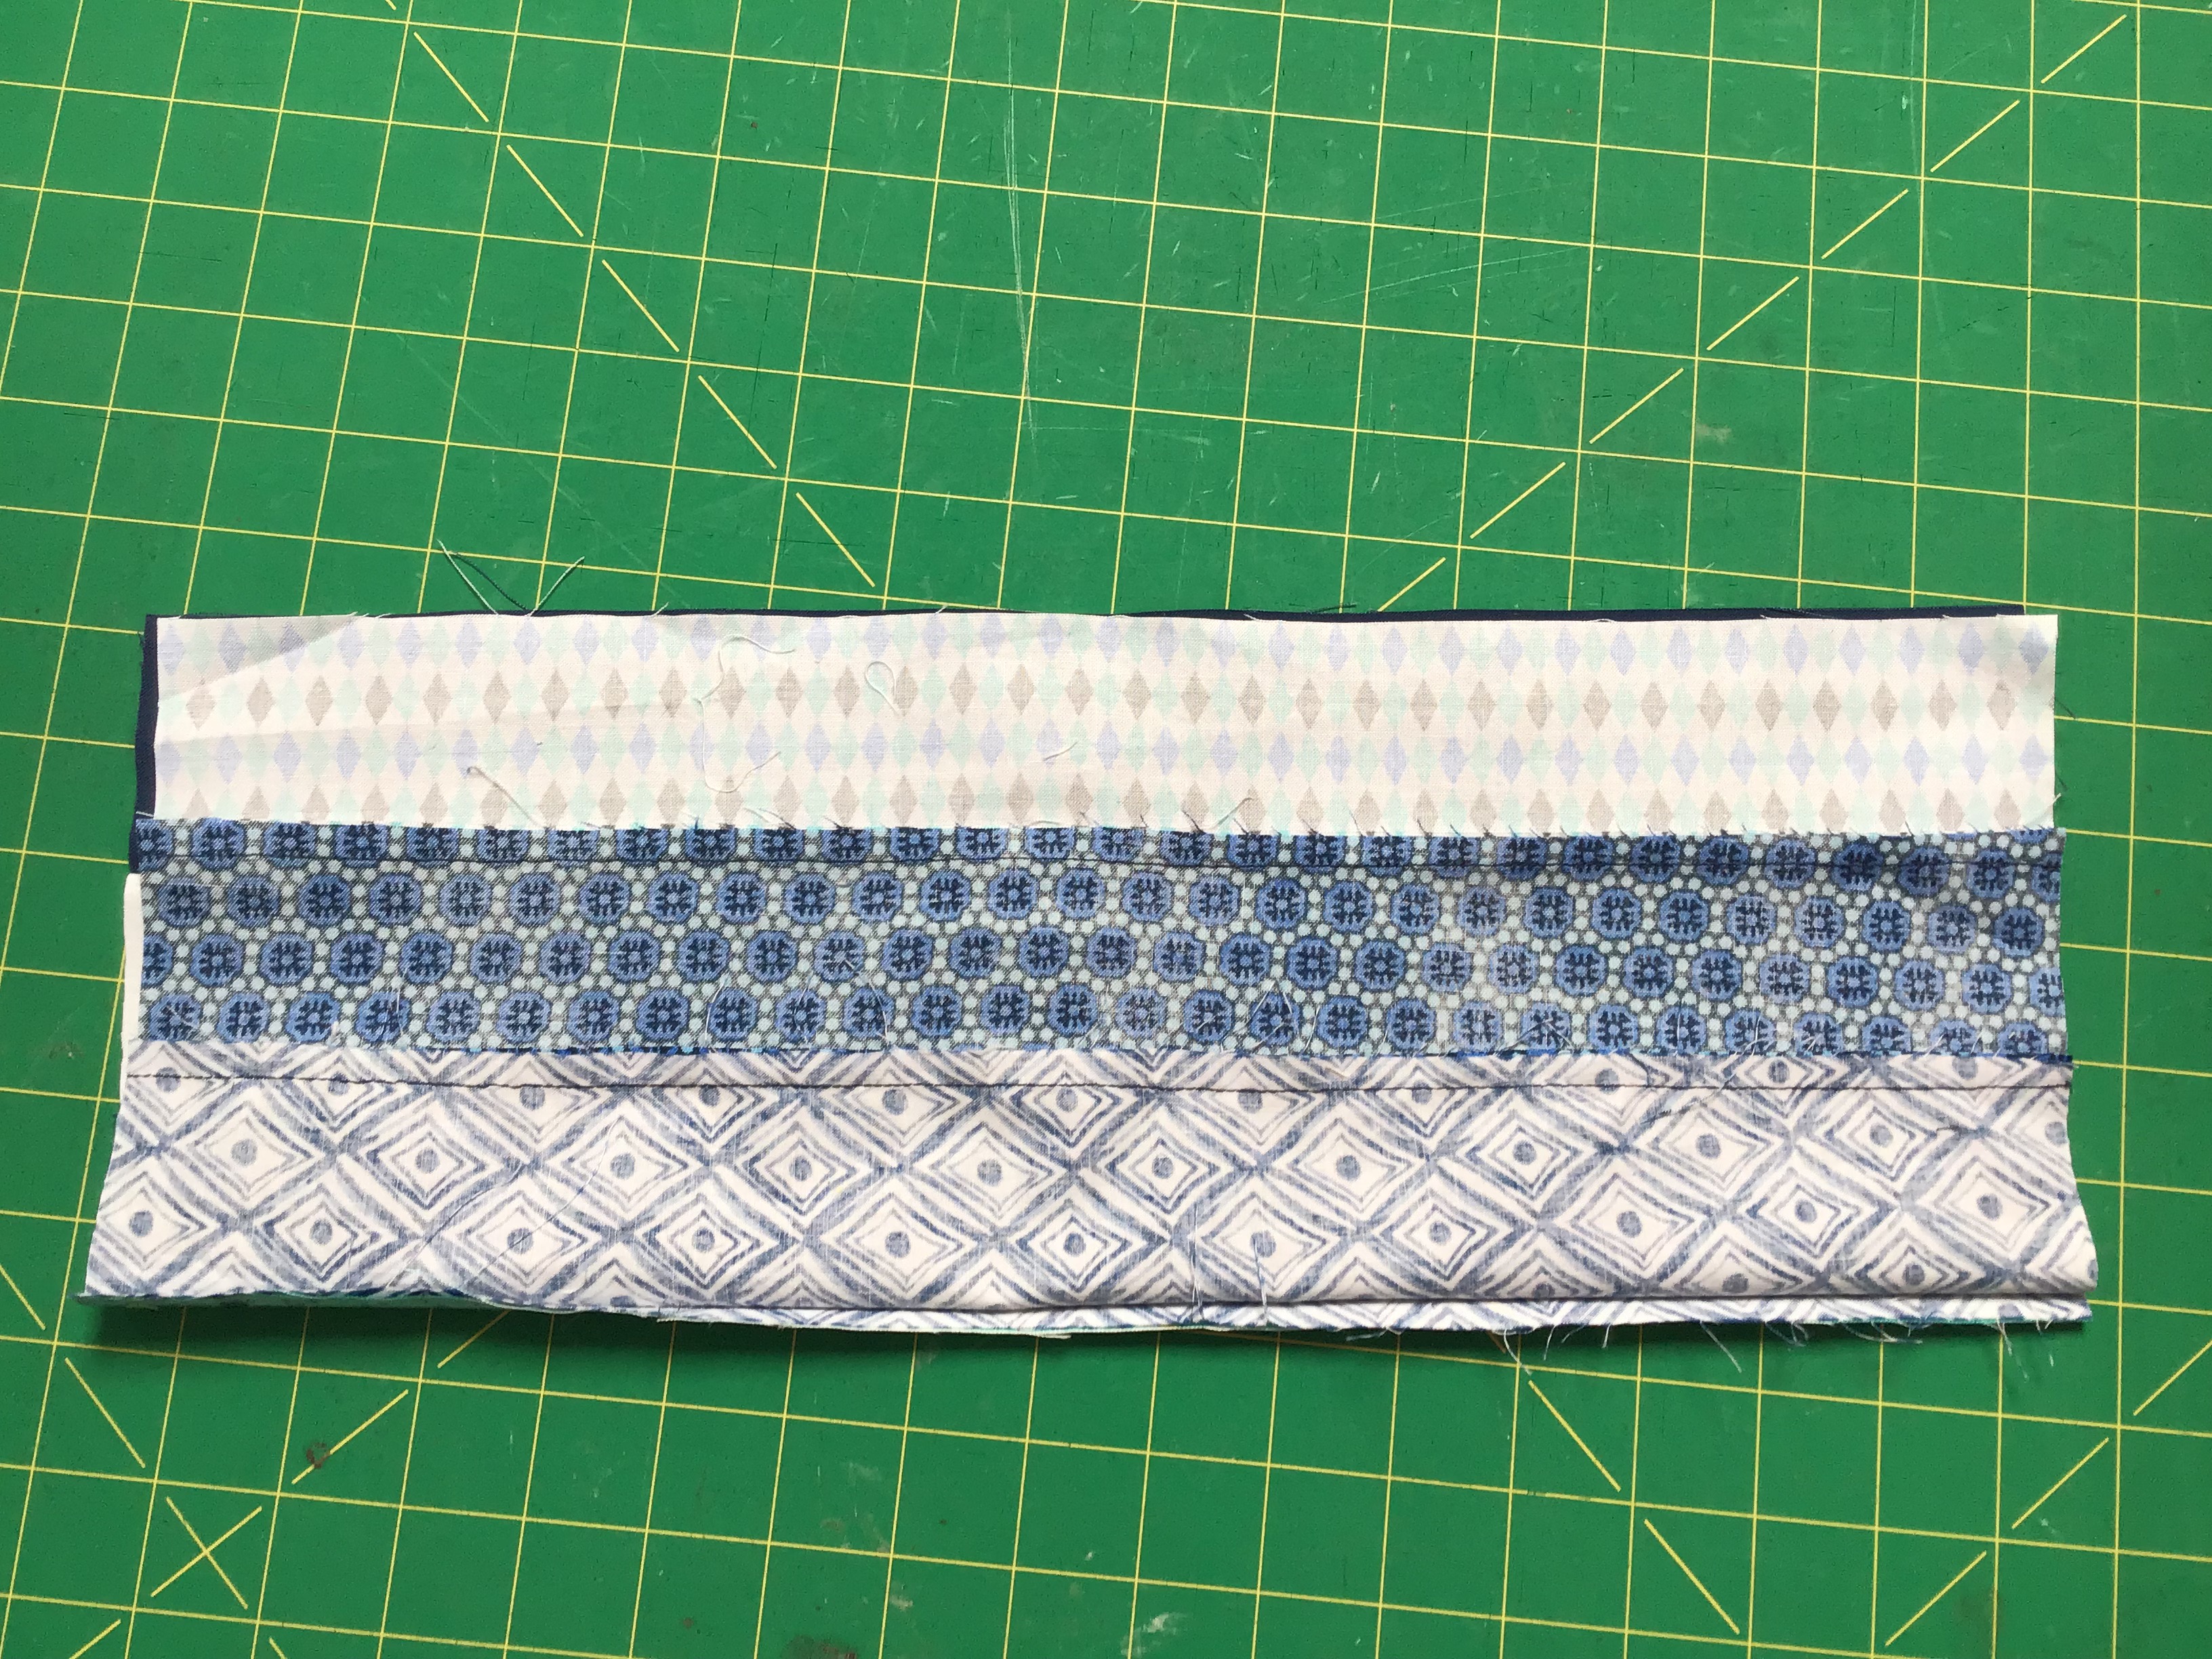
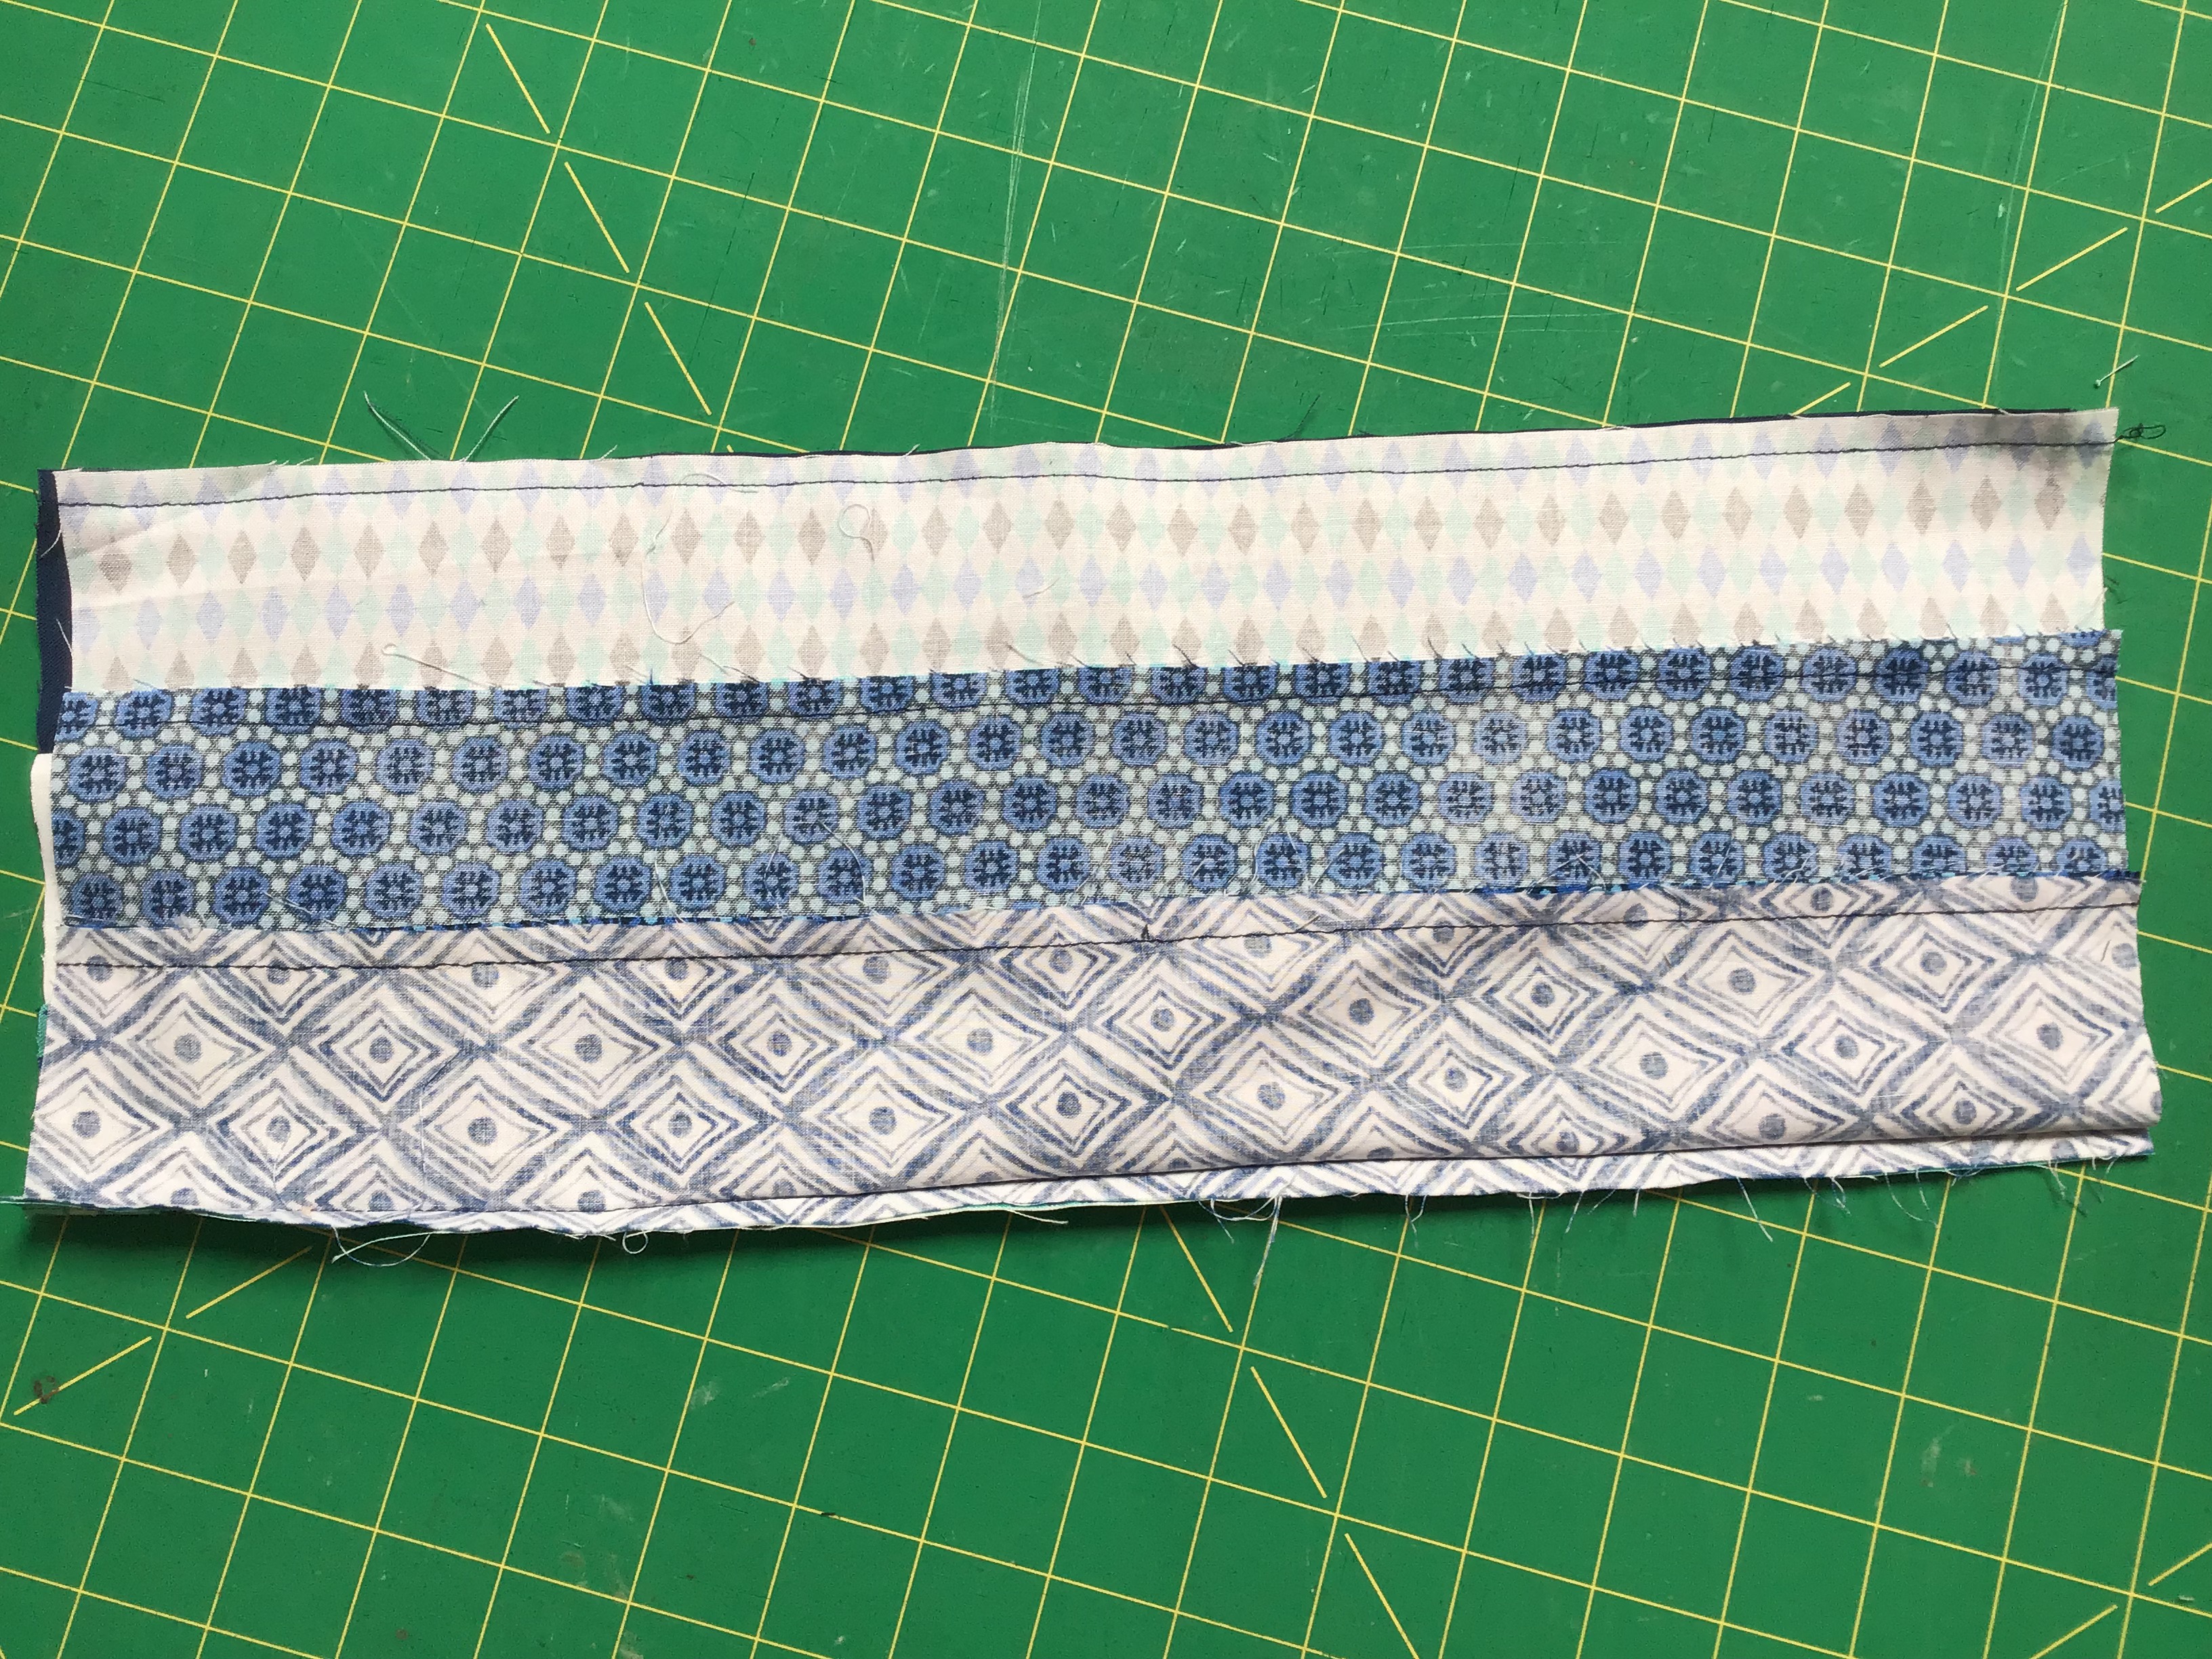
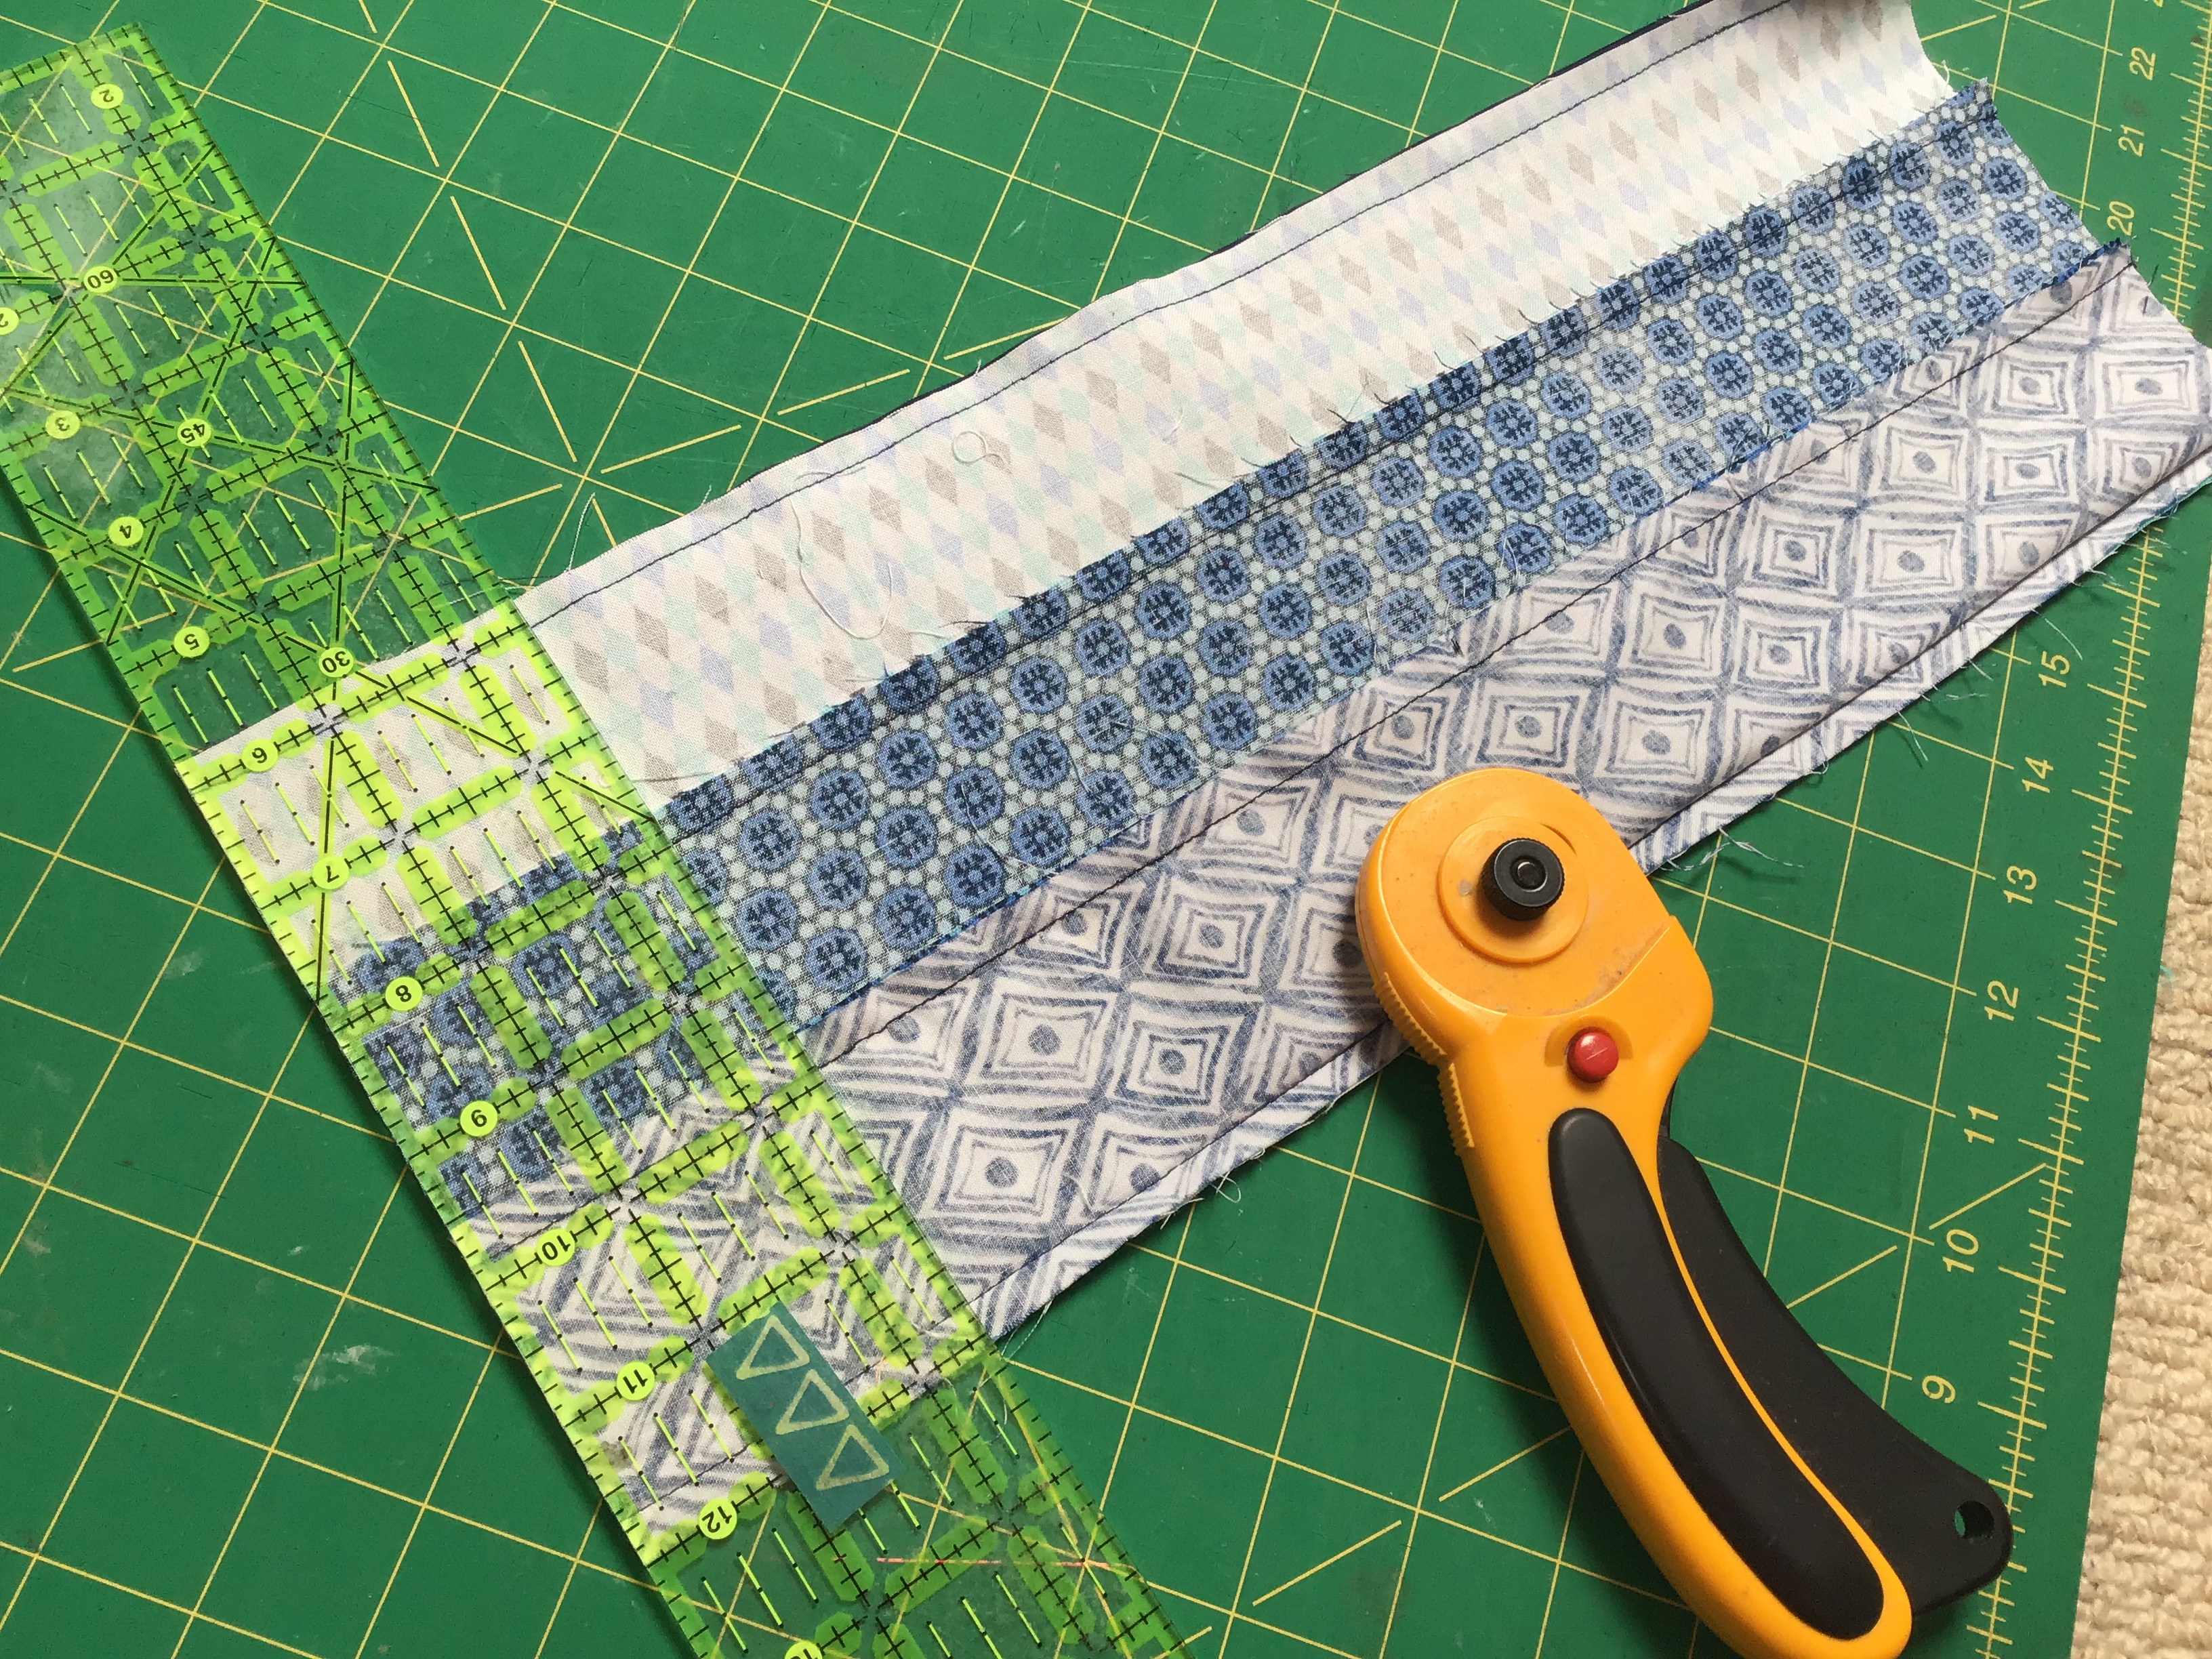
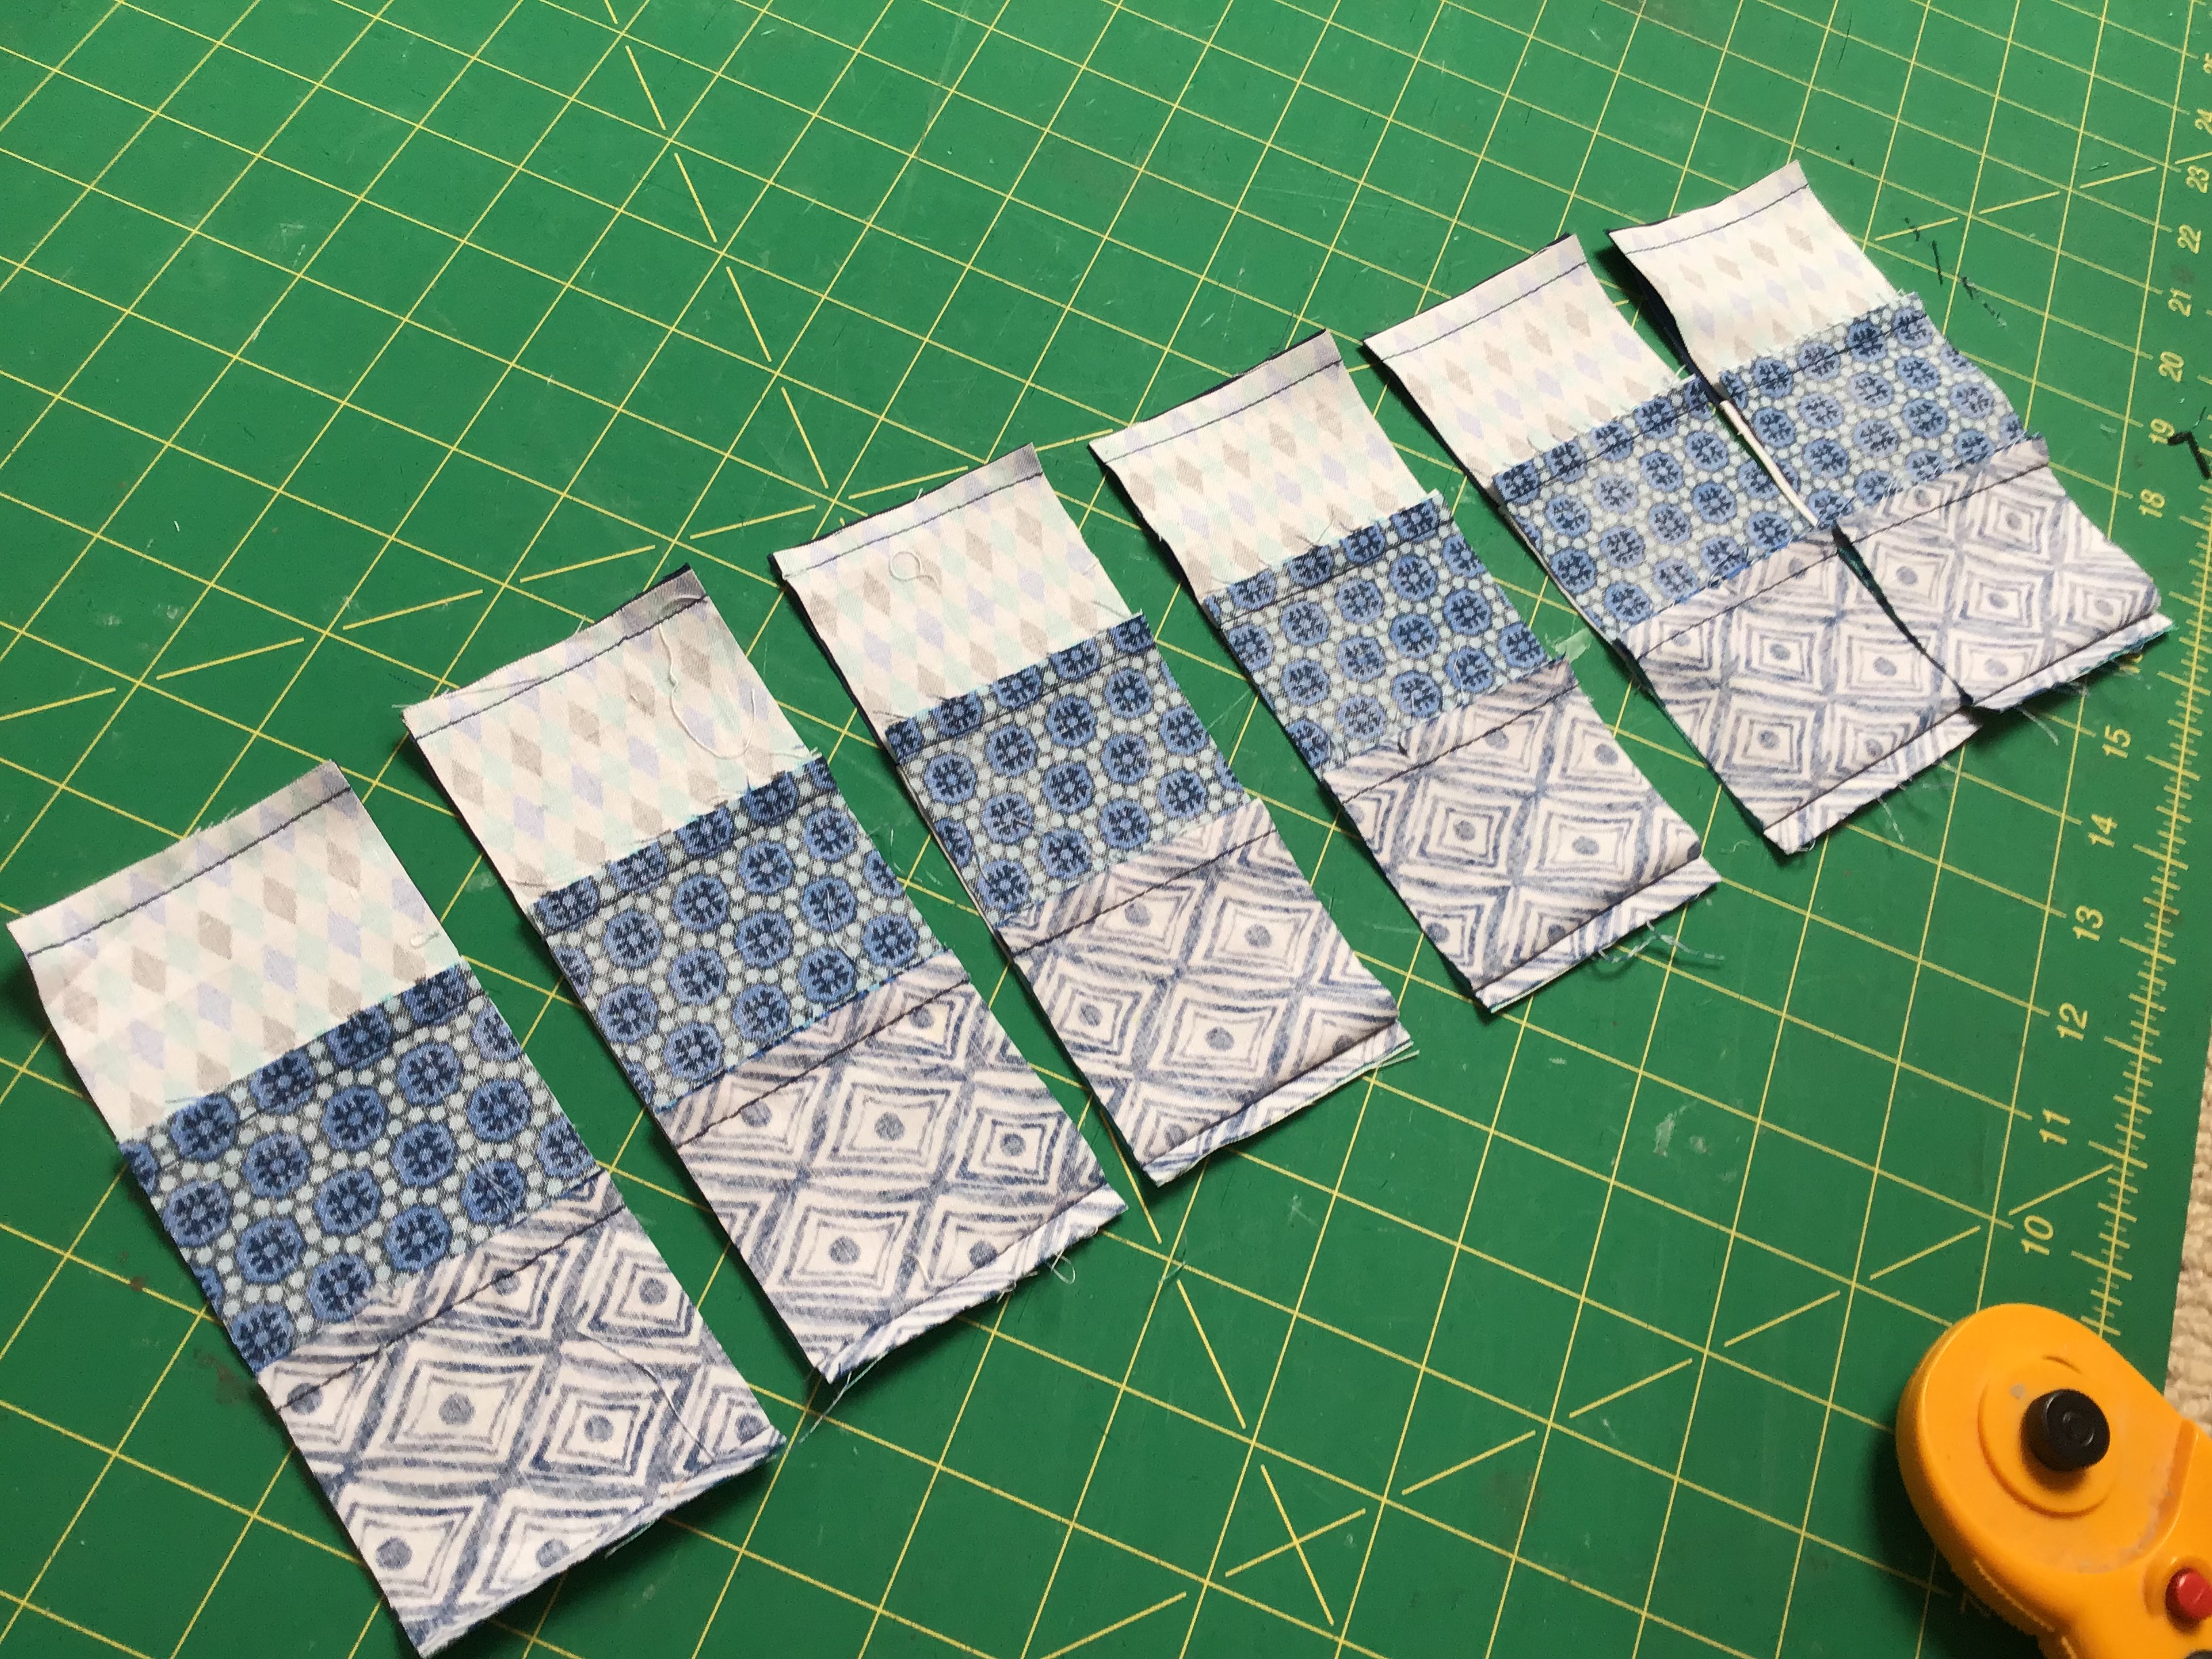
Oddly enough the things  I’ve loved making and have proved so useful in keeping me on track are these scrap pouches. All credit to Tori Smith #cloudtori for the inspiration, hers  are far more exquisite but I love these bags which are quick, easy and effective. A blog post to come….


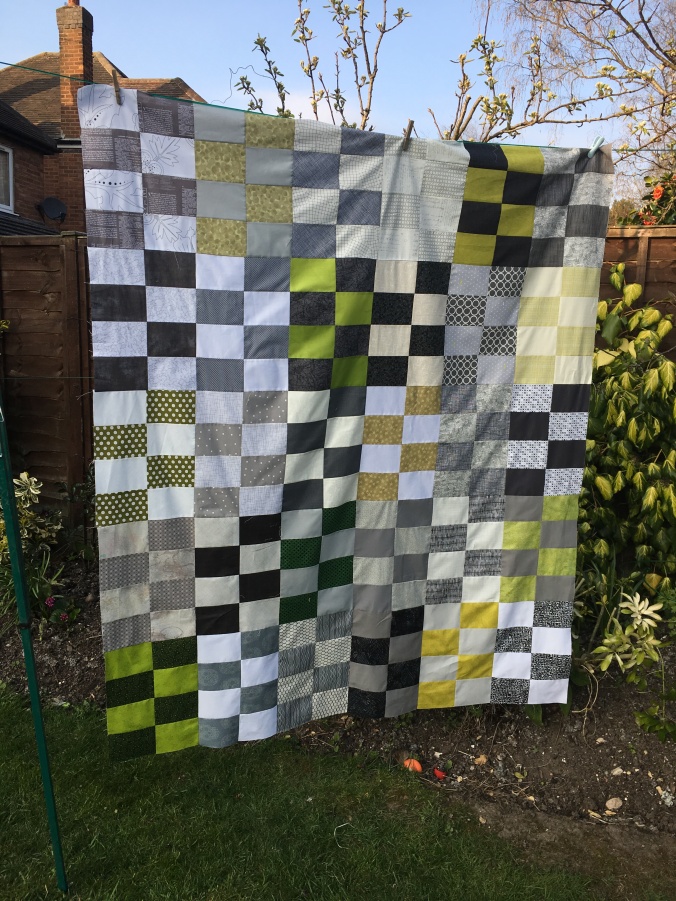
The quilt I’m of which I’m most proud

img_1294

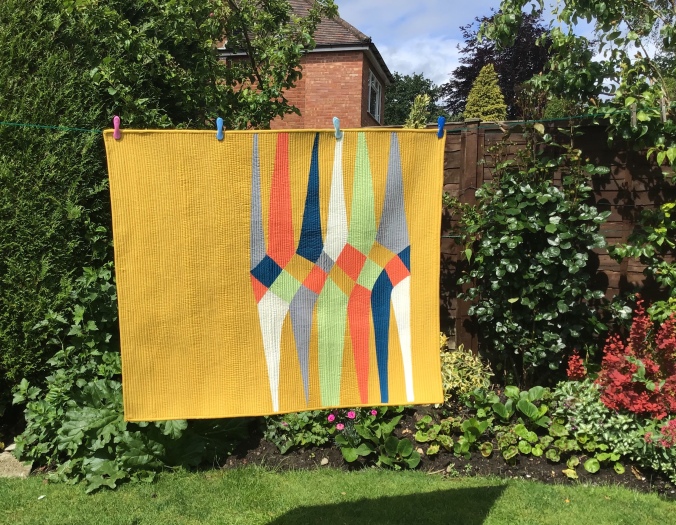
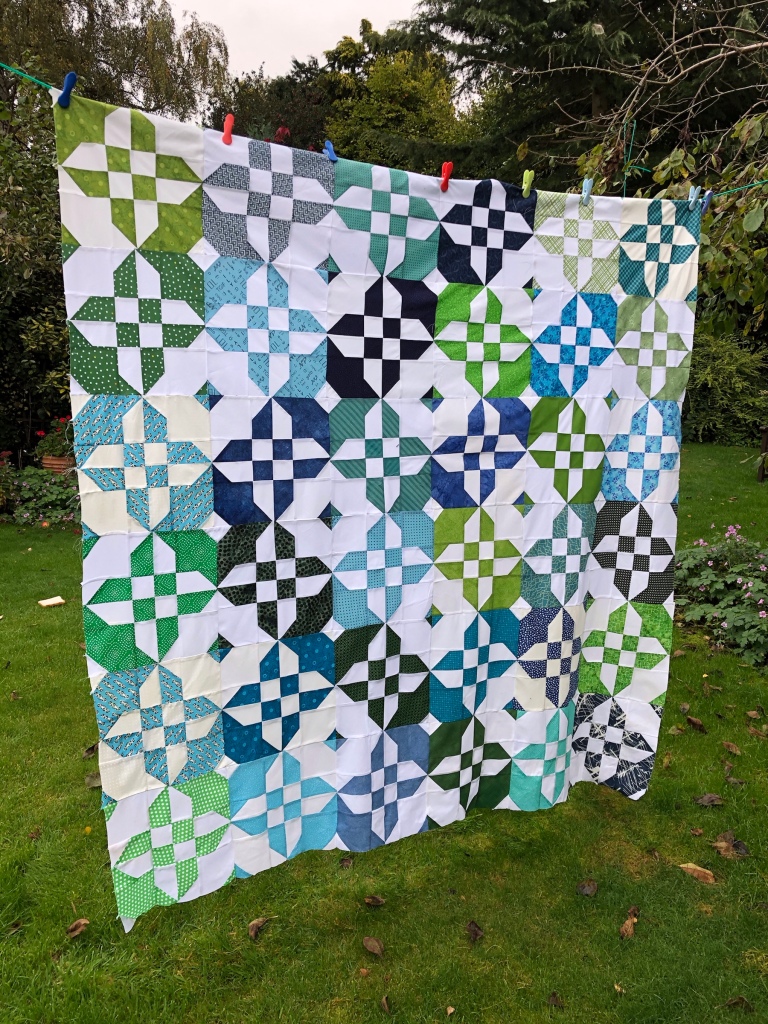
Now this quilt would miserably fail under the heading of ‘the quilt I most enjoyed making’ but I loved this design idea and thought it doable with templates etc.  I mocked it up on TouchDraw and it looked good.

But in reality the template curves weren’t precise enough and there was much resewing to get the quilt top to lie flat.  And letting you into a secret, this quilt is currently sandwiched between two sheets under a heavy Indian rug going through more flattening!

The idea for this unusual treatment was when I received a quilt back from the Modern Quilt Group. When I sent it in for exhibition, it was less than perfectly flat, but thanks to it being kept in a box weighted by all the other quilts on top, it arrived back beautifully flat!

But that aside I like the colours  and design. I might enter into it the Festival of Quilts.


The quilt I most enjoyed making

6E2900E1-6072-4A20-80D8-61DCA5C3BC68


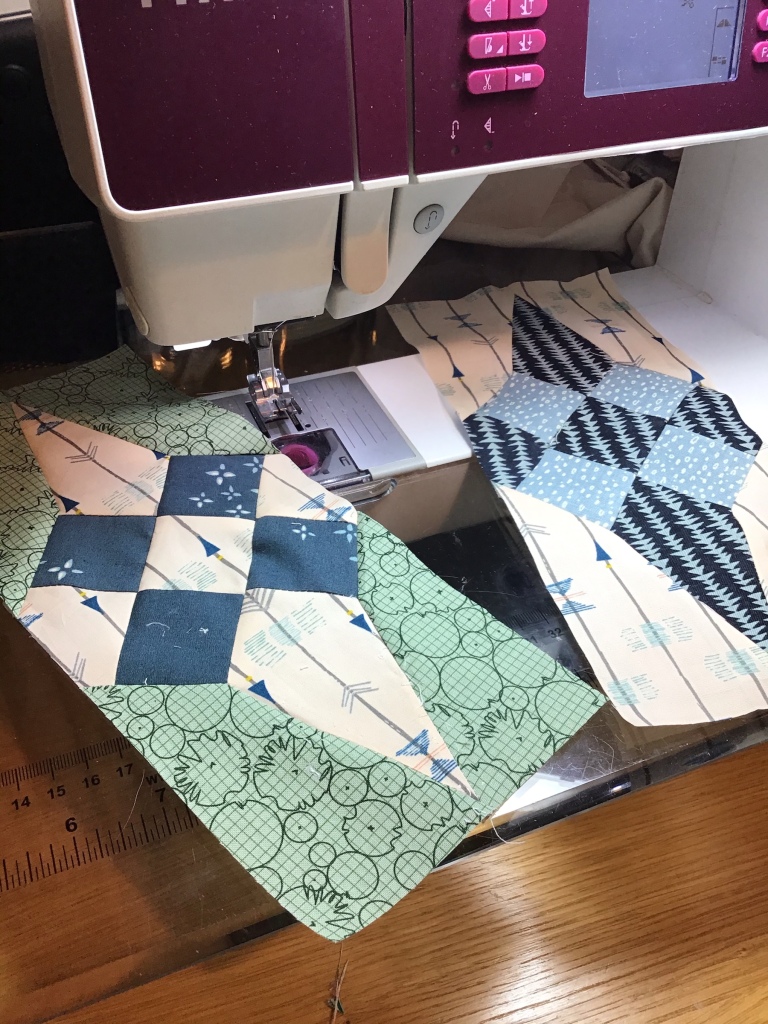
I love curves, that is no secret. So when the Modern Group Challenge announced that the theme was to make something inspired  by a 19th century coverlet I was delighted to find it had curves. Needless to say curves had to feature and  I did improv curves which are easy and quick.

What was interesting about this year’s annual challenge was that it was thrown out to all the sections of the UK Quilters Guild and was shown at the Festival of Quilts.

It made for an interesting display, they were all so very different. I think mine was the brightest of them all! It was also the first time I had entered a juried competition but in saying proudly mine was selected this must somewhat tempered by the fact they had very few from which to select!


The Bad


My organisation skills

My sewing room continues to be messy and disorganised. Having said that the pouches mentioned above mean that crucial things like Siblings Together  Bee blocks are safely kept under control but the sewing process is a mess. And my large working surface cluttered and inefficient. Oh dear maybe the new year will inspire me.


My calendar management

img_3002

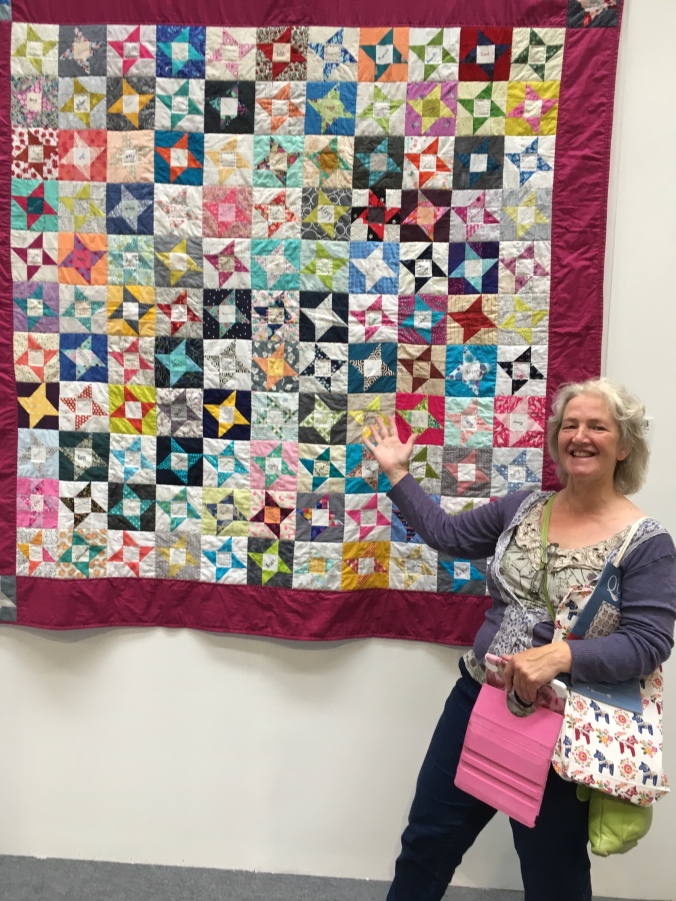
Nicky Eglinton with the Group Siblings Together quilt to which we all contributed 

I spent the entire year thinking that our holiday clashed with the Festival of Quilts, the UK’s biggest quilt show. So I didn’t bother to enter anything and put it out of my mind. A blog post literally the week of the FoQ mentioned the dates and to my amazement I’d got it wrong, I had one day that I could go.  The problem was we were asked, after we’d booked the holiday a year before, to move it back 2 days and there was my window of opportunity. I could only for a few hours but go I could and did. The best thing was seeing Nicky Eglinton above with the Group Siblings Together quilt


The rising tide of Siblings Together Quilts as WIPs

IMG_2636

I hang my head in shame here. I think  I have some  9 sets of blocks, some of which are quilt tops I hasten to add! The problem is, in respect of my motivation, we have been a bit of a victim of our own success. There is no desperate need for quilts  in the here and now as we have enough for this year’s camps. So that vital push isn’t there. But some will be 2 years in my possession by this summer and that isn’t good enough. So this will be the spring and summer of assembling quilt tops and quilting them.


And finally the Ugly

imageimage

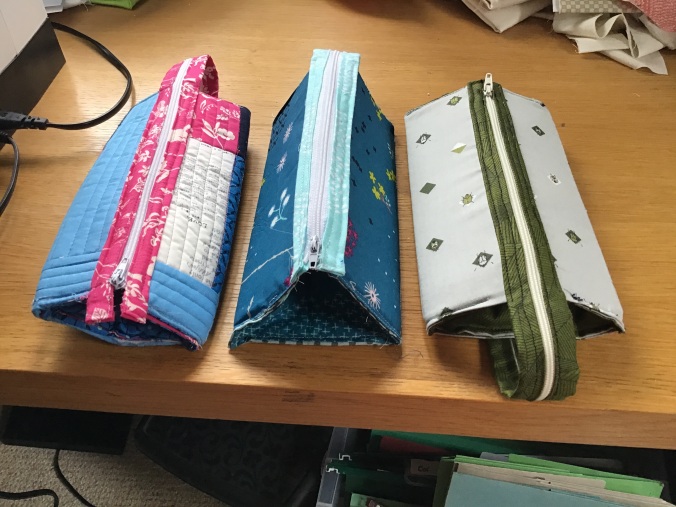
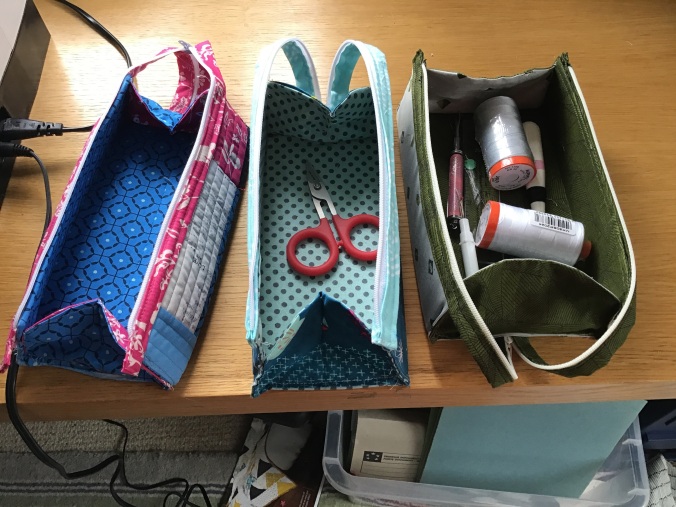
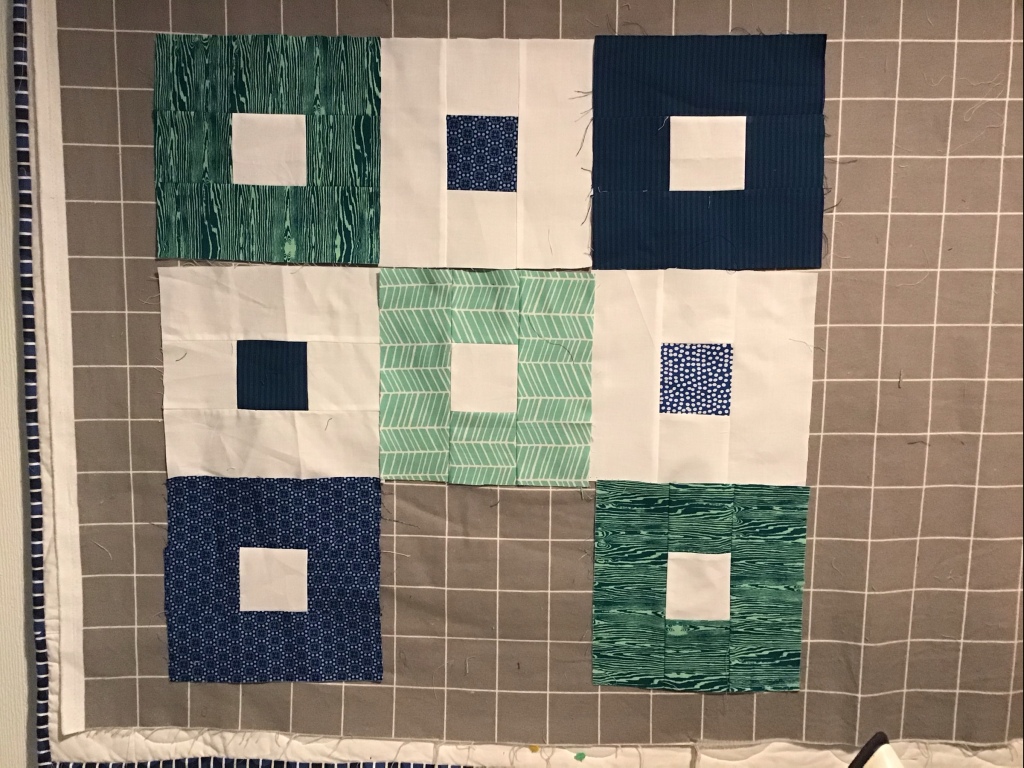
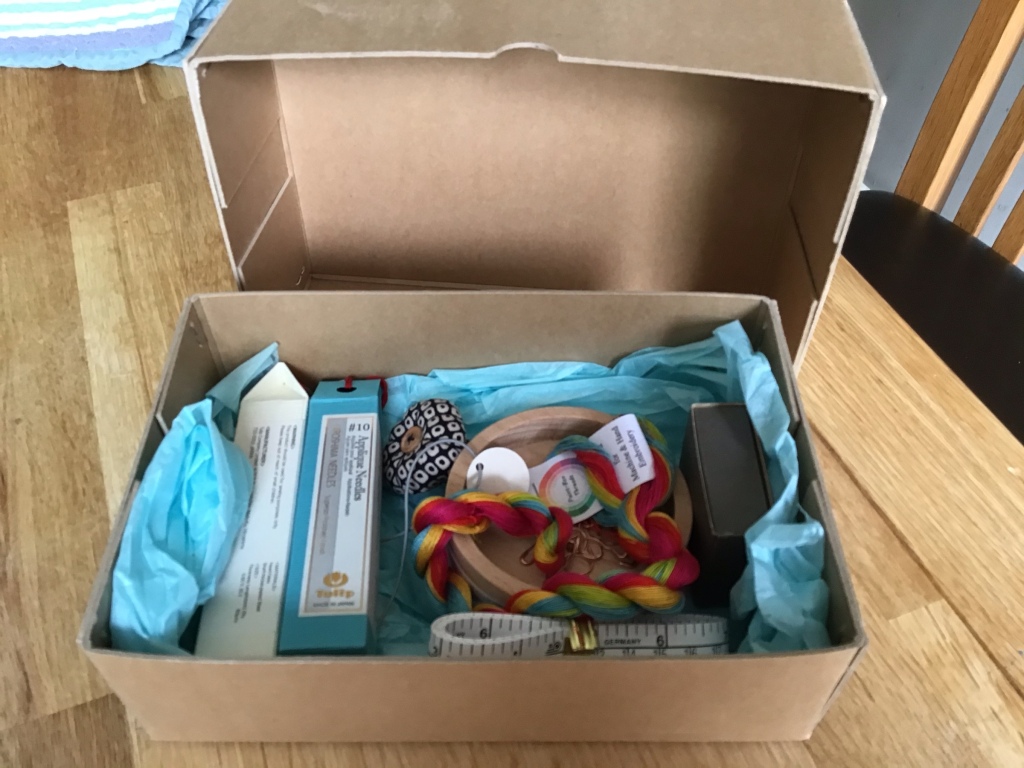
It has to be this little pouch tray, looking in particular at the one on the far left.  In a vain effort to be more organised and to combat a work surface that’s slopes ever so slightly so everything rolls off, I like having trays to put essential things like seam rippers, pin cushions  etc. by the side of my machine.

Bonnie Hunter, one of my favourite  bloggers, mentioned this pouch as being similar to a shop bought one she had. I made it from  scraps and as you can see whilst it’s OK as a small tray, once zipped up it doesn’t sit squarely and has openings so things can slip out. And let’s be honest it looks plain ugly!  I made two others to slightly  different dimensions and not so scrappy and they are better, particularly the end one on the right but I’m still  on the hunt for the perfect side tray….
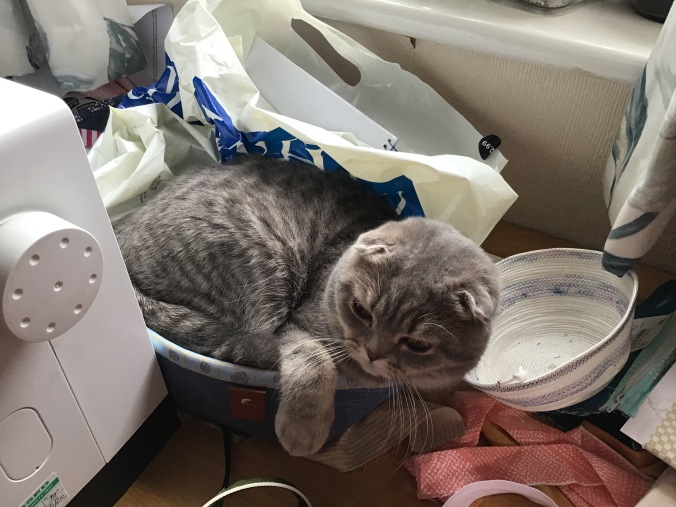
Ugly but much loved

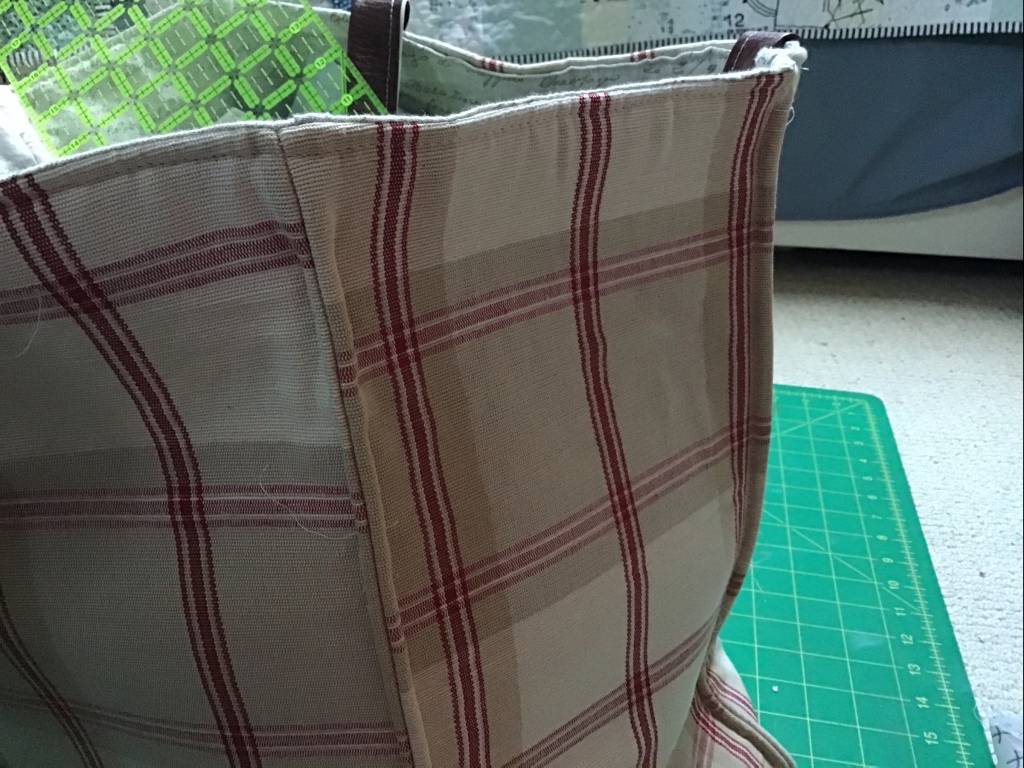
In my review of two years ago the item that one the ugliest award was this.  This was entirely because my leather handles looked ridiculous and try as I might I couldn’t remove them.

IMG_7487

Its part of a free pattern by Anna Graham of Noodlehead fame called Little Treasures and actually this design and the smaller curved trays are lovely, I just didn’t read the pattern properly.

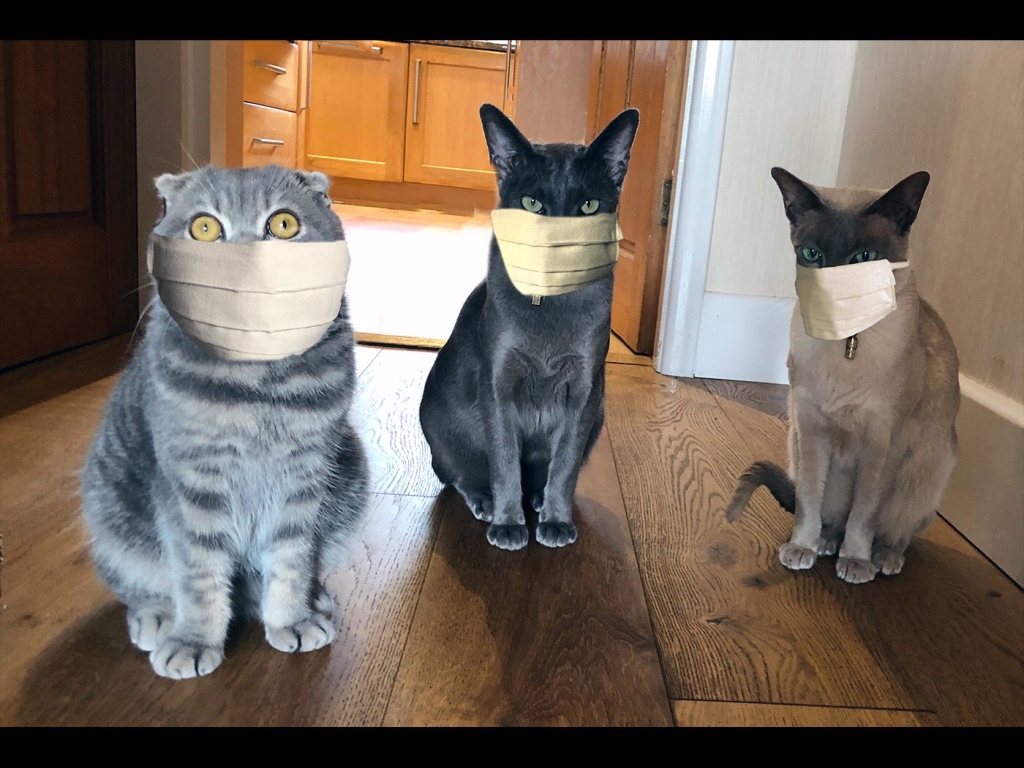
Well it seems that my cats don’t think it is ugly at all and it has become a favourite bed of my daughter’s cat Bella.  It lives on her bed and Bella loves to curl up inside. So it just goes to show…..

IMG_1303IMG_0881


So to a new year. I predict a massive world wide event that no one could possibly have predicted…..ok I added that last sentence!

2020 – a different year


I suspect that everybody looking back over the last year will have different reflections about what could have been had it been a normal year and how very different it was from what we expected this time last year. Although blogging hasn’t been at the forefront of what I’ve done in a year when I’ve had more time at home than at any other (more’s the pity!), I still wanted to try and capture what had happened particularly on the creative front over the last year. To that end I would be joining up with the ‘best of 2020’ Link with Cheryl of Meadow Mist but I have missed it…..no surprise there!

Quiet the brightest quilt I have ever made!!

I’ve done this for a few years now and always enjoy remembering what were the highlights. But I don’t like to just reflect on the ‘best of’ but in addition to the good, also the bad and the ugly.

So to the good…..

Once lockdown hit, which for us in the UK was in March, it was such a swift change and unlike anything before it all seemed very unreal. Of course there was the anxiety, not so much for myself or my children but my parents in their eighties/nineties and the uncertainty of it all. But all that freedom was incredibly liberating…. it coincided with me stepping away from a role I’d had for 10 years at a local university and not yet being able to start in a new role so I had the luxury of time.

I hadn’t heard of zoom at that time, it absolutely dominates my life now! It took a while for things to get set up using this and other platforms so in those few weeks everything focused on the home. I made the executive and not entirely popular decision, with my children being late teens/early 20s and of course stuck at home with no school or college that I would shop just once a week and they had to make their own lunches. There were no chauffeuring duties, it was amazing the extra time I had!

My garden never looked so good. Parts got touched that hadn’t been in the 30 plus years we have loved here.

On the family front when the lockdown lifted, with our normal holiday postponed, we took the opportunity to revisit Scotland and had a lovely week up there and stayed in the cream cottage in the centre of the photo. It was surprisingly warm, not quite how I remembered it!

And on the sewing front the chance to pick up a long-standing WIP, my glitter quilt, which coincided with Rachel Hauser’s book ‘A quilter’s fieldguide to colour’ and a sort of teach-along that she did all about colour. Perfect timing as I needed to make at least another 60 blocks and playing with colour was the best way to keep my interest. Oh and machine sewing them not hand sewing. That was a game changer.

Wouldn’t it be nice if I could show you the finished quilt but sadly not have I only about 10 more to do and then I should have enough for a good sized quilt. But I’m on my way and our second lockdown now 3 days in should give me ample time!


The bad….

I had every intention this year of really getting on top of some blocks made for me by bee members for the charity Siblings Together. I think I have something like eight sets of blocks that need to be made into quilts. And that might be an underestimate…..

There was some progress but not really enough justifying the amount of extra time I had. But here are a few quilt tops I’ve sewn up.


You will note the critical difference between completing a quilt top versus finishing a quilted quilt… I’m a bit of a dilemma though about quilting them as that will just take up more space and as the camps didn’t really happen this year they’re not desperate for quilts at this point at least. But something for 2021.

I did finish one quilt though…and in flat out speed as well. In discussion about Christmas presents my younger son said his girlfriend would like a quilt. This three weeks before Christmas… We agreed she needed to be involved in the design etc. So armed with Pinterest my go to for inspiration she settled on a perfect design for a quick quilt and wanted bright solid colours. I think it’s the only solids only quilt I’ve made.


Whenever I’ve made a quilt for a young person and they’ve had an input in the design they go for graphic bold design and always go for a fleece backing. I can’t blame them. Cotton backings are a bit cool to touch for me. So on Boxing Day under the tree was a finished quilt. It was a bit of a canter but we got there and she was delighted which made it all worthwhile.


The ugly….

Well for a start my lockdown hair cut courtesy of my daughter. I should have realised there was a problem when I didn’t hear the familiar snip snip of my hairdresser but crunch crunch as the scissors hacked there way through! Thank heavens hair grows. We did laugh though.


I also have to put in here masks. Ok necessary, but no one’s fashion item of choice! UK guidance took a while to catch up with elsewhere so I could see all the wonderful creations and absolute multitude of patterns before we had to follow suit here.

I started off with the conventional pleated type modelled here by my cats. Before anyone gets worried about animal cruelty the original mask was made for a photo competition at my camera club. I got my daughter to wear it then photoshopped the shaped mask onto an existing picture of the cats. The thing that struck me was just how uncomfortable it was to wear on the breathing front. Maybe it was pleated too much.


But realising that it was only a question of time before we had to wear them here I made up a couple of designs and settled on the free pattern by Dhurata Davies. This doesn’t have a central seam so better air flow and as I have mild asthma it helps, well psychologically if nothing else!

Well 2021 doesn’t look a great deal different at the moment. Indeed we are into another lockdown and no family visits allowed because they are too far away. Roll on the vaccines but in the meantime I am beginning to realise like many others that online fabric shops have come into their own and all that stash I had built up should keep me going for a while!

October block for Siblings Together Bee 4.5 – a backward look

Well the name Bee 4.5 seems to have stuck given we’ve combined Bee 2 and Bee 9. I didn’t do maths A level for nothing it seems! But don’t let your creative minds be discouraged if you have a better idea….

October really begins to be Autumn for me and this year it feels such a very strange end to the year. And what a year!

But back to our monthly block I am going to be very cheeky. I did think about an entirely new block but I am concious that as both Bee 2 and Bee 7 were waning towards the end of the bee year I am really rather short of blocks for 2 quilts, one from Bee 2 and the other from Bee 7

I then had, for me at least, a bit of a brain wave, a rare event indeed, and thought now we have a combined bee then those from old bee 2 could do the blocks I asked bee 7 for and vice versa. So new blocks for everyone and more blocks to make up a quilt which I guess it is what it is all about.

So if you were in Bee 2 can you please make the blocks in this post….. https://thelilaccat.com/2020/03/01/march-siblings-together-bee-7-improv-flying-geese/

Ands if you werer in bee 7 last year then can you please make the blocks in this post…. https://thelilaccat.com/2020/03/31/aprils-siblings-together-block-for-bee-2/

I should have plenty to get these quilt tops made. Many thanks everyone.

July block: Siblings Together block for Bee 4

IMG_4237


Quite how we’ve got to July so quickly in this weirdest of years I don’t know, but we have. And for the Siblings Together bees that run from September to July this will be the last block for this particular year.

I had got a design up my sleeve but it was relatively complicated and I thought I would think on. But then today I saw this picture on Bonnie Hunter’s blog.

Bonnie’s blog is absolutely wonderful. It’s essential daily reading for me with my first cup of tea. She documents what she’s been doing and boy is this one woman who can cram so much into so few hours. She has an interesting life as a professional quilter in that she runs a retreat centre and travels to teaching across the world. Or would normally, but of course has been locked down like the rest of us. I highly recommend it.

Bonnie puts up a vintage quilt every day with a quote. This vintage quilt struck me as having potential for a Bee quilt. It’s interesting, relatively straight forward and scrappy.

I had my morning cancelled because it was too wet and cold to meet in the garden for a cup of coffee with a friend. (Which also explains why these pictures are so dark!). That gave me time to think through how this could be made into a slightly easier block to make and therefore quicker. So I made up four blocks of 12 1/2 in.² so you can see the effect. On the diagonal makes it work just that much easier I think. I love the lattice effect.

IMG_4238

So to make each block and I’d like at least two please. You will need

2 x  7 1/2″squares of contrasting colours 

1 x  6 1/2″ square of white/neutral but please make sure there is enough contrast with your coloured fabrics.

4 strips 2.5” x 6.5” of coloured prints or solid

2 strips 2.5” x 6.5” of white or neutral but again please  make sure there is plenty of contrast between your neutrals and the coloured fabric

IMG_4223

Please use scant 1/4″ seams through out.

First off make the quarter square triangles. I’m sure most, if not all of you, could do these in your sleep but if a refresher is helpful then follow along.

Iron one of the squares diagonally (or use a pencil to mark a diagonal line) then lay right sides together and stitch either side of the ironed line by 1/4″. Cut through the marked line and you will end up with 2 half square triangles like this. 

IMG_4224

Now iron one of them (or you can use a pencil to mark a line) that bisects the seam going from corner to corner. See below

Put them right sides together making sure opposite colours are adjacent to each. Make sure the two seams are perfectly aligned. I use pins….

IMG_4227

Then sew 1/4″ either side of your mark and cut up the centre to reveal two quarter square triangles. Put one aside for your next block.

They will need trimming. Take a ruler that has a diagonal marking and trim to 6 1/2″ square. You can see from the pictures below how I’ve done it by lining up my centre point at 3 1/4″ on the diagonal rule line. If you don’t have a ruler then just eye ball it. It will be fine! 

IMG_4231IMG_4232

Now make the strip sets so you end up with 2 blocks that look like this.

IMG_4234

Next step is to lay out the block and sew together. The final block should be 12 1/2″ square. 

IMG_4235

IMG_4237

Repeat for the next block(s)


Any questions or queries please let me know  


June’s Siblings Together block for Bee 2

Even with lockdown slightly easing here is the UK it has been the strangest of times of uncertainty and for many, real financial worry and stress. So I think a particularly simple but hopefully effective block for this month of June for members of Bee 2 is called for. I’ve seen it used on a number of ST quilts and they always look good. I’m sorry my brain is not up to originality at the moment!

I keep trying to explain to my children that they are living through an historic time. I suppose Brexit was too but it got soooo boring towards the end, we nearly all lost the will to live! This period of time is certainly not boring and the most over used word of now is ‘unprecedented’! My children remain unimpressed but in the main reasonably content with life particularly now they can meet up with one or two friends.

Anyway to the block for this month. As I said it’s really easy for that sort of brainless activity which I find very soothing at times like these. Not that of course times have been exactly like this….

So to the blocks themselves, I would like you to make 4 please.

Two blocks need to have a centre of blue or green with bright white borders and the other the reverse with a green or blue border and a bright white centre.

The measurements are as follows.

You will need for the white border block

2 x 8” by 3” strips of bright white

2 x 3” square of bright white

And 1 x 3”square blue or green

For the green/blue bordered block it is the reverse

2 x 8” by 3” strips in a green or blue fabric

2 x 3” square in green or blue fabric

1 x 3” square of bright white

Please admire my new pristine ironing mat. It won’t be like this for long I assure you!

Sew together as shown below

And hey presto a block…..

Can you please trim to 8” square.

I have to say these were chain pieced and they come together so fast and no need for careful matching. My sort of block!

Here’s what the overall effect will be.

As always any queries don’t hesitate to get back to me. Thanks everyone and take care.

A Large Tote bag for a Sewing Retreat


In preparation for my fourth Thread House Retreat one essential make was a large tote bag. For those who’ve been to a retreat or really any sewing experience away from home then you will know just how much stuff needs to be taken. Not quite the kitchen sink but sometimes you feel that’s needed as well.

I have never successfully cracked this. I always end up with multiple bags that all get messy however much I try to be organised. Last year on retreat was the worst however.

I had the ‘bright idea’ of using one of those bags you get when you buy pillows with the see through panel. You can see it at the front of the pile of stuff that went last year. As you can see the cats were very intrigued and wanted to be on the action!

But it was a disaster! It was so floppy that everything heaped at the bottom and then it looked dreadful to boot. I cast my eyes round at all the other tote bags and mine fell way short.

So this year it was a priority to make a bag that worked. It needed to be large and structured so it stood up and looked smart as well.

Using a typical shopping bag from Morrison’s I tested whether the size would work with what I needed to take. The size worked well. Of course I could have just taken this bag but it’s a sewing retreat for goodness sake, I would have been drummed out!!


I used some stiffish upholstery fabric I had bought as a remnant. I had just enough linen lining fabric although one of the side pieces had to be constructed Frankenstein style. So everything from stash so tick for that.


I used headliner, the poor mans Annie’s Soft and Stable, as interfacing. I didn’t have enough fabric for the base in either the lining or outer fabric but in any case I didn’t want to use fabric. The floor at this retreat gets absolutely filthy. Honestly if I were a cleaner there I’d cry every time I went to work. The problem isn’t messy people it is the chalk chippings surrounding the conference centre. It’s always wet at this time of year and people track in white residue. I didn’t want that on my new bag’s bottom! I had some vinyl in stock for just this purpose and it worked a treat.

I didn’t use a pattern but winged it. Now this isn’t meant to be a tutorial but for those used to making bags this is a really very simple construction. It will also serve as a useful reminder to me if I want to make another.

For the outer shell I cut 2 times 18.5” by 15” for the front and back and then 2 times 8” by 15” for the sides. And the same for the lining pieces but I reduced these measurements by .5” for a snugger finish. The outer vinyl base was 8” by 18.5” and the inner base .5” less on each side. I also cut out headliner pieces the size of the outer pieces. This made a bag with a finished height circa 14” and width around 17.5”. It’s big!

I used .5” seams. I glue basted the headliner to the outer pieces. The 4 outer pieces were assembled and sewn from the top to the bottom on each side but leaving the last .5” unsewn at the bottom.Then I sewed the base to the outer pieces. It’s probably best to mark where the .5” comes so you don’t sew too much or too little.

The inner lining is sewn exactly the same way but with no headliner.

You now need to join the outer and inner bags. So to do this the outer shell is turned inside out so the right side is on the inside. And the lining is also turned inside out and placed inside the outer bag so now the right sides should be facing each other. Sew round the top of the bag leaving a 8” gap along one of the long sides. Turn the bag inside out and sew along the top sewing up the gap.

Then sew down the edges as shown in the picture below. This makes a nice rigid edge and keeps the bag upright. However for the first time ever my sewing machine could not cope with the thickness. Even needles for Jeans broke. But I persevered….

I used the vinyl for handles which was a doddle as it doesn’t fray of course.

It is more than large enough and I enjoyed filling it with all the items I needed for retreat as I gathered them together. There were some great workshops to attend but each needing a kit of supplies.

But disaster struck more of that in the next post…..shall we say it never got tested!

March Siblings Together Bee 7 – improv flying geese

I’ve been watching the beautiful creations of people who are currently doing a sew along of the improv triangle blocks from Nicholas Ball’s recently published book Inspiring Improv. These are a few of mine.

It got me thinking that we could do something a bit similar but make them more about flying geese than triangles. So here are the blocks I would love you to make

Now I don’t know the method advocated in the book as I haven’t bought it so I use a method I know for inserting triangles. Feel free to do your own thing and if you hate improv and you like precision sewing just do flying geese using your preferred method, but please make sure it fits the block size and design.

I would like 2 blocks please of improv triangles in a flying geese formation. But note please, as in the picture above, I need one block where the geese are flying left to right and the other right to left.

As to colours I’m going for blues and greens and bluey greens, but no limes or yellowy greens please. As to neutrals, very low value grey/white neutrals please. I initially tried some stronger neutrals as you can see at the bottom of the photo below but they were distracting. Mind you, I used that fabric with the crosses you see in front, but the wrong side. You can use prints or solids.

You can, if you wish, use neutral scraps. I have drawers of scraps so they were my first port of call. Alternatively use a strip of neutral 4” by 16”. But please use 3 different neutrals for your strips.

For the 6 triangles cut squares/rectangles/or triangles of the colour fabric around 3” to 5” for the base and 3” to 4” for the height.

Now to the block itself. Place the coloured square (or precut triangle) over the neutral thus.

This is going to be the first triangle to the left side so please remember to ensure there is at least a couple of inches of neutral to the left of the triangle.

Then cut as shown

Discard the pieces you don’t need

Then flip the triangle over

Sew that seam and iron

Now sew the other seam leaving you with a triangle inserted into the neutral strip. To ensure you have enough seam allowance at the top of triangle you just need to make sure there is bit of a dog ear at the top. But if points get lost ca la vie!

Trim to 3.5” by 15”. Remember to ensure that gap at the end is at least 2”

When doing the second strip I found it helpful to lay the first strip I made above so I could get the placement of the triangle correct.

Then repeat for the third strip but again please ensure there is at least 2” to the right of the end triangle.

As I’ve said you can use scraps and can make a scrappy strip as I’ve done here below and then just cut into it as above.

Your triangles can be precise or skewed. Whatever takes your fancy. They can extend up to the top of the strip or finish lower. If you want them to finish lower, as with the triangle in the middle strip in the picture below, then you need to cut and sew one side at a time. And also unless unless you are using solids which can be flipped over you will need a longer strip to start with.

Now to assembly. As you complete each strip stagger the triangles so with one block they slope left to tight and other one right to left.

Sew them together. You should end up with a block 9.5” by 15”.

In terms of setting I plan to make a ‘lead goose’ as you see in this picture which will go over the top of your two blocks to give that wonderful chevron shape that geese make.

I’m hoping you enjoy making these blocks and the finished design will be effective. Thanks very much and as always any problems please get in touch.

My early lockdown and the retreat that never was.

Earlier this year when Covid was this rather strange and worrying virus but would surely be contained on the other side of the world…. I got that one wrong….I was planning to go off on a sewing retreat. My bag was packed, supplies gathered with just a few more to pull together and some hard decision-making about what to take and what to leave when it came to fabric. I had also finished most of my swap items which again had been safely packed away. But then the weekend before the retreat at Folly Farm pictured above with the Threadhouse team of Jo Avery and Karen Lewis the phone rang at two in the morning.

You know a phone call at that time is never going to be good news, at best it’s a wrong number. I answered it to find out that my son had broken his humerus just above the elbow while arm wrestling! They had been killing time before some key boxing match which started at 5am and in fact only lasted 45 seconds! The pointlessness of male sporting events never ceases to amaze me.

There’s no point in taking this sort of news anything other than this reasonably calmly but I could see all my plans for that weekend, the weeks ahead and of course the retreat fading away. But it was much worse for my son, apart from being in a lot of pain, he had to be settled downstairs because it was the only seat we had in the house where he could remain upright and allow his broken arm to hang down. He does a lot of weightlifting and it was generally agreed that the nursing staff had never had to do a cast quite as big as the one on his upper arm! But that of course was quite painful because of the sheer weight of it. But to cut a long story 8 weeks in and the verdict was the bones were not healing and he had to have an operation to bolt everything together! In effect our lockdown started early!

Although I couldn’t go to the retreat I wanted to ensure at least the swap items got there. The ones that were finished at least.

With the name badge I always struggle here as I’m not that good at quilting in miniature. It didn’t help that the lady I was making it for isn’t on Instagram so I had no real idea of what her tastes were. So I rather boringly went with the design and I used a couple of years ago of paper pieced flying geese. I chose liberty on the basis that most quilters are fans of it.

I was also room sharing with a couple of long-standing retreat friends Kate and Marianne. We’ve always swapped smaller items. This was an entirely selfish make of mine. I’d had the Tub family pattern for some time and had seen some beautiful ones on Instagram and I was itching to make one.

For Kate it was a pink confection with Amy Simibaldi fabrics which I know she likes.

Marianne is a bit more tricky. She tends to like bright strong colours but I don’t know what would suit her particular home. In the end I chose cotton linen mix with the word Maker on it which is very much what Marianne is. She both knits and sews and makes a lot of beautiful crafted items particularly accessories. I chose a screen print of Karen Lewis, who is one of the tutors on the retreat.

It was very touching to receive a large package of items kindly brought back from the retreat by Mary who lives pretty much around the corner from me! I received this lovely gifts from Kate and Marianne.

The needle case is Kate’s and she must be psychic because I am for ever casting around for needles at some crucial moment as a child about to leave the house with a button needing repairing or a tear or whatever. It’s already filled with needles!

Marianne made this pod which is a well-known design but by reputation quite tricksy because it’s got this curved pod like bottom. It’s beautiful I will be very useful. It’s even got a special cat fabric in the right colour.

I also received in the post this time the most beautiful pouch, a Angela Hoey design, from Charlotte. It brought home to me what I’d missed at the retreat however because Charlotte is somebody I have emailed and chatted to in the virtual sewing world many many times and I was looking forward to meeting her in the flesh but it was not to be.

She had used denim and then beautifully quilted it for decorative effect. And yes there were also cats in some of the fabric choices. It is what I like most in a pouch study with some structure so very practical but also beautiful and in this case personalised for which I’m very grateful.

One of the highlights of the retreat is the Saturday evening prize draw. Everyone gets a prize gifted by a sponsor. Well I think I must’ve got one star prizes as it was a selection of sewing items from Beyond Measure. This small business which is mostly online is run by Grace who I’ve met a number of times now. Well what a grand selection. Indeed the items are way better than my standard of sewing deserves! Here are a few to show you…

Obviously retreats have had to be abandoned but at least this one snooked in before the Covid restrictions. I just couldn’t be there to enjoy it! But in the scheme of things so many plans have have to be unmade and rethought. So many changes but at least I had some time, at least initially, for some creativity and I must get on and capture that and also that very unusual phase of strict lockdown.

February block for Siblings Together Bee 2

IMG_1996

I was going to make this month’s block for Siblings Together red, white and blue given this auspicious date for the UK and the EU but decided not to be political. However you view Brexit personally, and based on my Instagram feed it seems that most are ‘agin’ it, then we just have to let democracy be our guiding principle.

So in the spirit of neutrality I have gone for blues and greens which hopefully will provide a gender neutral quilt for a child in care separated from his or her sibling.

Incidentally there is a very powerful radio programme you can download/access from the app BBC Sounds called Separated Siblings under the series heading File on 4. If you have yet to download BBC Sounds app and you like radio this is an absolute gift. I’m not sure it can be reached from all over the world but if you are in the UK it’s easy peasy and this programme is both shocking and emotional at the same time.

IMG_1995

Anyway onto our block for this month

I’ve chosen a block that was all the rage a few years ago called Trip around the World. I have no idea why it has that name. When I first started quilting there was a sew along  using this pattern and it looked very complicated to me. However one of the Bee mamas  did a similar style of block and I realised that in fact it was very easy, just clever cutting.

The actual quilt pattern is set out in the wonderful Bonnie Hunter’s Quiltville blog here. But as we are using different measurements to make smaller blocks I have replicated it below.

You will need for each block six strips 2.5” by 15.5” in different shades of blue and green and include please, one white/grey strip.

IMG_1528

Sew these together along the long sides. The eventual pattern works better if you can put contrast between the strips. So for example if you have two dark strips, separate them. Iron seams on the back at this point, open or to one side whichever is your preference.

IMG_1529

Now here comes the clever bit. Fold up on the long side of the block you have made……

IMG_1530


….. and then sew along that seam.  You will now have in effect a tube of fabric  with the right side inside the tube and the wrong side on the outside of the tube.

IMG_1531

Now lay the tube on your cutting mat and flatten out as much as possible and then sub cut that tube into 2.5” strips.


IMG_1532

You will then be left with 6 strips such as these.

IMG_1533

Now the next clever bit is to unpick one of the seams of one of the strips and lay that out. Then unpick the next seam along on the next strip so that you start to get the pattern of the squares going diagonally. This can be tricky and yes I have had to resew many a seam and unpick another when I have made this block.  Do that to all of the strips so they have diagonally running squares of the same print.

IMG_1535

And then if necessary reassemble the strips so that the darkest fabric you have is the centre diagonal line of the block as is the case in the picture above and the finished blocks below.  Now sew the strips together to make the block.

IMG_1996
Can you please make two of these. They are quite addictive so feel free to make more than two!!

Any queries please get in touch

PS

If you are wondering what the furry thing is on which the strips are lying that is a large square of fleece stuck onto a piece of rigid plastic.  It was a tip I got from Kerry Green. It is just so you can move the unassembled block to your sewing machine with out everything moving. Invaluable.  

Siblings Together block for Bee 7 – All the birdsongs

It’s all about these fun improv birds this month for members of Bee 7. No don’t worry I’m not expecting you to make numerous birds it’s just I found these so addictive and fun to make I couldn’t stop! I would love 1 bird block from everyone but if you have time for a second that would be fab.

They are also wonderful for using scraps for the birds themselves at least.

Now for those who find improv not their thing then there is a free pattern on the website Blocklotto which gives all the measurements and how to assemble the bird. If you like to cut everything out to begin with and to precise measurements then this is the method to choose. They look just as charming and will come out at a block around 6″ by 9″ the pattern is here

However if you fancy doing this in an improv way then be my guest. I have to say it’s a perfect block for improv because the bird itself can be made to really any dimension and in fact the more variety the better. You will see I’ve got long legs, fat beaks, thin beaks, at least one wing that went wrong when I snowballed the wrong corner but it really doesn’t matter! I’ve added extra strips where I fancied!

I know many of you in this Bee are very experienced and can easily work out from the picture above how to make this block. To those bee members the only thing I’d say is the finished block needs to be no more than 10″ by 14″ (portrait or landscape) and any variant down to a min 6″ by 9″. And if you could consider doing one facing to the right that would be great. But for those who’d like a pointer as to the dimensions and some tips along the improv way please see below.

You will need 3 coloured fabrics, one for the wing, one for the body and one or two different fabrics for the beak and legs and any colours you fancy (and I don’t say that often!). You will also need around a half of a fat quarter of the neutral background which can be any grey/beige/white patterned or solid neutral as long as it is a good contrast to the bird fabrics you choose.

So to start cut out two right hand triangles that when sewn together will make a square (but don’t sew them together just yet!). One right handed triangle in the neutral and another in coloured fabric. This coloured fabric will be the bird’s wing. The sides can be anything from 4″ to 6.5″. The example given is 5″ and makes a medium sized bird.

Now you want the wing triangle to have two corners of the body fabric so it looks like this.

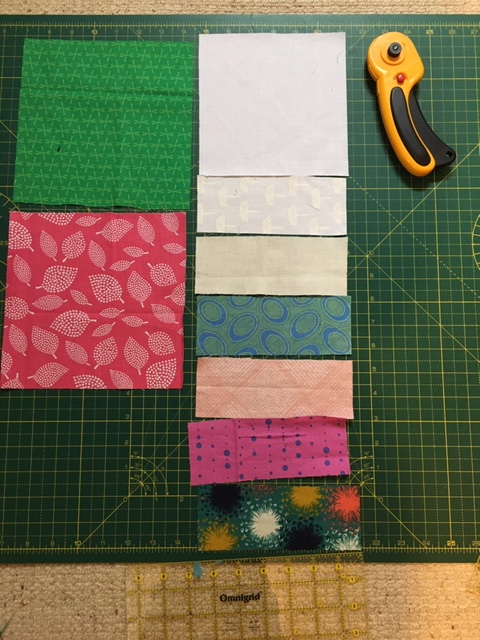
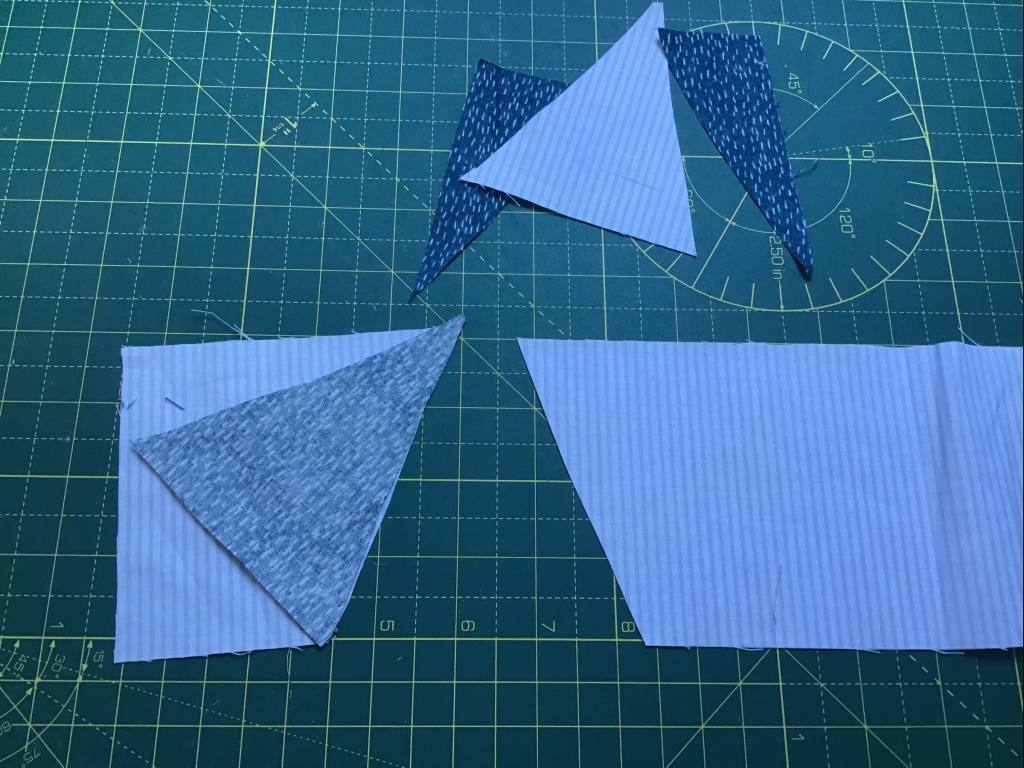
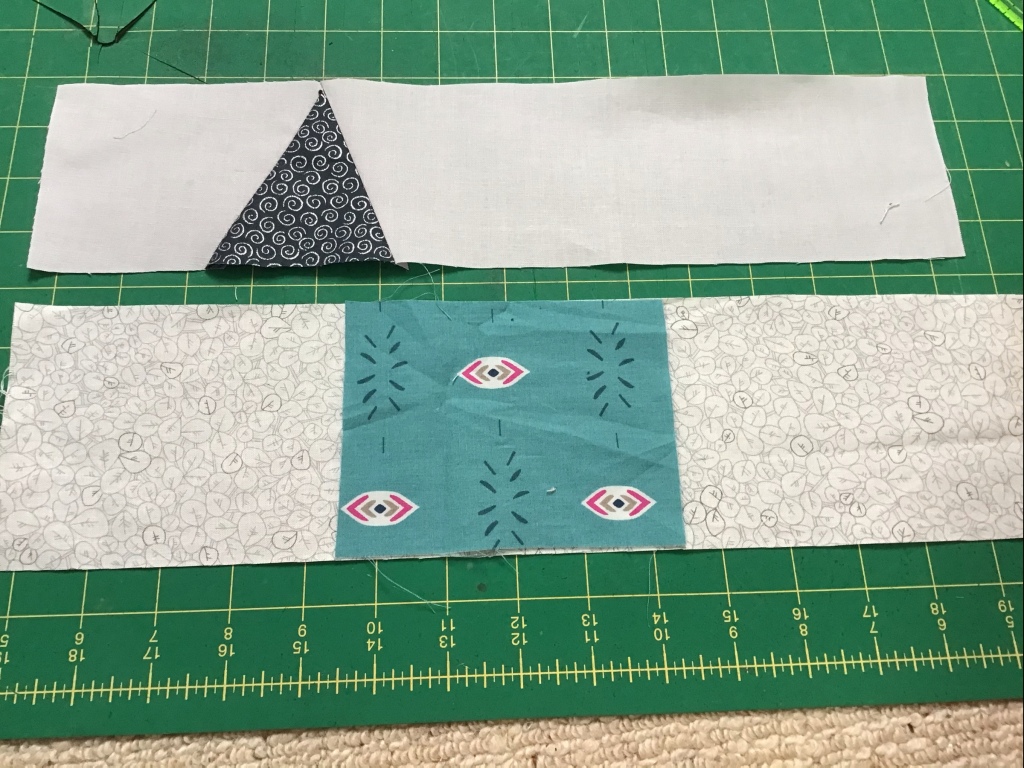
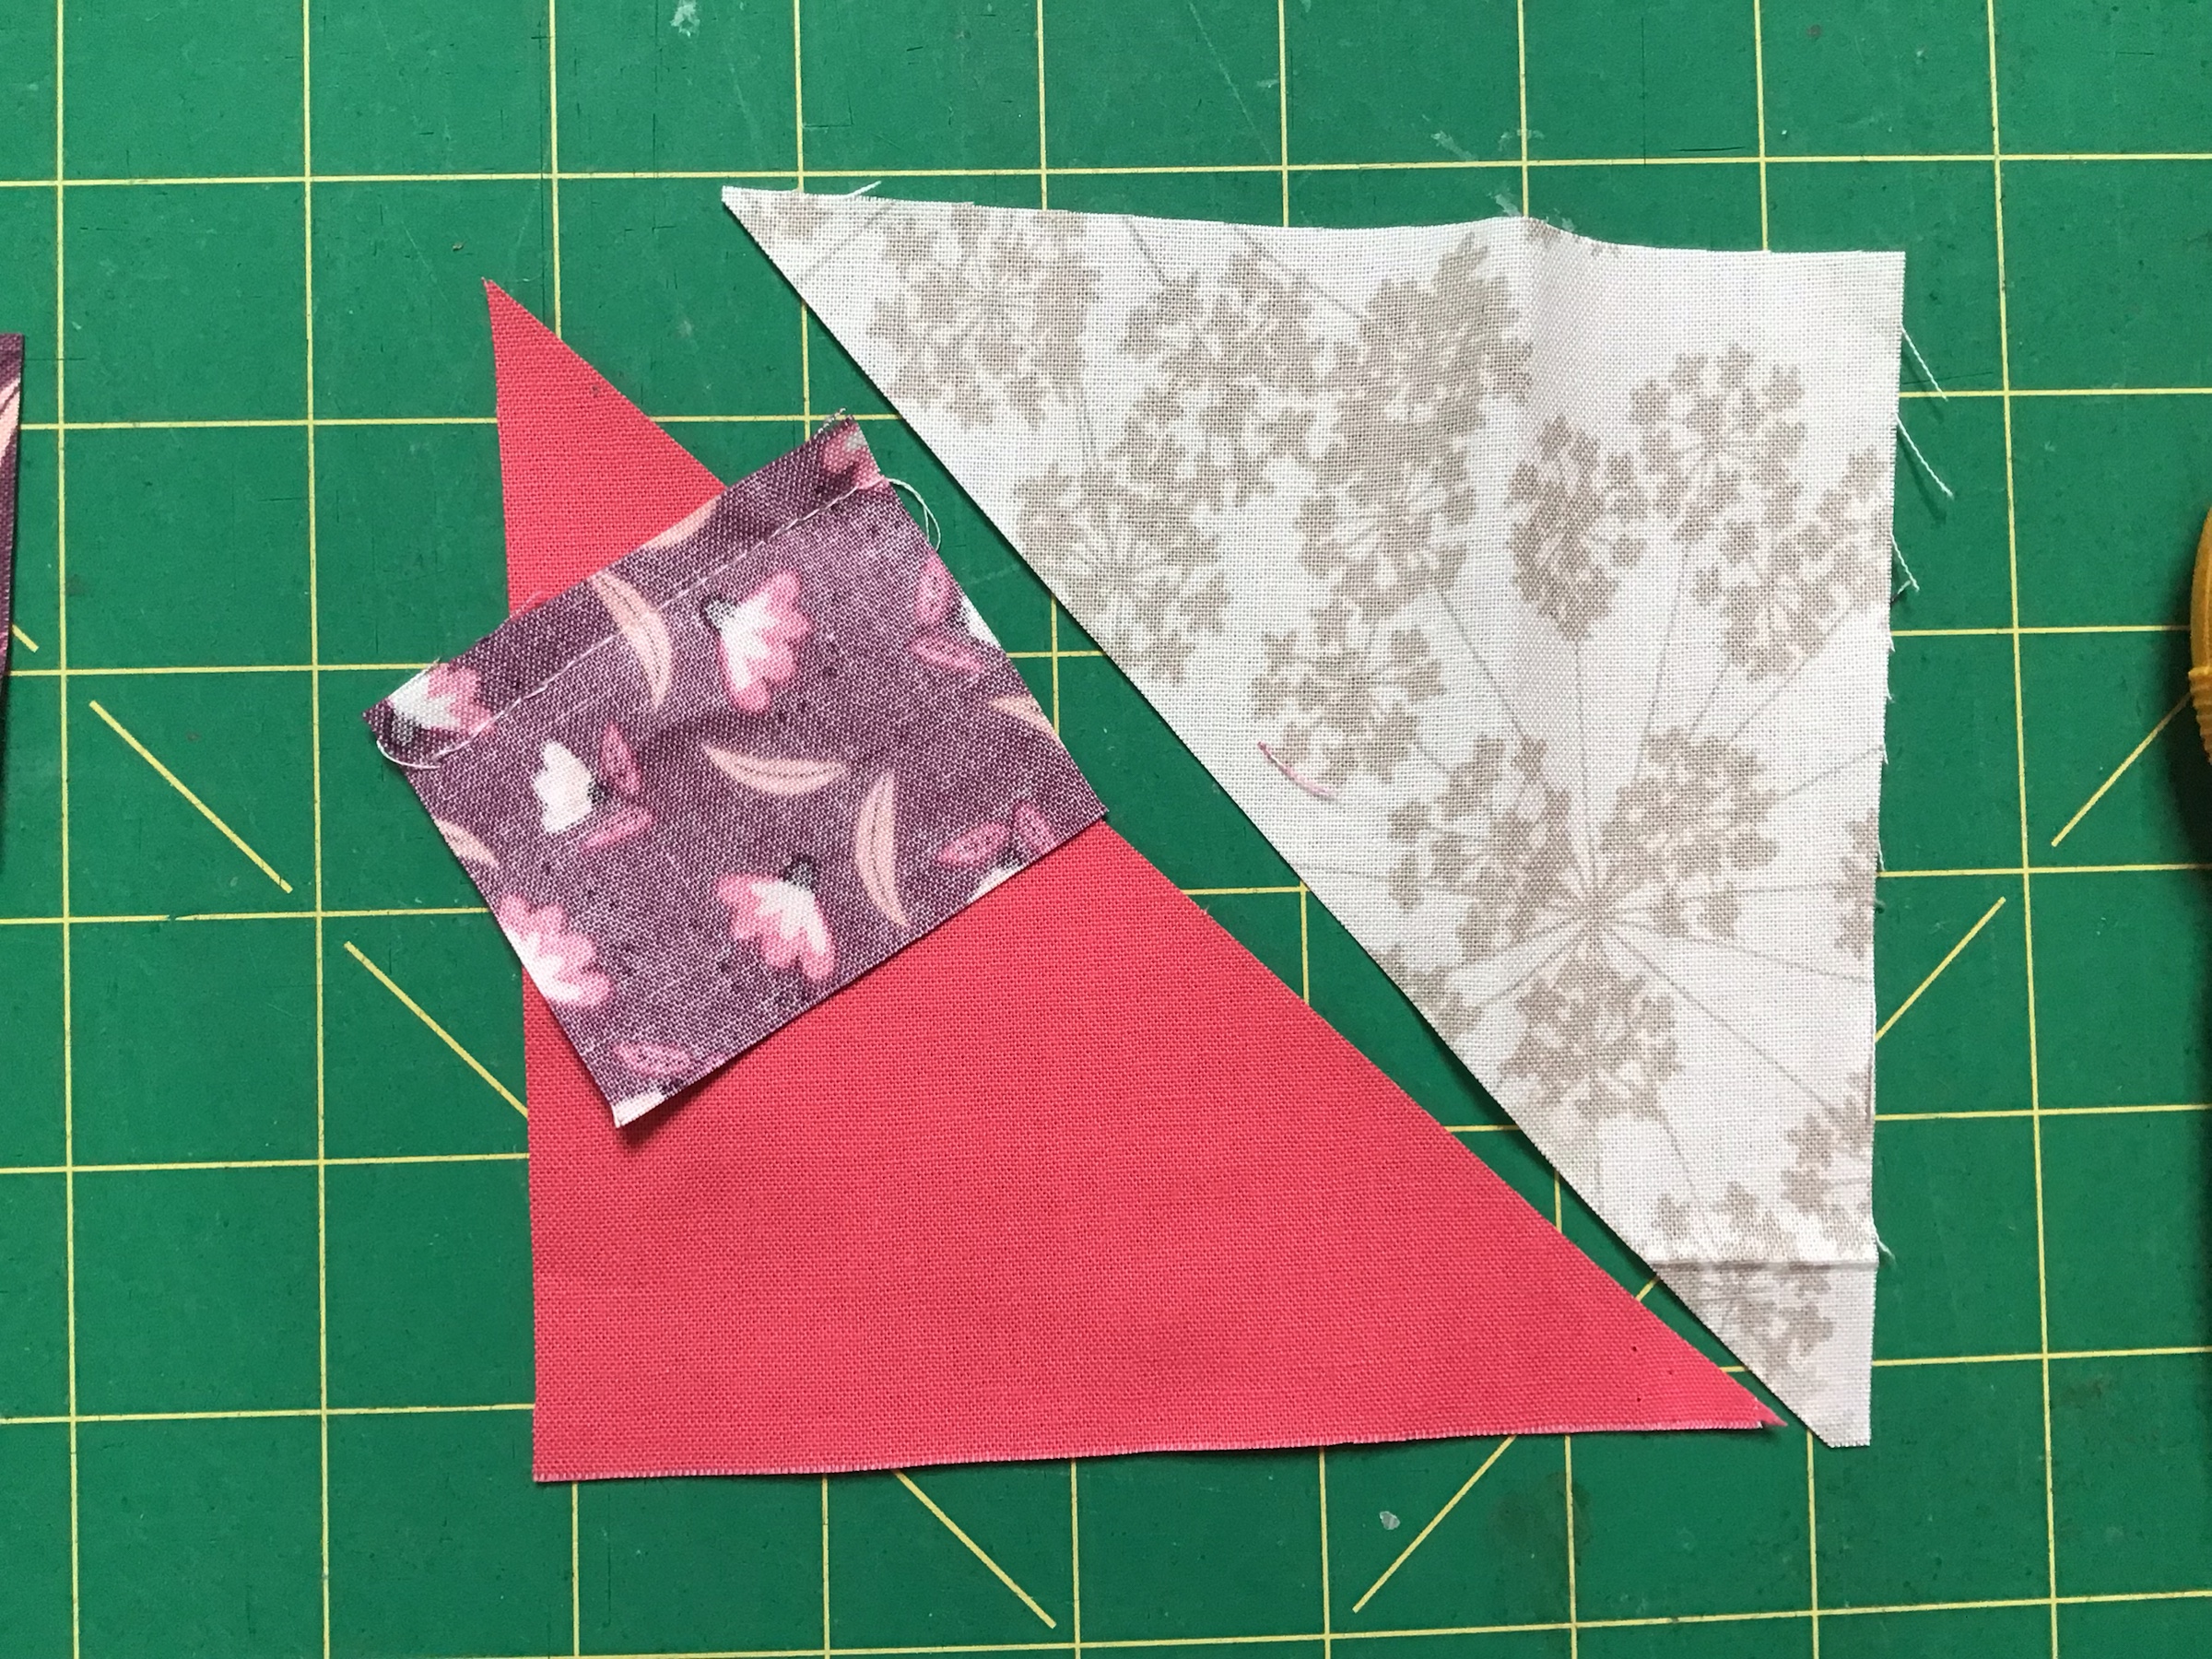
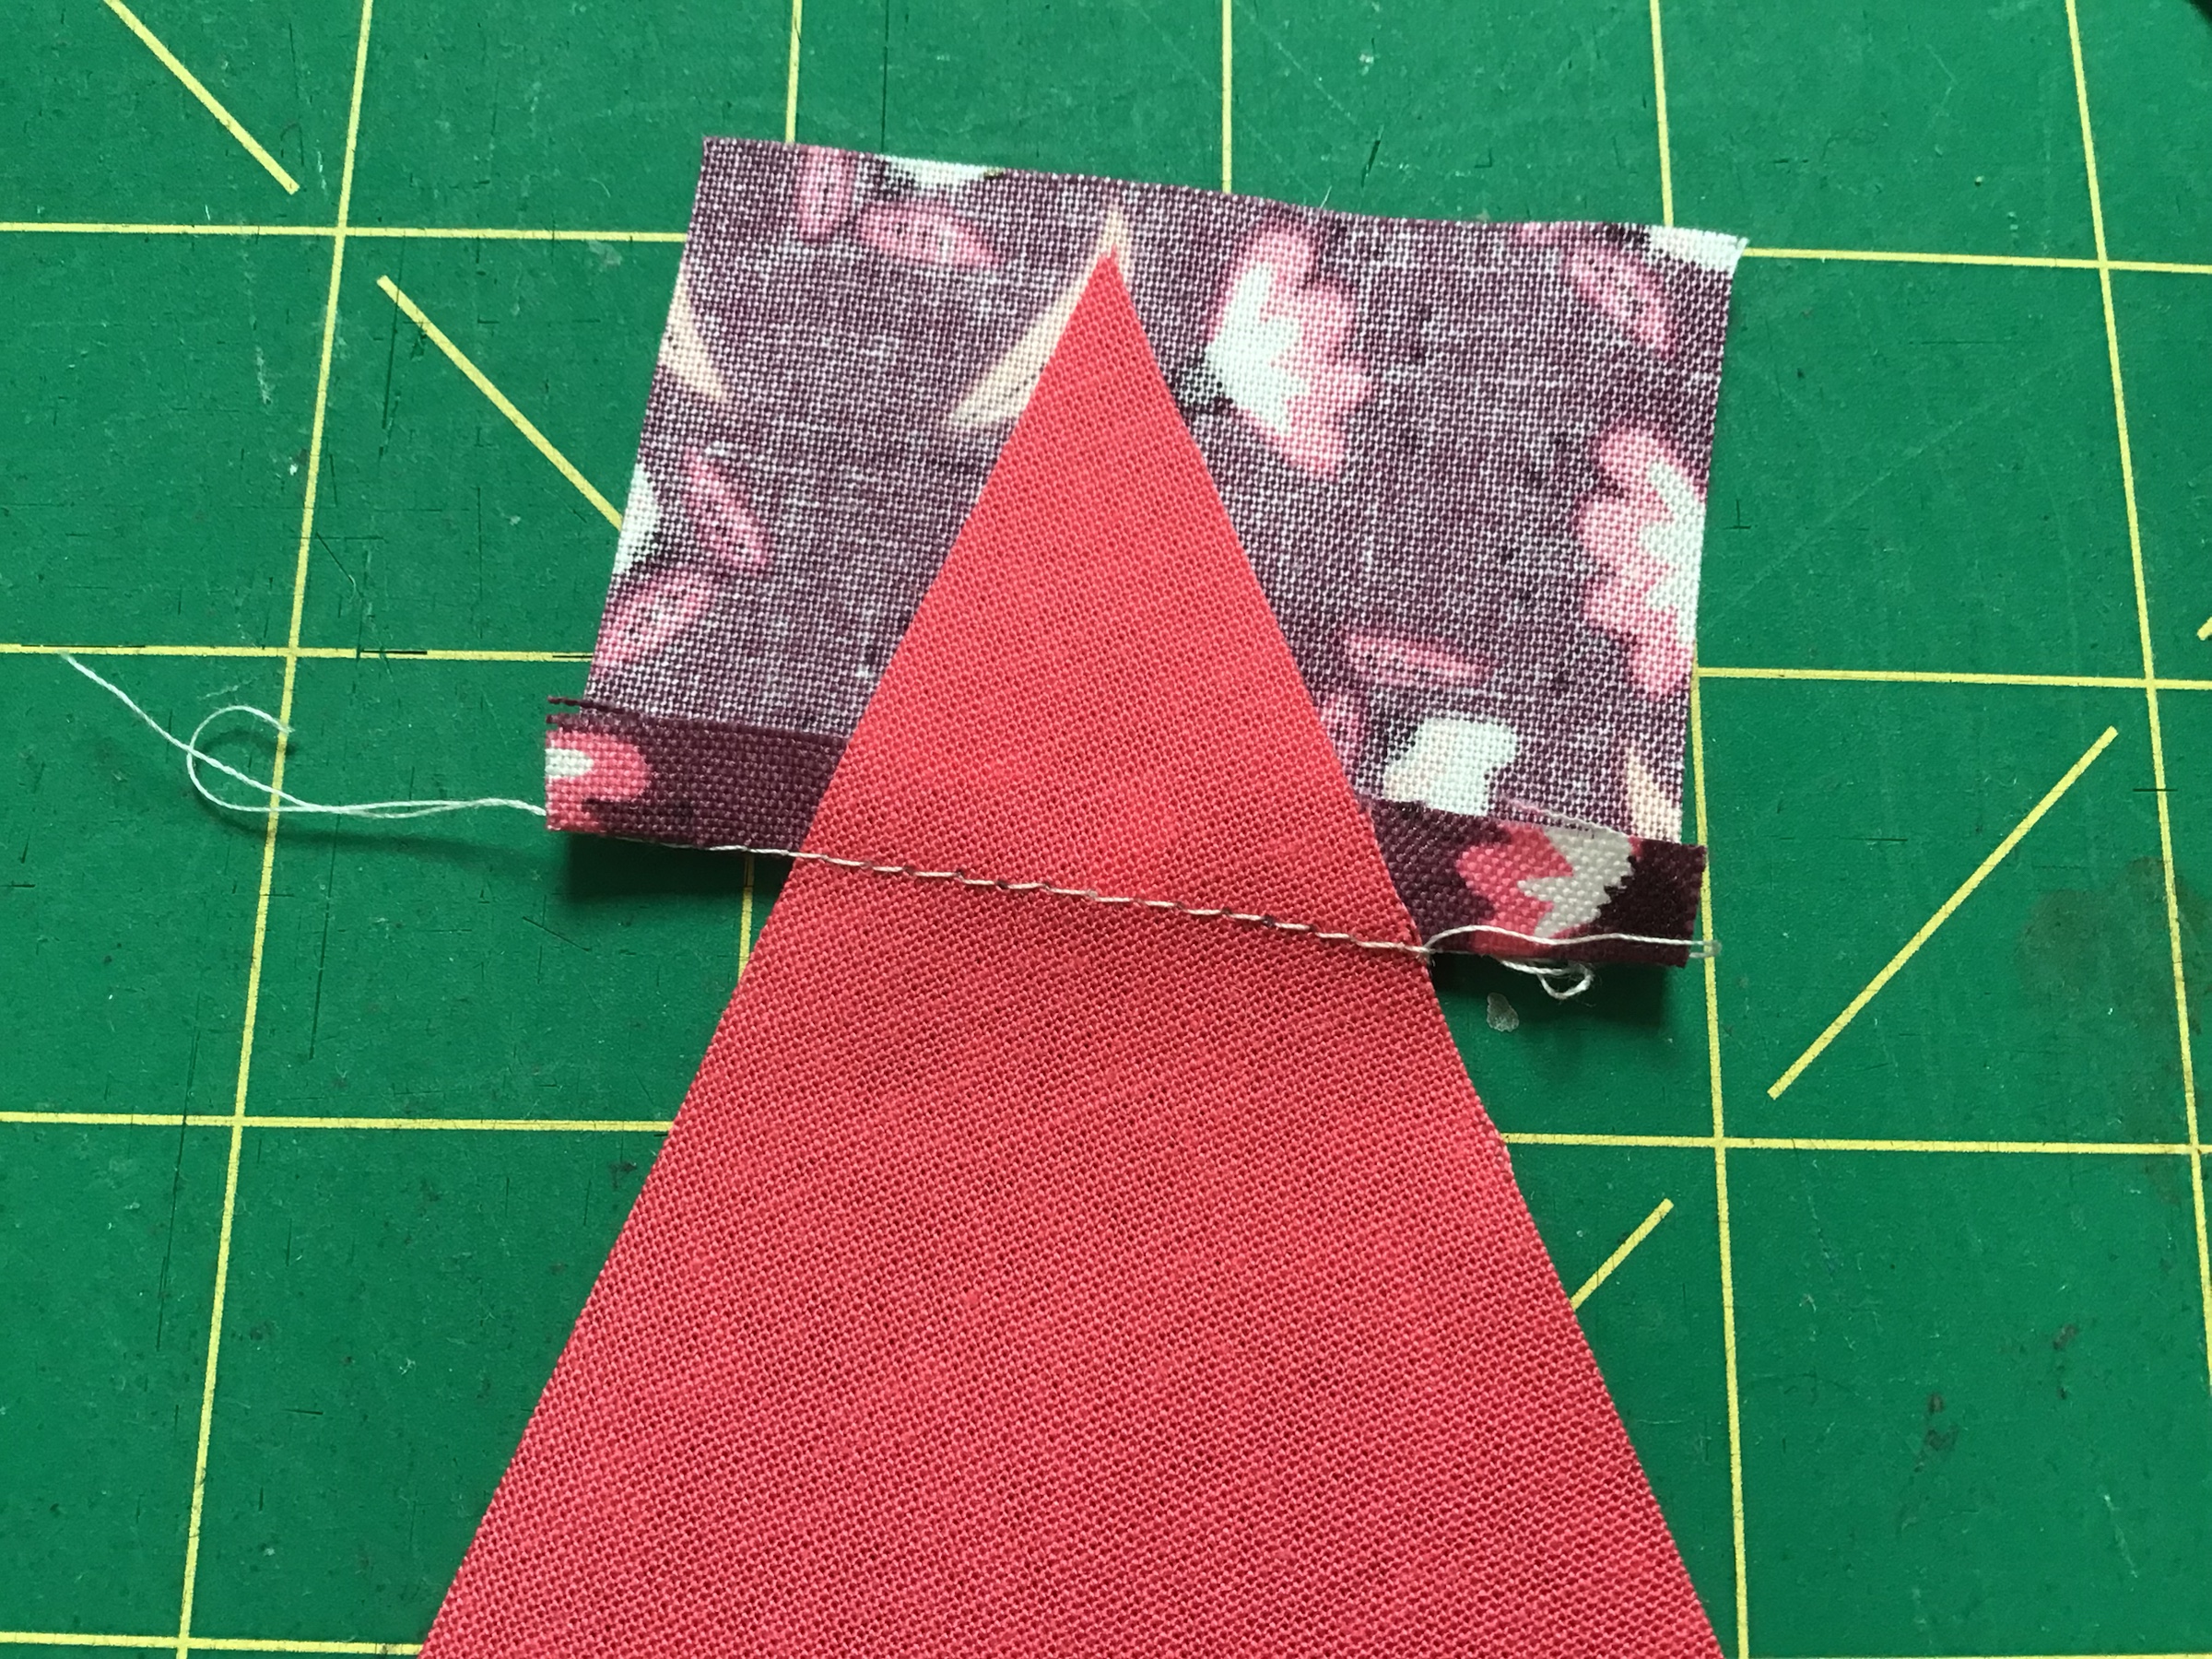
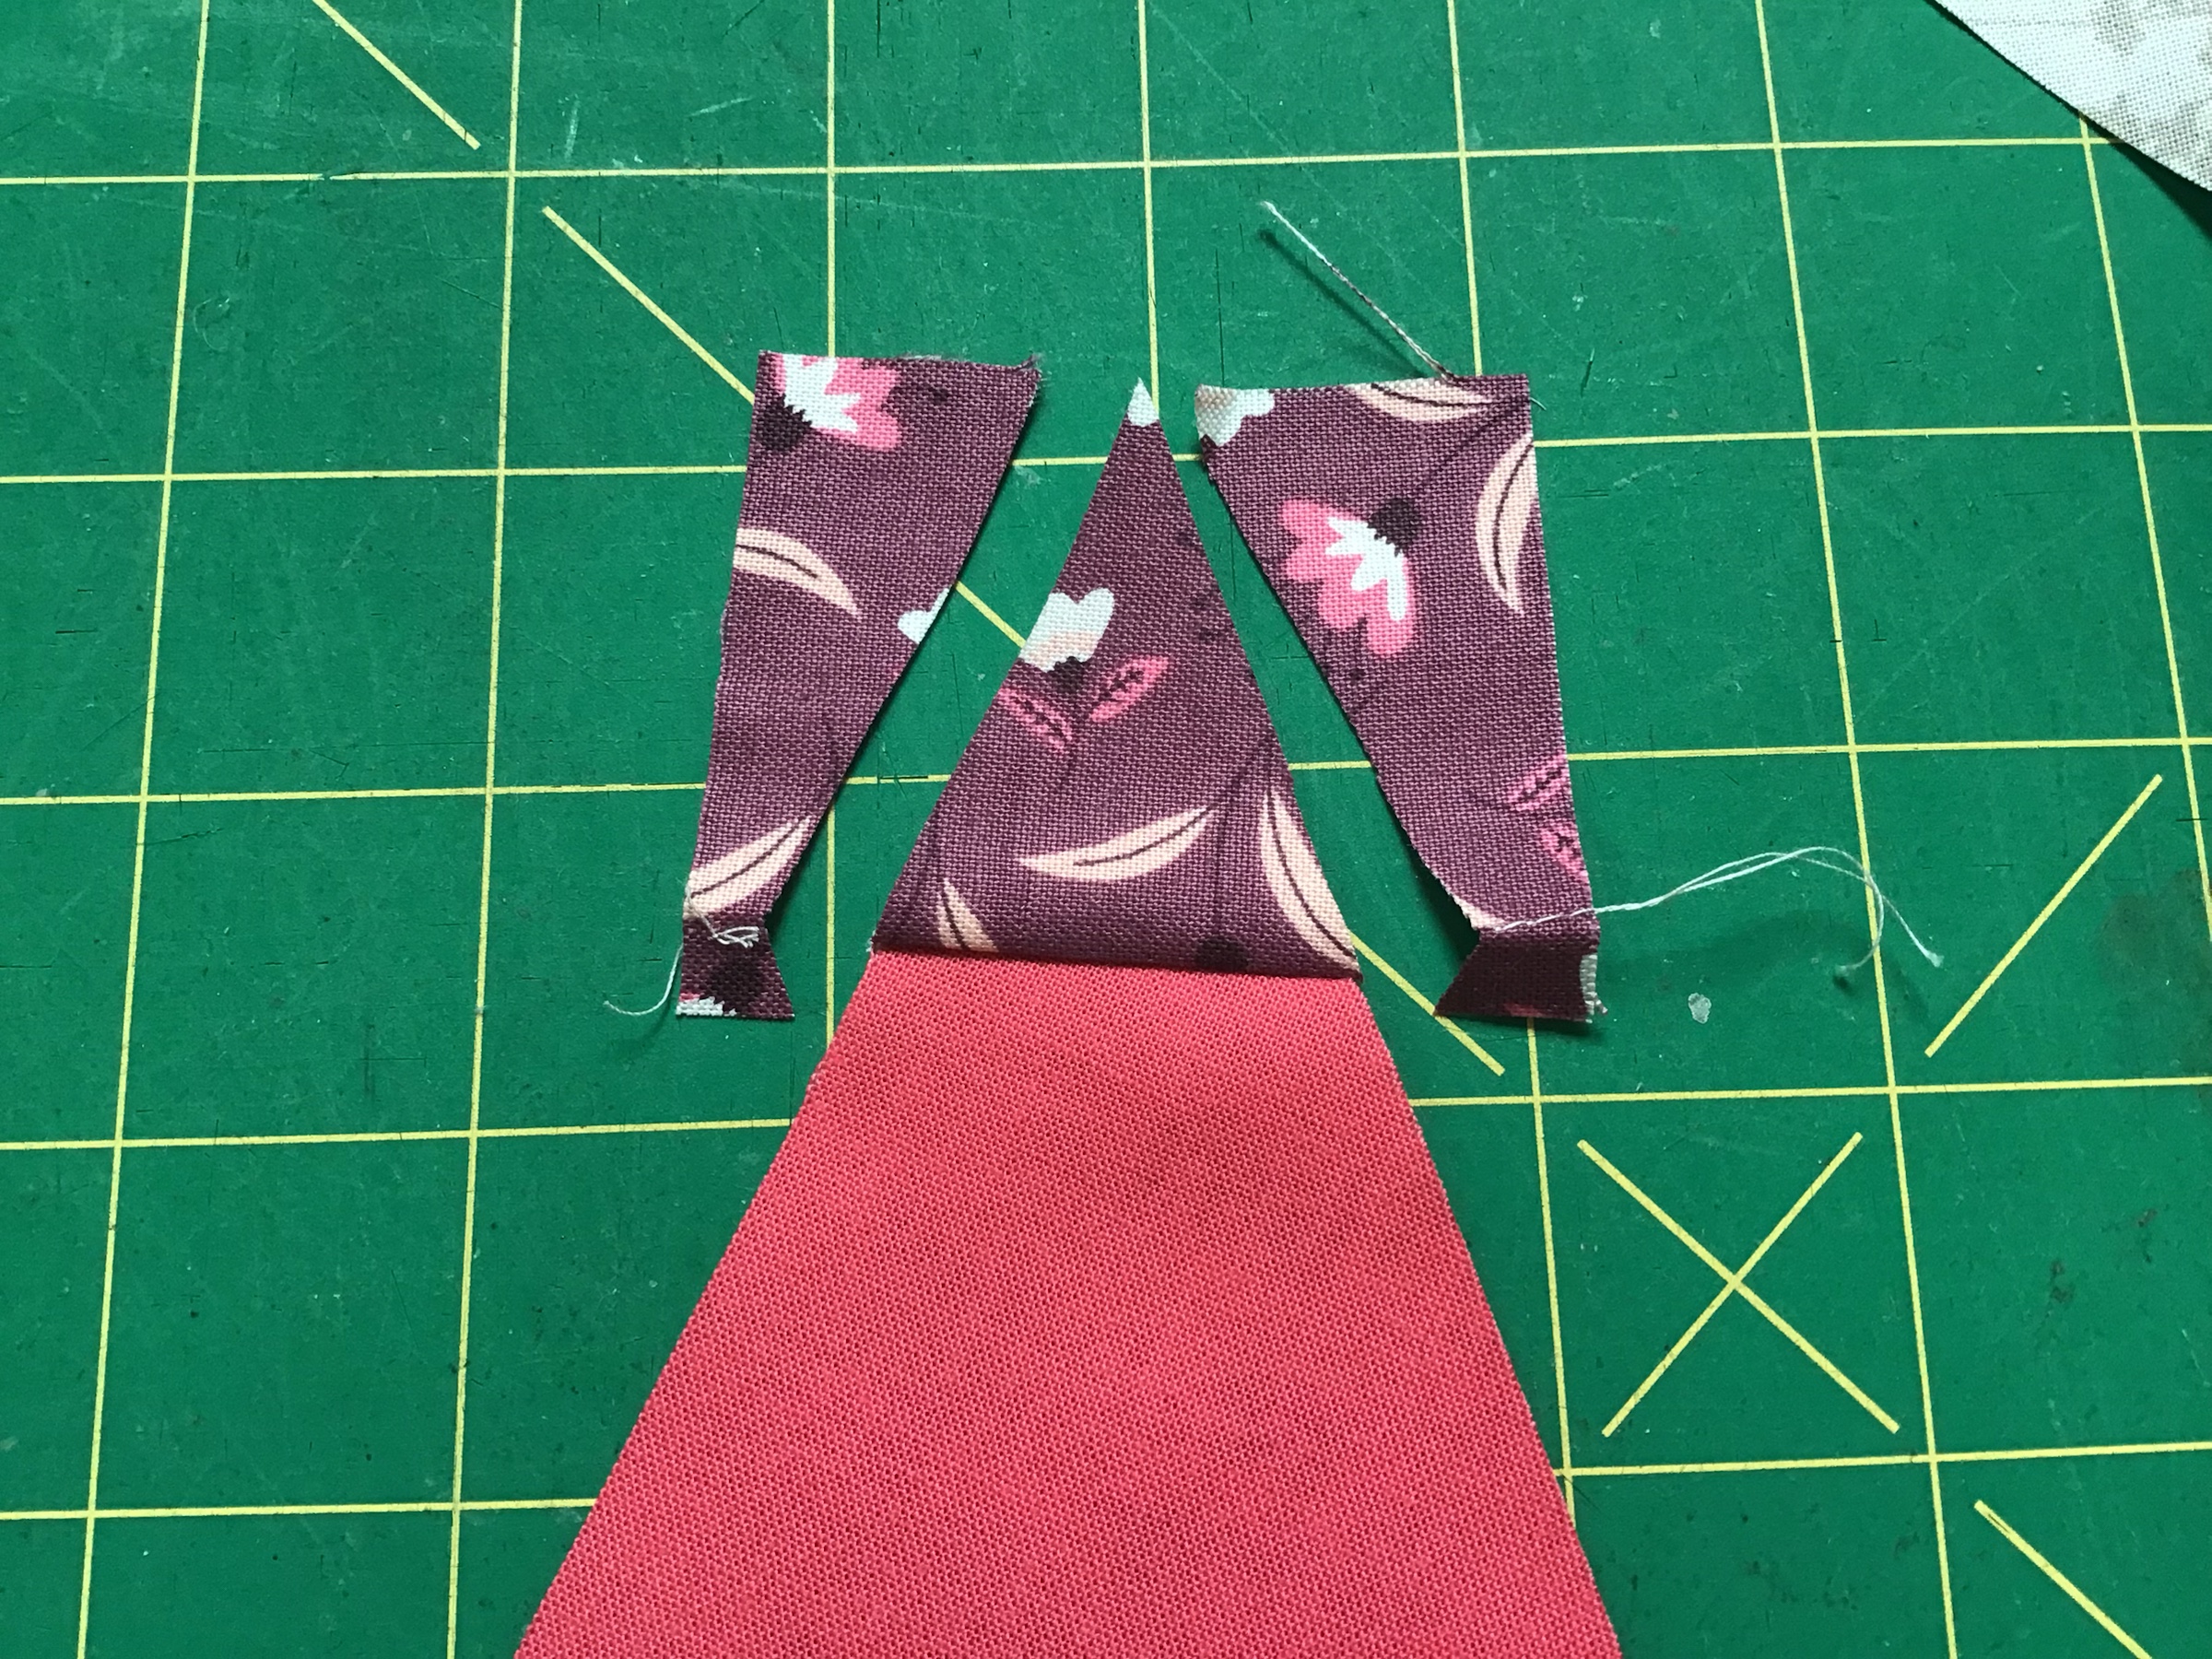
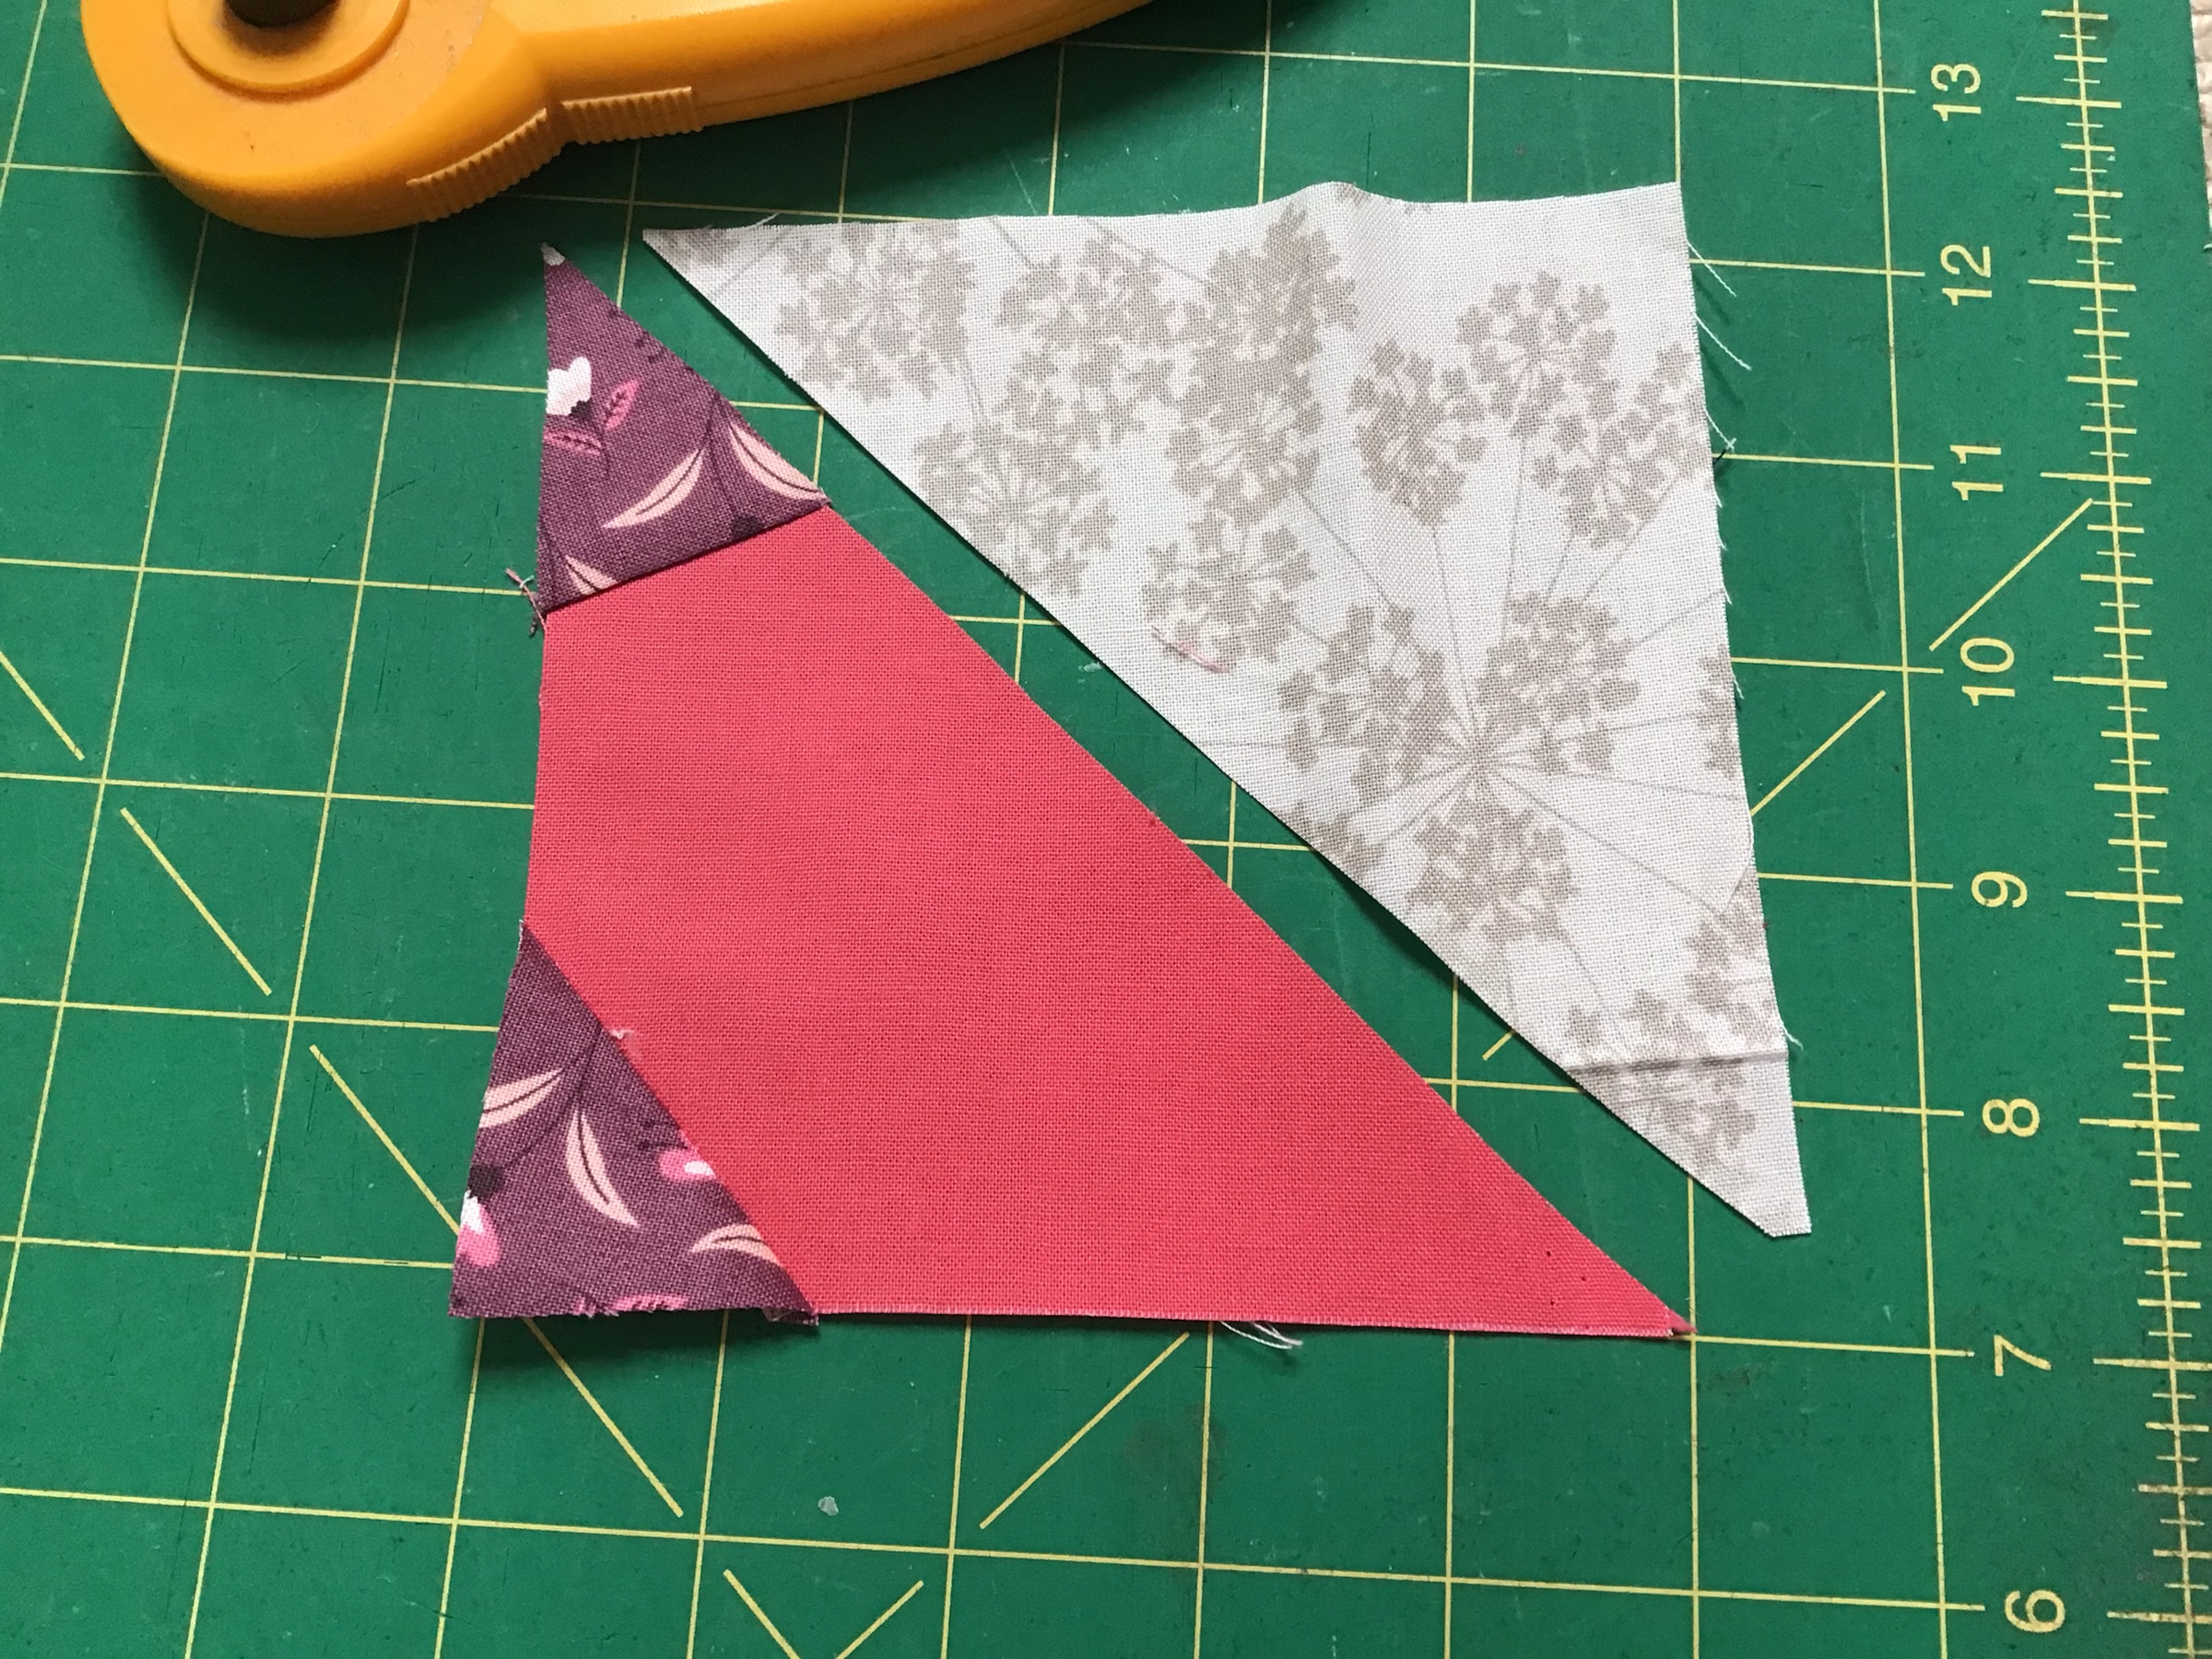
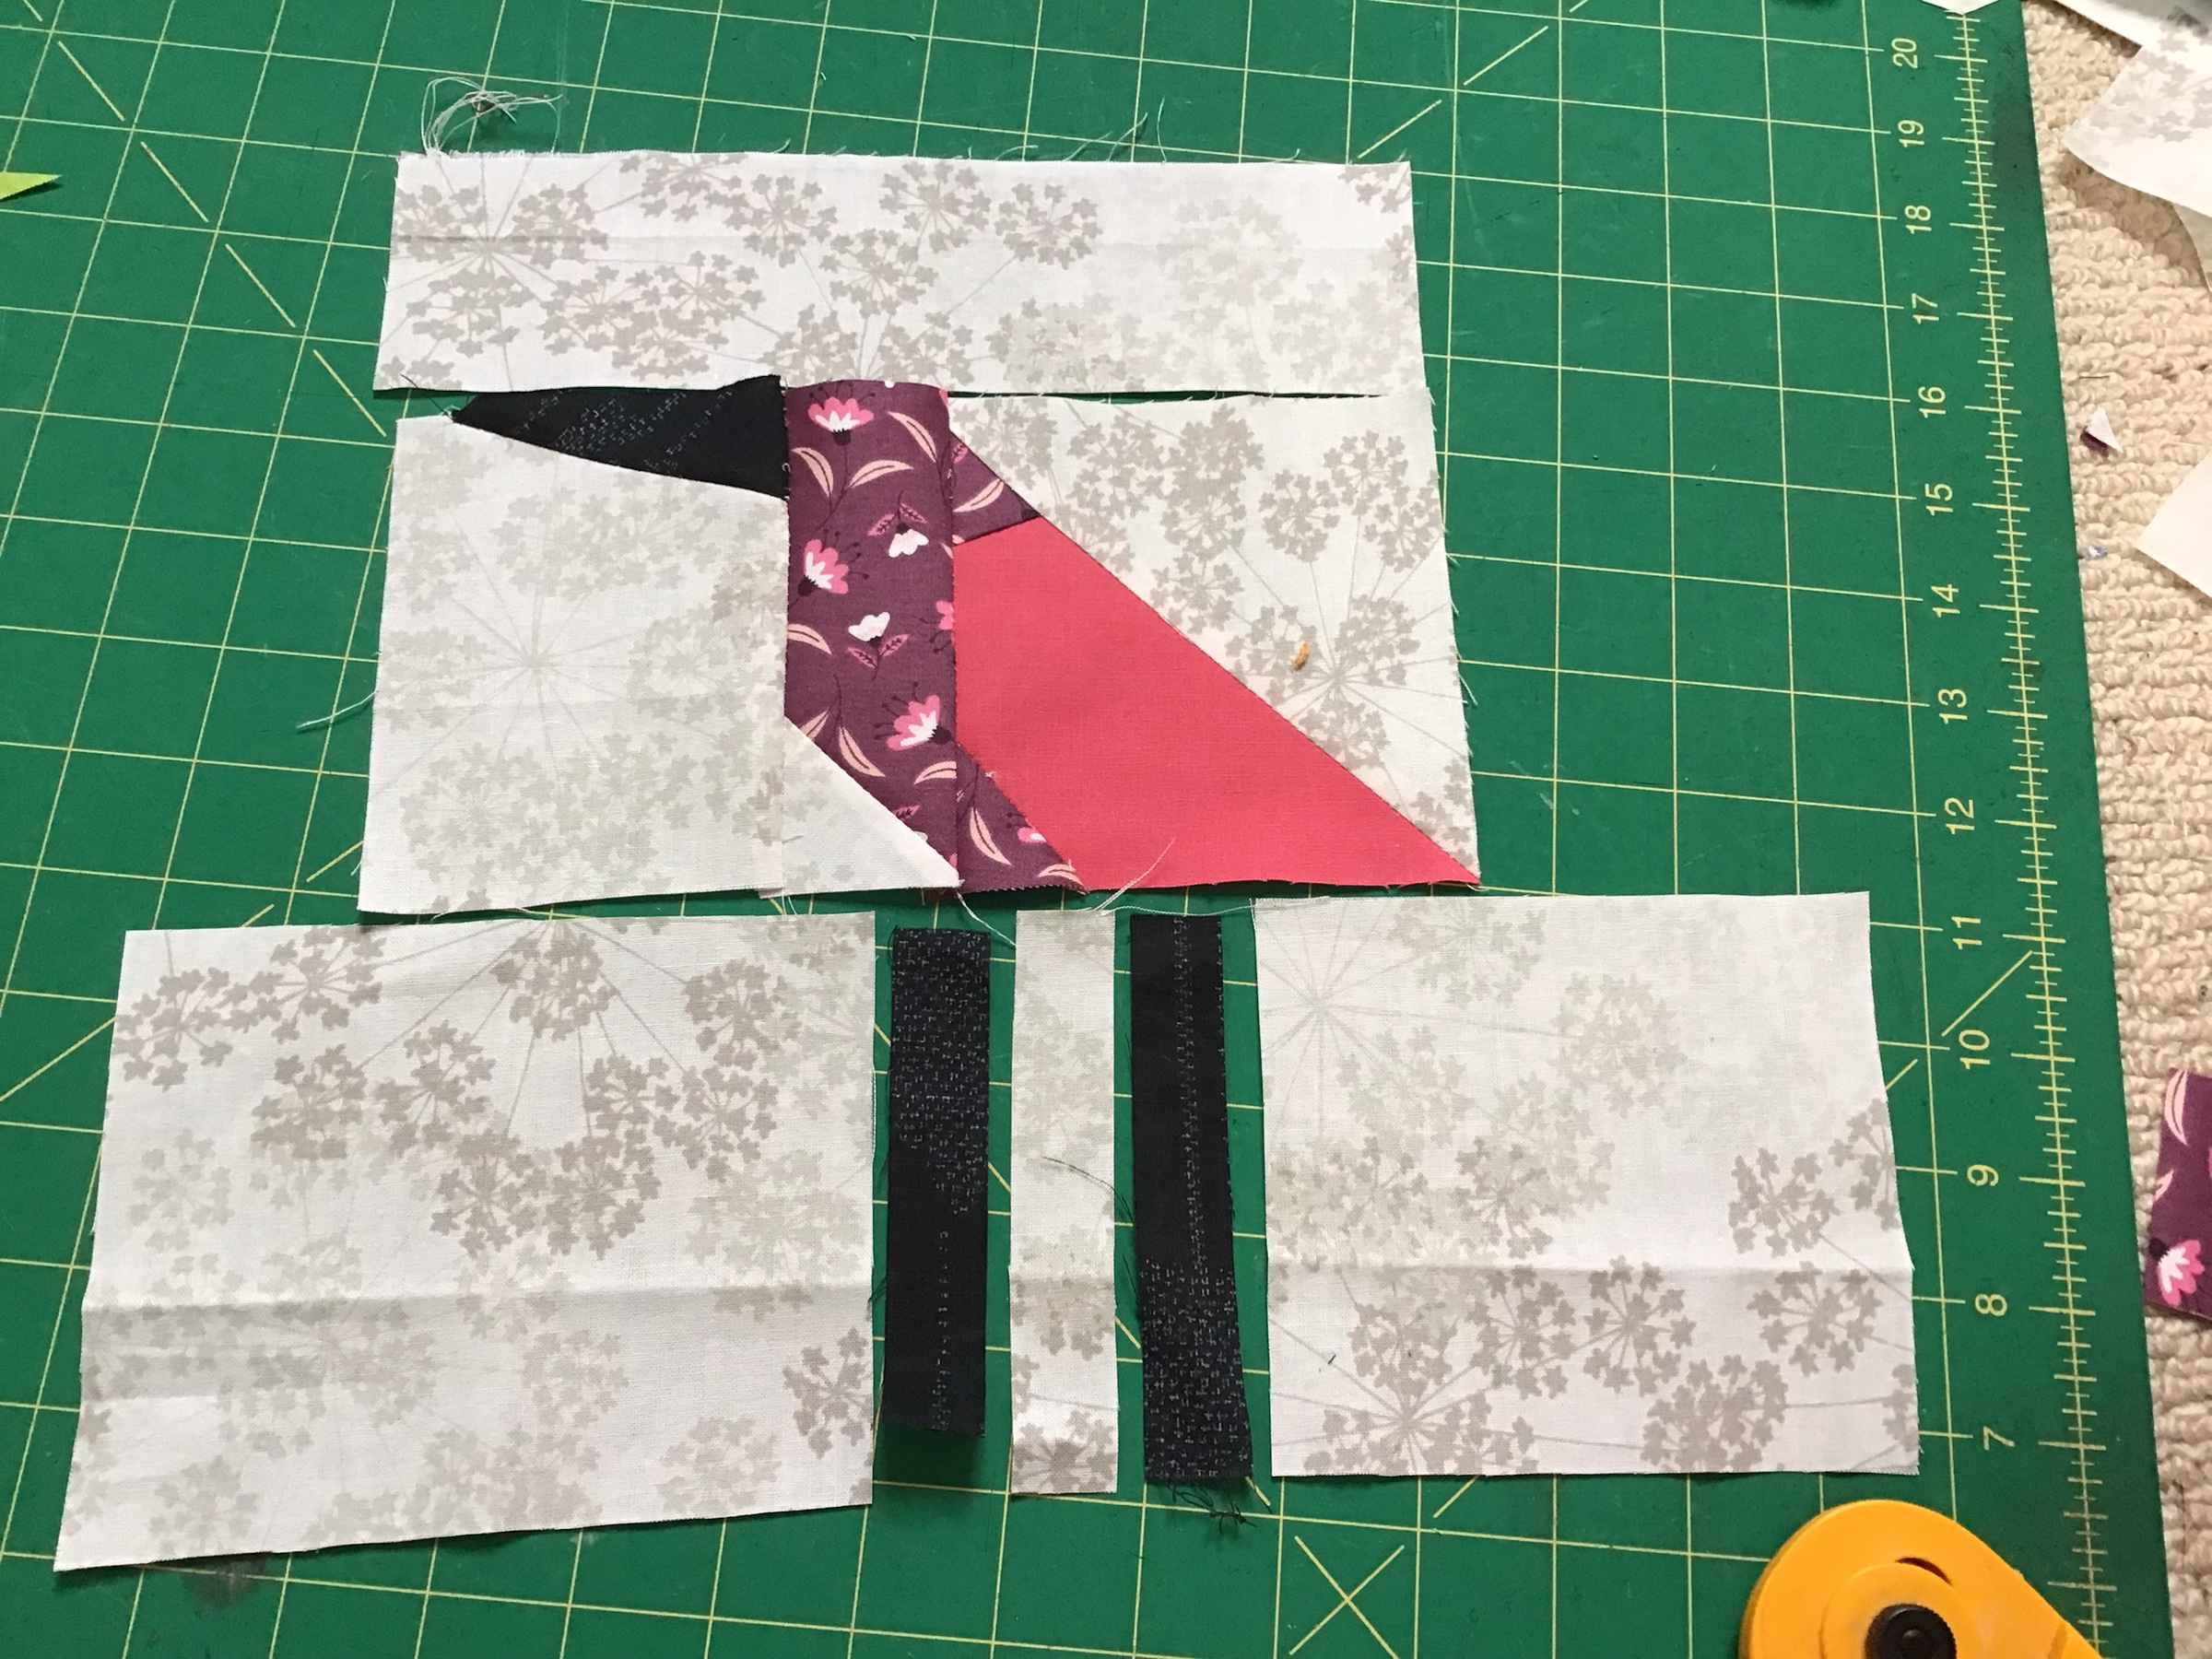
To do this you need to snowball scraps of the body fabric onto two corners of the wing triangle. If you are familiar with this method just skip the next few pics.

If you are new to this then the method for doing this is shown in the pictures below.

Using pretty much any size of body fabric just make sure that when you flip up the fabric it will cover the corner completely. Now sew it across

Flip up the triangle of the body fabric,

turn it over and ….

…. cut off the surplus body fabric using the existing corner as a template

Now trim off the excess fabric behind. Now be careful here, the number of times I have cut off the wrong corner….

Next step is to snowball the other triangle corner using the same method so it looks like this and again any size will do.

Now sew this modified wing triangle to the neutral background right hand triangle to make a square. Trim the square, mine came out at 4.5″, then cut out a body strip the length of the square and around 2″ or 3″ wide. This is the bird’s breast.

Using the snowball method add a corner of background fabric to the bottom of the body strip. Again this can be any size really.

Now prepare the beak section. Cut a strip of the background fabric the same length as the square and snowball the beak onto the top. This beak fabric strip can be any width.

Now sew all theses pieces together. Then cut and add a strip to the top the width of the pieced block. Then cut a piece the width of the block plus a couple of inches for the bottom of the block

With bottom piece make two cuts for the legs and insert the legs so they measure around 1/4″wide. You also need to ensure the legs, when pieced, will be under the body. Having that much extra length in the width of this fabric will give you that wriggle room.

Now sew together and voila!!

I hope the pictures have helped but if you have any queries please let me know.