Cloudburst


img_4848

My children would be the first to say my grasp of popular music is non existent so I was immediately out of my depth when I found out the Modern Group of the UK’s Quilters Guild was setting a challenge to produce a quilt based on a track (or two) of contemporary music. Now when I say contemporary I don’t mean in the hear and now but over the last 30 years or so. As an aside it amuses me no end that my teenagers are listening and  dancing to the same music I was nearly 40 years ago and much to their irritation I never hesitate to tell them so!! Anyway back to the challenge, it’s linked to music from Manchester which was the UK’s cotton city and is the theme of the display area the Modern Quilt Group have been given at next year’s Festival of Quilts.

I always enjoy these  challenges, subject matter aside, as they are for minis so very doable and you have a lot of  freedom regarding design, technique and  fabric. This year’s challenge quilts were on display at the South West Quilt Show in Bristol last weekend. The theme was black and white and one other (colour). My two quilts are blogged here and here.

img_4776

So my choices were to produce a 24″ square quilt interpreting either Oasis’ Cloudburst or the song Swoon by the Chemical Brothers.  You choose the band name or the song title.

Well for a start although I had heard of the band Oasis everything else was a completely closed book to me. But the song Cloudburst offered lots of creative opportunities so I decided to focus on raindrops. My original plan was to make improv curved raindrops and I made a couple but they didn’t lie very flat and they didn’t inspire me.

img_4631

The curves were very tight and they were quite tricky to construct.

IMG_4461.JPG

So still wanting to do raindrops I decided on using the ‘six minute circle technique’. This is a great technique for sewing pieced curves using freezer paper. There are some great tutorials on this if you google it. Mind you 6 minutes is a very optimistic time….. I used the technique for this quilt.

img_2776

And these blocks…

img_4734

Having multiple  layers made it a bit more tricky but I was inspired by Hillary at Entropy Always Wins one of the most innovative quilters out there who has been using multi layered shapes to great effect. In fact they  didn’t take long to make and insert them using the same technique into the background fabric.

img_4735img_4737

And then the quilting, oh the quilting, what a complete pain. I had doubled up the wadding so that the quilting would give it texture and to make the raindrops stand out almost like trupunto. I did tight spirals to reduce the volume of the background and give the impression of movement. But the constant thread breakages and skipped stitches….. I tried everything, changing from my favourite 70/80 top stitch needle to 90, then even down to 60. Needless to say that needle didn’t last long! I cleaned the bobbin area countless times, rethreaded over and over again, re wound bobbins etc etc. But we limped there….but my faithful friend is going in for a long overdue service…

img_4769

img_4853

In keeping with the stark design I decided to face the quilt and not bind it. This was a first for me or perhaps I should say it would have been a first because I completely forgot when I cut the quilt to size that I would need it to be larger than the finished size to allow for the seam. Having been very gently chided, quite correctly, for the fact that one of the quilts I’d submitted was over an inch too small against the required size  I was paranoid about getting it right…. so cut precisely to 24″ and then when I came to do the facing I realised that it wouldn’t work. But there’s always next time. But to give the effect of facing I used the same fabric as the background as a binding.

But one first for me I did succeed with doing was blocking this quilt. The too small quilt irritated me because it didn’t lie flat.  I wouldn’t bother blocking a bed quilt as the odd wavy edge isn’t so noticeable but with a wall hanging if it doesn’t hang true then wavy edges are very noticeable and as this raindrops quilt would/could  be shown at the UK’s premiere quilt show I’m really trying hard to live up to that standard. So after doing a quick colour fast check with the background material which is a woven cotton but unbranded fabric I  bravely put the quilt in the bath…..

img_4820

…and then pinned it out. Did it work, I’m glad you asked, yes it did.  I am very pleasantly pleased with how flat it is although I’ve noticed since the binding has gone on it is a bit more out of shape. Something else to think about finessing but this one is done and will be off shortly. Someone told me you should bind with 4 exactly sized strips rather than one continuous strip.  Perhaps.

img_4846

This is one of my QAL finishes albeit I was going to do another design at that stage  I’m not sure that counts then.  This is the original  Q4 QAL  post.

Linking up with

Kelly at My Infatuation, Debbie at QuiltJournal , Sarah at Confessions of a Fabric Addict and Myra at Busy Hand Quilts Amanda Jean at Crazy Mom Quilts


The exploitation of orphans

img_4802
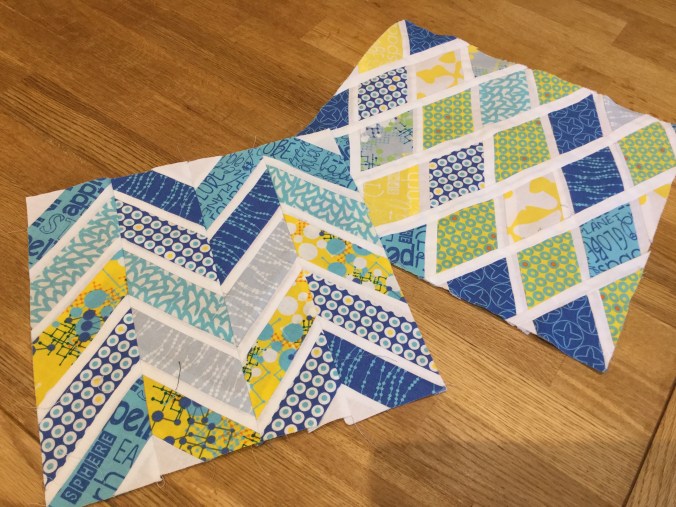
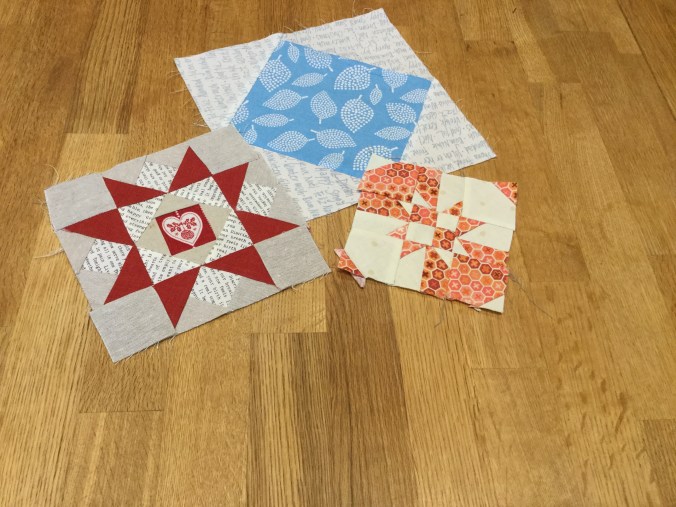
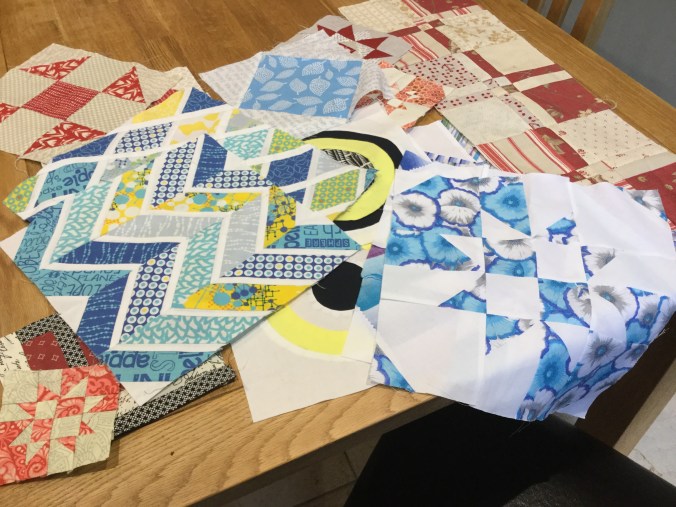
Before you think of Dickensian villains exploiting vulnerable children in the 1800s I am of course referring to the orphan blocks that I guess every quilter has tucked away in some corner. These are blocks that for a whole variety of reasons have been abandoned and left behind by luckier blocks that ended up in the quilt or whatever was being made at the time. Or perhaps they were  blocks that were never part of a family and were practice pieces  but are now all alone with no purpose other than taking up valuable space.

When I did my recent sort through my drawers of  shame I was surprised by quite how many I’d got and what a varied collection they were.  So I thought it was timely to review what you can do with orphan blocks to give them some purpose and useful function as well as hopefully being decorative in the process and then link this up to Yvonne’s and Stephanie’s (The Late Night Quilter) tips and tutorials on the Quilting Jet Girl’s  blog. I’ve found the posts in this series and in the past so useful and they have improved my quilting experience no end so I thought if you take out you should put back in!  In fact my main tip is to periodically to go through any leftover projects, large or small. I was really very pleasantly surprised when I went through my drawers of shame to find amongst some decidedly ugly ones some real gems that really do deserve being used or projects that were once put away and forgotten in the excitement of a new project but in fact are lovely and really deserve to be put back on the list. But let me introduce you to my orphan blocks and quite how I ended up with so many. Maybe these will ring a bell with you.

There are blocks that you have made to see whether you enjoyed making them and whether the pattern looked as good as you hoped. Here are some blocks from a tutorial from the Missouri Quilting Company by the wonderful Jenny Doan. It is a lovely block and it does make a great quilt but too late I realised that they were quite time consuming, lots of seams to match which I never find enjoyable and the colours were just too white for our house. So I made a few for the project before it got abandoned.

img_4808

There are trial or test blocks where you don’t ever intend to make a full quilt but just want to play. There are quite a few like this in my collection. The bright yellow ones are the Kona colour of the year Highlight and were for an IG challenge which I never got to participate in because I forgot to tag it the way you should do!

img_4804

There are mistake blocks. The picture below shows a tear in the block when I used a seam ripper to remove the papers from the back of this log cabin. Not a tip I would offer up!!! And the blue block at the back made too small for a charity bee.

There are other blocks that never quite made the grade when it came to assembling the final quilt. Maybe like the red and cream ones below that were just not going to be pointy enough!

img_4805

So what to do. Well here is an open ended list and by that I mean add your own ideas!!

1. Make a pouch. Most blocks are a size which would make a perfect pouch and if you have got a couple spare like the red and cream ones above then it’s a quick job to make up a pouch. It saves having to cut awkward sized pieces out of a fat quarter or half meter which I always hate doing and the finished product looks I think very effective.

img_4816

2. Make a needle case like the wonderful stitchy pies, which is a very creative and useful needle case by the talented Lucy Brennan. One for me and one for a quilty friend.

img_3519

3. Mug rugs/ quilted mats/pot holders  are perfect for leftover orphan blocks. I used my accidentally torn block to make a rug mug and it’s in daily use. I also used it to test out spiral quilting for this block and then discovered that I  didn’t like it for the finished quilt so it was doubly useful.

img_4817

4. Quilt backs. The obvious solution to  excess blocks. And there are some beautiful quilt backs out there that use the extras to make a creative pieced backing. On my first drunkards path quilt there were a great number of poorly pieced curved blocks which had no chance of matching up so they got used on the back and really adds to the final finish.

img_1233

6. Cushion covers. Cushion covers would be perfect to use for these blocks and I have thought of doing that but it would have been for one of my son’s rooms and I know exactly where that cushion would end up just adding to the already overly cluttered floor. But this lovely little star block in the bottom picture is one that I pattern tested for Esther could easily become a Christmas cushion.

img_4812

img_4813

8. Use to brighten up something boring! I use these cheap canvas tote bags for all my wips. It was just fun to quickly add something to make it more interesting.

img_4811

9. Charity blocks. I know our local Project Linus Cordinator happily receives any orphan blocks to make up quilts for this excellent cause. Alison at Little Island quilting does the same and she has made dozens of beautiful quilts for orphanages and children’s homes across the world.

10. Bin them! Or in my case put them into pillows for dogs at our local dogs home. This will only to apply to the most ugly or truly failed blocks like these…. actually the photo has been kind to them, they are really ugly….

img_4806

There are countless ways of using these leftover blocks please do tell what what you’ve done with yours.

Under the influence.

img_4721

I had absolutely no intention of doing any Christmas sewing this year despite having bought some lovely Christmas themed Scandi fabric to make placemats at least 2 1/2 years ago. But I hadn’t reckoned on coming under the influence of a group of virtual Instagram friends who suggested a Christmas cushion sew along. I have never felt the urge to have a Christmas cushion nor thought that my Christmases have been  compromised by not having a themed cushion to lean against, but caught up in the excitement I found myself signing up for the sew along and that long stashed fabric being brought out of its slumber. I quickly made up a curved pieced top from the Scandi fabric which you can see below……

img_4602

….but with my butterfly approach rather than finish that one I couldn’t resist making a couple more which jumped the queue for finishing…  I changed tack and instead of piecing I once again using Lara Buccella’s appliqué technique from her book  Crafted Appliqué book to make that classic, cliched perhaps, Christmas robin. Lara’s technique is  easy and effective and is now my go to method for appliqué. No more lightweight fusible fabric for me thank heavens. My iron is very grateful…

So an evening’s  work produced these legless robins.  In fact as you can see from the picture below there are in fact two robins. Having cut out the necessary template pieces to do the first more traditional robin it was really easy to use modern fabrics to come up with a more contemporary version.My Dad asked whether being legless was them getting into the Christmas spirit? And maybe these robins were  under the influence as well!!


Well with a bit of free motion quilting which was quick and simple these tops were finished and with the piping and zips obtained we were away.

img_4713

It took a fair bit longer to do the backing, the zip and the piping than I anticipated. I used as an excellent tutorial on the Village Haberdashery website.  I was extra careful as I was doing it for the first time and wanted it to look reasonably professional as this cushion is going to be gifted. Or is it? It looks so good on our sofa I think it’s going to be hard to part with. I may have to make a third robin cushion top!

img_4723


Linking to

Kelly at My Quilt Infatuation

Amanda Jean at Crazy Mom Quilts

Myra at Finished or Not Friday 


Beautiful browns – really?

img_4659

If you peeked into the fabric stash of a typical modern quilter I strongly suspect the colour least represented would be brown. If there is a colour that tends to divide quilters into modern or traditional it is these earthy colours like browns, olives, tans and so on.   They are typically associated with more traditional quilts. They are certainly not colours that get me excited at all. I remember on my ‘Get to know your sewing machine’  course when I purchased my Pfaff 4.2 we were given a practice piece of fabric to sew on. I was disappointed to find I’d been given a particularly  drab piece of brown fabric. It was only a practice piece  what did it matter? But there’s something about sewing on what you think  is ugly. And there lies the rub, as I was looking at my unwanted  brown fabric the lady next to me leaned across and said would I mind swapping as she loved that colour. With great relief, obviously well disguised,  I handed it over!  It was a valuable lesson in what is someone’s idea of ugly is someone else’s idea of beautiful.

Having declared my lack of appreciation for all things brown I have played with brown in quilts. Last year there was a competition run by Adrienne of On the Windy Side  featuring quilts using the Pantone colour of the year which was marsala, a sort of warm reddish brown. It caused a bit of a flutter as a lot of modern quilters didn’t want to join in because of the colour, or lack of. But I liked the idea of the challenge and entered this one. I used the curved wonky cross from a stunning quilt by Heather Hasthorpe.  It has rather grown on me.

img_1149

And then I’ve used  some browns in my glitter blocks just to introduce some deeper colours and a bit of depth. But they are either whimsical ( I love the bears!) or a rather nice rich brown.

img_4458img_3899

But I needed more browns for a project and found myself in my local quilt shop on a brown fabric hunt.  The purpose? A Christmas themed cushion to feature a robin. I really wanted a brown batik, their multi toned nature make them perfect for animal/bird appliqué but no luck.  But I came away with the fabrics at the top. There’s an interesting print from Tim Holtz’s range Eclectic Elements, a brown grunge, a nameless batik and another nameless grey brown strip.  Not the most exciting of purchases but I guess it’s how you use them…. and this is what happened….  And suddenly the browns above seem right if not beautiful !


img_4664img_4663

I used my favourite raw edge appliqué technique set out in Lara Buccella’s book Crafted Appliqué New Possibilities. I can’t recommend  this technique over using fusible enough. It’s so much neater and best of all you can reposition the pieces so you can easily move them around even after they’ve been stuck down. Put it on your Christmas present list!!

Having drawn and cut out plastic templates for the robin I couldn’t decide whether to go down the trad route or make a more modern version. As I’d prepped and chosen a range of fabrics from my scraps as well as the purchases above it was no trouble to do two. A quick poll poll amongst the family has them split but I love the more modern version but love the depth of the batik fabric – I think in these type of art quilts they do bring a realism rather than prints or solids. I did try a solid red for the red breast initially  but it was not as good as the print.

What next? Well they will get quilted (and get some legs!) so the appliqué pieces get stitched down and then at least one will become a cushion – this is my one monthly goal for Heidi at Red Letter Quilts. And also linking to Molli Sparkles 200th Sunday Stash here.

My hybrid….

img_4654

No not a very flattering name for this rather sweet mini quilt! But it is a hybrid  in the sense that its design is a blend of all sorts of aspects of other quilts out there put into one 12″ square. I wish I were an original thinker but I’m not. What I am good at is finding beautiful quilts and clever ideas and mashing them together hopefully to produce something equally beautiful. Thanks to the power and accessibility of the internet, not to mention the generosity of this community, finding wonderfully creative quilts, which I guess have been influenced by other quilts, makes that part easy. My habit is to save the picture on my pictures folder on my ipad and then every so often flick through them when I need an idea. And an idea was needed for this quilt as it’s a challenge quilt for the Modern Section of the Quilters Guild.

The modern quilt movemement has its heart in the US where quilting is big, the size of the population alone helps. The definitions of modern quilting are many and numerous but for me they are fresher, often brighter and more graphic than their traditional quilts. The UK Quilters Guild took a little while to warm up to the rapid growth of modern quilting but owing to the work of Helen Howes and Heather Hasthorpe, both very accomplished quilters in a whole range of quilting techniques, a Modern Section has been set up and has grown very fast.  Every year the Modern Section put out a challenge to its 200 or so members and a small mini can be entered which is then shown round various quilt shows across the U.K.

The first year the theme was equilateral triangles. What I love about theses challenges  is that aside from the quilt following the theme and a set size, you are completely free to do your own take. Here is one of my two entries for that challenge it’s from the beautiful Painted Leaf design by  Sarah Elizabeth of Not Hats in the House. And it is square – it’s just a rubbish picture!!

image

This will coming home to me soon after a year away (and I can try and take a better photo for a start) and these two are this year’s challenge quilts with the theme Black and White and One Other (colour) and are off on their travels.


img_4065image

This year’s theme is a bit different  only 12″ square but it must incorporate the challenge fabrics which are these….

img_4537


An interesting choice really as the two batiks are fabrics typically found in traditional quilts. But I guess that’s the challenge …..  any way what to do. Having done a mustard and black themed quilt already I wanted to do something different and had been itching to play with some fabrics from Maureen Cracknell’s range Fleet and Flourish I’d bought earlier this year. I thought they went rather well with these fabrics. And yes they do rather hide them…but as the challenge is to use the supplied fabrics not necessarily feature them I guessed that was OK. And every bit did get used….

img_4370

Then to the design. Being so small I thought it would be fun to work on a small scale. I’d admired this beautiful quilt from the recent Bloggers Festival by Pasqualina of Pasqualina This and That.  It should have won but didn’t. My favourites never do! And then  from the blog hop of this fabric range this stunning quilt here where the lovely log cabin cheater fabric was used for the centre of squares by Amy Friend of During Quiet Time who is always very inspirational and very original…sigh  There have been other log cabin quilts I’ve seen that take this very old design to new places. Anyway I set to and drafted a log cabin design for some paper piecing. Because I wanted it set on point I needed 12 blocks. Time consuming but very satisfying.

img_4591

And those challenge fabrics? They got this treatment but I agree in the finished quilt it is a question of spot the fabric.

img_4538

Disaster struck when I started to take the papers off….. lesson learnt don’t use a seam ripper… But as it was first test block I made and not particularly accurately maybe it was good to remake and improve on the accuracy.

img_4638


Anyway all done and with some simple straight line quilting – there are over 250 seams in this small mini quilt, it has texture enough believe me!!!  I tried a matched colour binding for the first time so it wasn’t too framed. I’m pleased with the effect of that. And the deadline for this challenge quilt? Oh next August/September. Are there more pressing quilts to do? Yes of course but I like to do what takes my fancy.  It’s about the only area of my life where I can do that and get away with it!


img_4657

Another look at this quilt. Still not sure which way up is right!!

This is another quilt off my Q4 FAL list and my original post about that is here.

Linking up with Kelly at My Quilt Infatuation for Needlework and Thread Thursday and Amanda Jean at Crazy Mom Quilts 


Waste not want not

I’d like to say I’m a model of careful management of the excess in our life whether it’s  week old vegetables or the recycling or repurposing of items at home that have seen better days but of course I can’t. Whilst I’m not truly dire there  is a lot of room for improvement particularly in the amount of food wasted which ends up in the wormeries or our compost heaps. But on the plus side we have so much recycling our council have given us an extra massive recycling bin – I’m the envy of my friends!! But when it comes to fabric I like to think I’m on the good side of waste not want not. And this quilt is proof….

img_4575

The quilt (if you discount the backing) is made I reckon with virtually 85 -90% of  scraps left over from quilts I had made previously from yardage. Even the batting is pieced from a number  of left over pieces of batting all of  roughly  the same loft. And of course there’s a scrappy binding from numerous blue strips.

img_4570

When it comes to scraps I keep them in glass jars which are more or less sorted by colour. The rope bowls gather the scraps which are then every so often sorted into the jars. The scraps in these bowls all went into those jars – they are surprisingly spacious if you squash the fabric down.

img_4521

When these jars get over stuffed I get quite edgy and determined to find a way to utilise their contents. This scrappy block was one recent attempt to conquer awkward sized pieces and worked very well.

For this drunkards path quilt the start place was the my over stuffed white/cream jars. I like scrap quilts to be controlled with plenty of negative space to rest the eye. But by definition these white/neutral fabrics were  varied but crucially they read as a neutral background. So I randomly pieced two then three pieces together  and then kept adding to get a piece large enough to cut a drunkards path block. It took a surprising amount of scraps to make sufficient.

img_4249img_4250

Whilst time consuming I loved the scrappy finish of these blocks. Certainly worth the effort and 2 very stuffed jars were emptied. Using my accuquilt was a huge bonus.

img_4261img_3185

Now  for the drunkard path ‘pie’ filling. Again I wanted it to be from scraps but wanted the colours to be controlled and not completely random. I had a fair bit of blue and pink larger sized scraps from which with careful cutting I could get 3 – 4 pie shaped pieces. But there were still not enough.

img_1018


img_4476

One of the reasons for being so particular about using scraps was this was for a scrap challenge run  by Kim of Persimmon Dreams. The rules were quite specific, minimum 80% from scraps defined as pieces less than a fat quarter. So as I wanted to stick to the rules I had to wait to use some of my stash so I’d be left with pieces of the right size. I even put in some old denim and a shirt destined for the charity bin. But the deadline of  3 November was looming but I’ve made it!

The design came about playing with ideas but I wanted to break away from the traditional drunkard path circle. I wanted bright and modern but when it came to quilting I decided the busy design favoured simpler quilting. As a general rule if the design’s curvy I go for straight lines and vice versa. But this time I wanted an all over crinkly effect so went with a curvy stitch. As it’s destined for a child through the Siblings Together charity I wanted it to be nice and soft.

img_4564img_4565


img_4477

I’m being very brave here showing my reverse side. It always looks a complete dog’s breakfast because I’m never consistent with ironing seams  but of course normally it’s mercifully completely hidden from view. But the picture better  shows the multiple pieces of the neutral background. The very sharped eyed may notice that this top is smaller than the finished quilt,  it just might be because Skye looked so sweet asleep I couldn’t quite bring myself to move her as I sewed the top together.

img_4474

This is my second Q4 FAL finish against my original target list here   It was also my also  one monthly goal for Heidi over at Ted Letter Quilts.

linking up with Nicky and Leanne at Scraptastic Tuesday and Amanda Jean at  Crazy Mom Quilts 

A much needed cover up

img_4530

No I’m not referring to the current political drama being played out in the US.  It’s compulsive viewing here in the UK, I can imagine it is mandatory viewing in the US.  No it’s a much more mundane cover up, that of my sewing machine. Yes not of world importance but as my 2 year old Pfaff got ever more grimy and dusty something had to be done.

I was much inspired by this sewing machine cover by Nicky of Mrs Sew and Sow. I liked the witty use of a vintage machine on the outside. Nicky used a screen print now no longer available. I am very capable of copying someone completely and utterly!! But foiled by this I came across this print. I’ve kept the details in in case you want to order a copy!

img_3226

My plan was to sew some small squares together from a charm pack of Wordsmith by Janet Clare.  Fuse it onto some interfacing and cut out a vintage sewing machine shape and then sew the raw edges onto some Essex Dyed Linen Flax, my go to fabric for a neutral background.

img_4363

But a couple of things changed my mind firstly an IG picture of Wordsmith hexies on a dark blue background by Karen, IG @kass_roberts. It looked very effective so that immediately meant my background changed and I chose the nautical colourway of this fabulous range. And then the purchase of Crafted Applique by Lara Buccella.

img_4531

I’d followed Lara’s book blog hop and seen some great detailed  appliqué using her technique and lots of positive comments. Now of course you need to get the book to find out the process, all I can say it beats using lightweight fusible hands down. The cut edges are crisper and no fraying, there is no risk of gunk on your iron or ironing board when the fusible goes on the wrong side and best of all the appliqué pieces are movable. It really is a super technique and easy to do. I highly recommend the book. And of course I was itching for a project to play with the technique and this was perfect. It was also quick and fun.

I chose to do half square triangles rather like the original print, and then was enjoying myself so much did another version.  I placed the appliqué on dark grey fabric to hide the odd gap and then free hand drew a template of a vintage sewing machine and cut that out and sewed them onto the Essex Dyed Linen. I made up the pattern for the cover, it wasn’t hard, after all it’s just a rectangular box. I used piping to define the shape and Vilene H640 which is quite a stiff interfacing to give it structure

img_4365img_4366
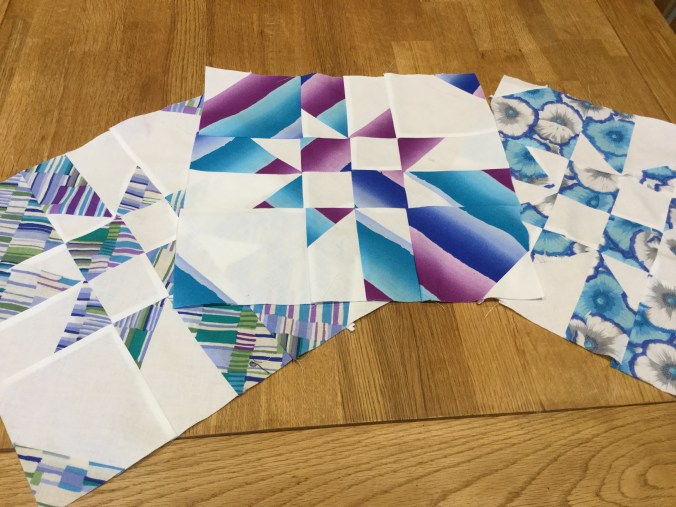
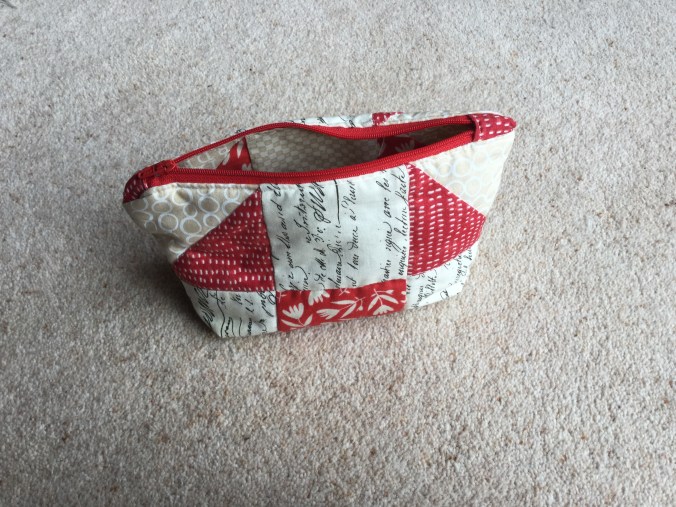
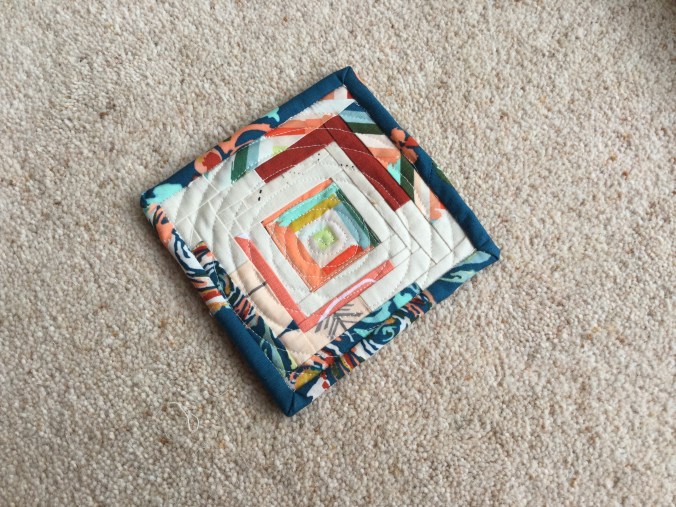
Sewing it together was a breeze with just a simple bias binding along the bottom and a handle on top to whisk it on and off.  At last some TLC for my machine….

IMG_4526.JPGThis is my first Q4 FAL finish against my original target list here

Sunday Stash – country blues

Er yes I know it’s Monday but Sunday is such not a day of rest sadly as I’m usually steeped in domestic toil….who knew children needed feeding so much and I would end up having to buy in so many supplies all the time!!

Back to Sunday Stash and linking up to host Molli Sparkles….I’m trying hard not to buy quite as much fabric as I did in the my first couple of years of quilting. The theory is  I’m buying just what I need for a project but of course I fall in love with a range and all my good intentions go out the window… That’s my excuse. My latest crush….  Heartwood by Makower.

I’d never make a fabric designer ever, partly because colour selection gives me endless anxieties but mostly because I’d never come up with catchy names  and the name of this collection is perfect.

img_4497

I love the soft blue and sharp lime as an accent. That stunning low volume in both blue and grey is just so very reminiscent of an English country scene –  I just need to think of a project that merits it and allows the larger prints to shine.

It was at a very reasonable price at The Fabric Guild. Whilst no one could ever say this online (and bricks and mortar) shop has speedy service it does have very low prices and is perfect for backings when you really don’t want to pay £12+ per metre for something that largely gets hidden. Choice of course is the compromise as it isn’t huge but I usually find something that will do just fine. And it’s rare I need something the next day anyway….

My other item of stash are these templates by Jenny Haynes IG PapperSaxSten.

img_4509

She made this wonderful quilt using these variants of a drunkards path block and it was shown at the Festival of Quilts in the UK recently. I can’t wait to play with them…. perhaps I should combine the fabrics above with these templates!!

img_0990


Finish Along Q3 recap and Q4 proposed finishes

Looking back to Q3 and what I proposed finishing well here is the composite  with the rather modest 50% score. Better than I feared but there are some long standing WIPS that just get moved from quarter to quarter.

img_4412What’s more galling is there are a couple of quilts I finished that never got put down on my target list. So to avoid that I’ve been a bit more ambitious about what could theoretically be achieved but at the same time try to focus on reality with Christmas looming….

So to start with

1. My scrap quilt made almost entirely with scraps. I’ve been a bit stymied by this as I thought I had loads of blue scraps but found I hadn’t enough of the size for a drunkards path block so had to wait until I created a few more scraps to make sufficient blocks. The reason for this determination to make it from scraps is that its for a quilt challenge which has very specific requirements that 80% of the quilt must be made with scraps which is defined as fabric less a FQ in size. This needs to be done soon and there’s no excuse.


img_4280


2. This is the first of a couple of challenge quilts for the Modern Quilt Group,which is a subset of the UK Quilters Guild. We’ve been given some show space at the Festival of Quilts 2017 which is quite a coup and very exciting. This is the UK’s largest quilt show and some say in Europe as well. So the first challenge is on the theme of the music of Cottonopolis, a name given to Manchester which dominated the cotton industry. I’ve been allocated a couple of songs from Mancunian bands Oasis and The Chemical Brothers. I can choose to interpret the band name and/ or the song into a 24″ square quilt. I’m still mulling over this one but I’m torn between doing Cloudburst, the Oasis song, with lots of improv curve rain drops or going with The Chemical Brothers (no I hadn’t heard of them either) and using the January block of Lady Harventine, a pattern I love and from an earlier one I made you can you see the outline of a round bottle glass flask.  In case I go with that option fabrics with chemistry symbols have been ordered.

img_1181

3. The next challenge is a 12″ quilt, any design, any colours but it must incorporate 4  2.5″ squares of fabric which have been provided . There are 2 of them in the top left which are low volume designs and 2 batik squares further down. This is my pick at the moment but it may change. If you think I’ve chosen the fabrics to hide these 4 fabrics, particularly the batiks, you’d be right….

img_4370

4. This is an old faithful string scrap quilt. There really aren’t too many more blocks to do to make this a sizeable quilt. The main reason for wanting to get this done is because it’s taking so much room up in my WIP drawer as the strings are sewn onto paper.

image

5. I purchased Crafted Appliqué by Lara Buccella.  She’s come up with a clever and very effective technique for appliqué and I just need to finish off this sewing machine cover. Should be a quickish finish.

img_4366

6. And finally no. 2 son wants a large warm quilt as he’s out grown the first I made him. We’ve chosen a pattern. Not the most inspiring if I’m honest and we have selected  these fabrics. A fleece backing is required….


Here are them altogether which will serve as a useful reminder.

img_4413

Linking to Nicky Mrs Sew and Sow for the FAL Q4 link up. Wish I was clever enough to add the linky button…..

My drawer of shame….. or delight?

img_4465

This innocent chest of drawers holds secrets. The large drawers are a depository of all my unfinished projects and planned projects that have rested there, in some cases, for more than 2 years.  And many of them are no nearer completion than they were when they were carefully tucked away.

I was reminded of my drawer of shame by a wonderful post by Stephanie of My Vintage Inspiration  which I chanced across, as you do, when surfing the internet and more specifically the blog of another very talented sewist  Kate of Fabrikated. Stephanie is an accomplished knitter and dressmaker and her post which is almost confessional in tone, very entertainly goes through all of her ‘stash of shame’, the many bags of knitting projects started or planned. It struck me that just over 2 years into this hobby I ought to do the same. So I opened that drawer and in true confessional mode the drawer above as well….

Well there were many project bags – I use those cheap craft bags from Hobbycraft some of which I’ve put a see through vinyl front  on like this one. Dear reader I shall not tell you how many bags as I do not want to be responsible for upsetting you

img_4377


These craft bags  work well, big enough for all the projects I do but not too big for the smaller projects and at £1 each having a few extras is not a huge investment.  And being bags as opposed to project boxes, like the ones below, they collapse down if not too full so you are not storing air. I know lots of people use these storage boxes but having trialled them they just take up too much room for me at least.

img_4466

In fact I had a great afternoon going through the drawers.

Some long term projects like this one below I fell back in love with and realised that I had sufficient blocks to finish the top at least. That one has become a priority as being scrap strings sewn on paper they were taking up a lot of space.

image

This drunkard path block project is also very near completion, well at least all the blocks are done. This one is going to be my October One Monthly Goal for Heidi at Red Letter Quilts as it’s been lurking around too long. And so far this year every OM goal I’ve set I’ve met, even if I went to the wire on occasions. I always feel I’m letting Heidi down if it doesn’t get done. I’m sure, the nice person that she is, she won’t hold it against me but it’s just enough psychological pressure to get it done. I think it will be destined for the Siblings Together charity.

img_4280

I also came across projects which are now redundant. For example this project bag was filled the fabrics I was planning to use to make another Sew Together bag.

img_4379

I made my first last year and another one as a pencil case for one of the children and I fully intended to make this one for sewing stuff as I liked the design so much.  However I came across the bionic gear bag which also has multiple zip pockets but also has this very useful ‘tray’ at the front to hold all manner of things when you are sewing. For me that just makes it a more functional bag. So it meant this project bag could be emptied and the fabrics put back into stash.  A win all round.

Another bag I opened (it was beginning to feel a bit like present opening at Christmas by now!!) had these gorgeous fabrics in it.

img_4380

I chose these fabrics at last year’s Festival of Quilts in Birmingham.  I came across these lovely screen printed images from a lady (wish I could remember her name) who made these in her home in South Africa and had taken a stand at the FoQ.  We’ve had some wonderful holidays on safari in South Africa and I thought a memory quilt would be fun to make.  We need a warmer and thicker quilt in the lounge and this one is coming up the list.

All in all an afternoon confronting my shame turned out rather fun and came up with some surprisingly delightful WIPs that really deserve the light of day and not hidden in a drawer. Now to just get on with stitching them!!