An oldie for a baby

0ADAF8E4-B452-4A46-BF3F-38722A820613I reckon the fabric for this very long-standing work in progress goes back around four years. When I cut out my first drunkards path quilt (below) I was left with lots of smaller drunkard path pieces. I couldn’t bear to throw them away so they just got stuck in a project bag and put in a drawer.

image

When rooting around for an empty project bag for some Siblings Together blocks that were coming in thick and fast  I decided It was probably easier to make up the contents of one of the bags rather than make a new project bag.

1A4354D0-DA90-44DD-90B8-405C348DFC832098C89B-5A3F-40B3-8AF3-A0B8AAEAFE05


One of the great things about baby quilts is that they are so very quick to make and finish.  And furthermore they seem to be universally liked as a gift, something I guess to do with the nesting instinct of a new mother.

73EB8B55-2C72-4342-AB24-683A8E3DBB1C

Yes it really was that messy!

It is perfect  quilt to give to Project Linus as it’s too small for Siblings Together and I know they actively collect for neonatal and paediatric wards. I made a similar cot quilt for them a year or so ago based on the Hungry Caterpiller story.

7878EDC7-CE5E-48D2-B65C-1155536E6F4F

I don’t know what the general view of the use of baby quilts where you live but here  in the UK the advice is not to use a quilt as a bed covering until the baby is 12 months for fear of cot death. This is on the basis that the baby may get too warm and babies that young can’t regulate their own temperature.

I remember being given a leaflet as I went home with the first of my premature twins with strict instructions that the room temperature had to be around 60°F with no more than two blankets covering them.  I had the thermometre ready to check the temperature and the requisite number of blankets and carefully monitored both for fear that any breach would lead to his instant death. I did worry as I tucked myself up in my 10 tog duvet in the same room and next to his cot that I would have been freezing with just two blankets but so fearful was I that I’d get it wrong I stuck to the leaflet.  Needless to say when the midwife came round the next day she discovered a baby with a  temperature that was so low he was on the verge of hypothermia and had to be rushed off to hospital to be heated up. I have been sceptical about health advice from the NHS ever since and you can see he was very warmly wrapped thereafter!

062A743C-D16C-4B46-9CAB-6EC9255EB6BB

Interestingly that same child, now 16, always sleeps with his window wide open in all weathers.  The neighbours, who can see his window from their house, were laughing that even when we had snowfall last Spring they could see it accumulating on his open window. So maybe it has had a lifetime effect!

Now whenever I gift a baby quilt to a friend I always tell them what the theoretical advice is and then let them make their own decisions but after telling them my own salutary tale…

B238D686-5873-40C5-959C-139D6F05D09C


Bold and curvy – Quilters’ Guild Challenge

6E2900E1-6072-4A20-80D8-61DCA5C3BC68

6C2204FB-69C2-497F-ACE1-794BBD1C3111

Spot the difference!!

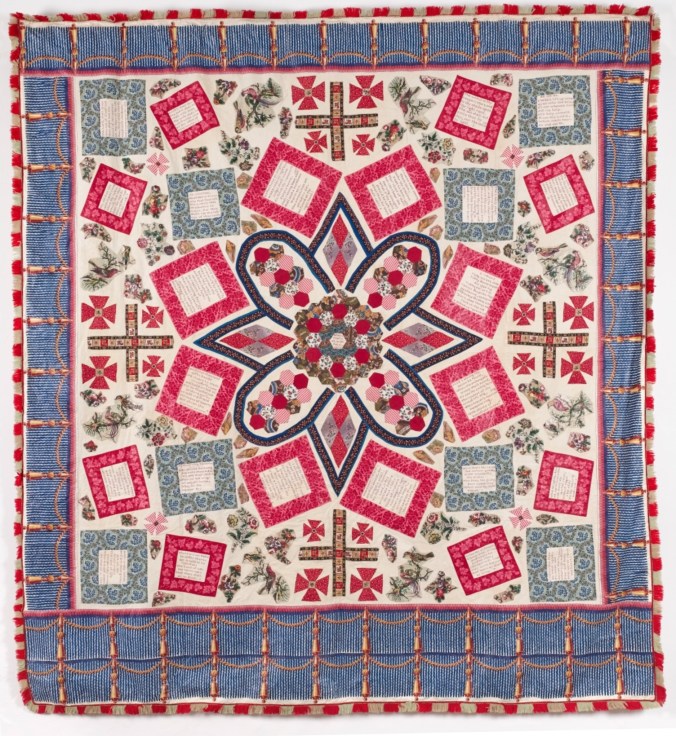
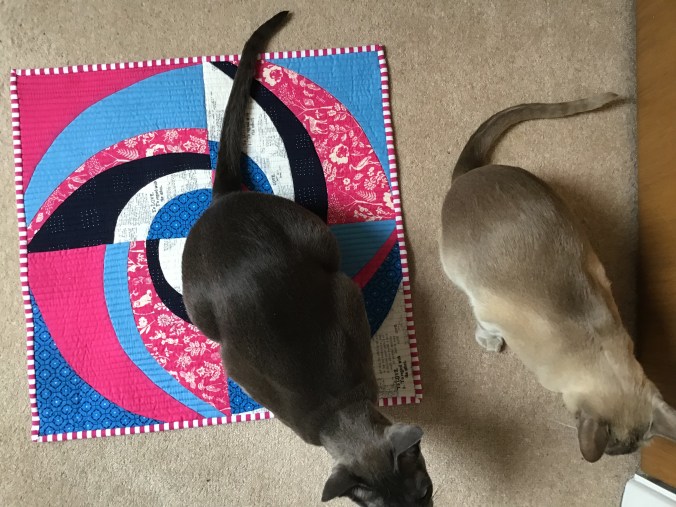
 The Quilters’ Guild here in the UK is celebrating its 40th anniversary this year. In some ways it surprises me that it’s only been around 40 years bearing in mind quilting as a tradition and craft  goes back many centuries. However for its’ ruby anniversary there’s been a challenge put out to members of all the specialist sections of the Quilters’ Guild to come up with a mini quilt based on one of the quilts in their  collection. The quilt in question is the one above, the Bloomfield Coverlet  (so in fact it’s not actually a quilt). And to cut to the chase my interpretation is just above.  I think we can say I’ve interpreted it quite radically…. (incidentally this is a wordy post so I have sprinkled in some outtakes of my photos of my mini with my assistants.)

The Guild’s specialist groups include miniature , traditional, contemporary and its most recent arrival modern quilting.

F106D6C0-1619-4820-874A-4041EE998607

I don’t think anyone could claim that the Quilters’ Guild were rapid in embracing modern quilting given the specialist group was set up in 2014 whereas modern quilting, according to a recent article in the Quilters’ Quild magazine, can be traced back to the early 2000s. And if I’m reading between the lines correctly the founders of the modern specialist group,  Helen Howes and Heather Hasthorpe, had their work cut out to persuade the Quilters’ Guild to set up this new specialist group. But they succeeded.

C5803B87-4CE4-44CC-A8B0-D614FE39F4B0

Needless to say this  acceptance of modern quilting as part of the Quilters’ Guild has been a runaway success. The Modern Quilt  specialist section  has numerous members all thanks to Heather and Helen who still play a huge part.

Another member who was in from the start was Kate Percival, who sadly lost her battle with cancer last year.  It was Kate who put forward the idea that to commemorate the 40th anniversary it would be a good idea if there was a Guild wide challenge. This was taken up and the result will be  a special exhibition of some of these mini quilts from the specialists groups, all with their own aesthetic, hopefully playing nicely together.  It should make an interesting display.

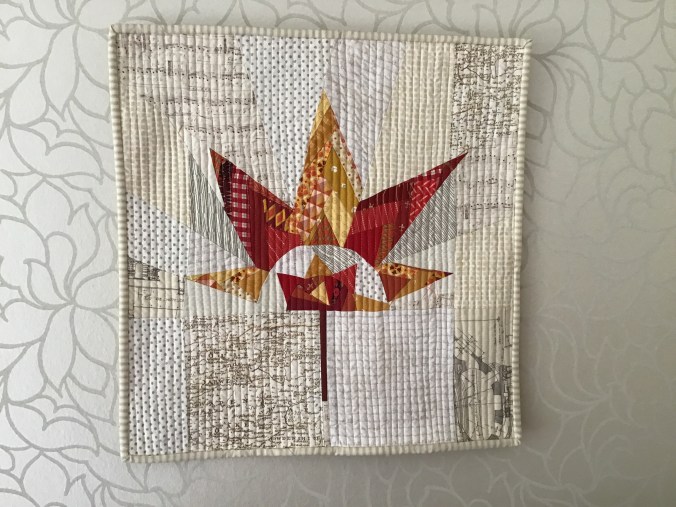
As it happens the Modern Group has always had an annual quilt challenge to make a 20” mini quilt based on a theme.  I’ve always taken part and an example is this one based on the theme triangles  which I can see from where I’m writing. But obviously this year we will follow the Guild challenge.

image

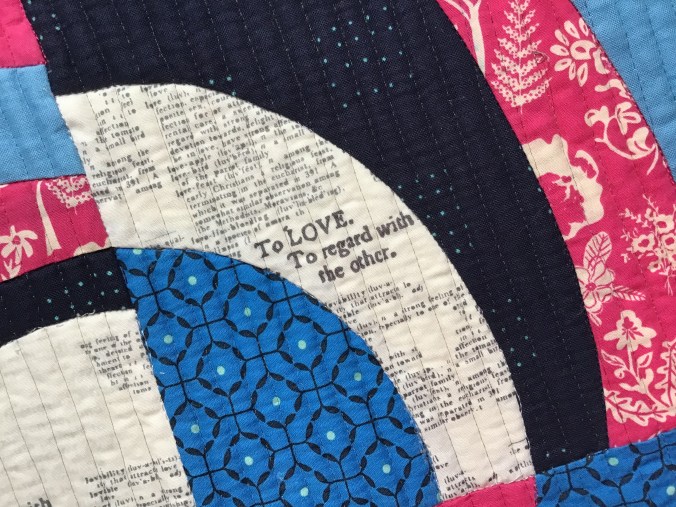
I don’t know what your reaction to the Bloomfield  quilt is but I don’t think there was universal excitement at the choice of quilt. It’s a bit of a funny one. Helen Howes wrote a very interesting piece about it to spur us on  We were also given access to a high resolution image so you could really go up close and personal.

It certainly wasn’t a quilt that set my pulse is racing. I’m not really a blue and pink person and even after over 150 years these fabrics are very vibrant as you can see from the close ups below. Neither am I keen on sentimental poems and the layout is a strange concoction.

DAC7A9A6-A423-4772-8D2D-641E3A31053D4500881C-3681-4891-9DBB-AEB1CC9768F3

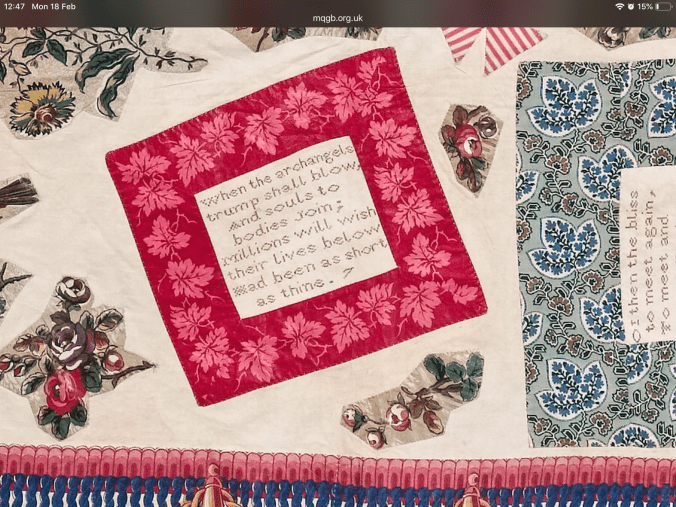
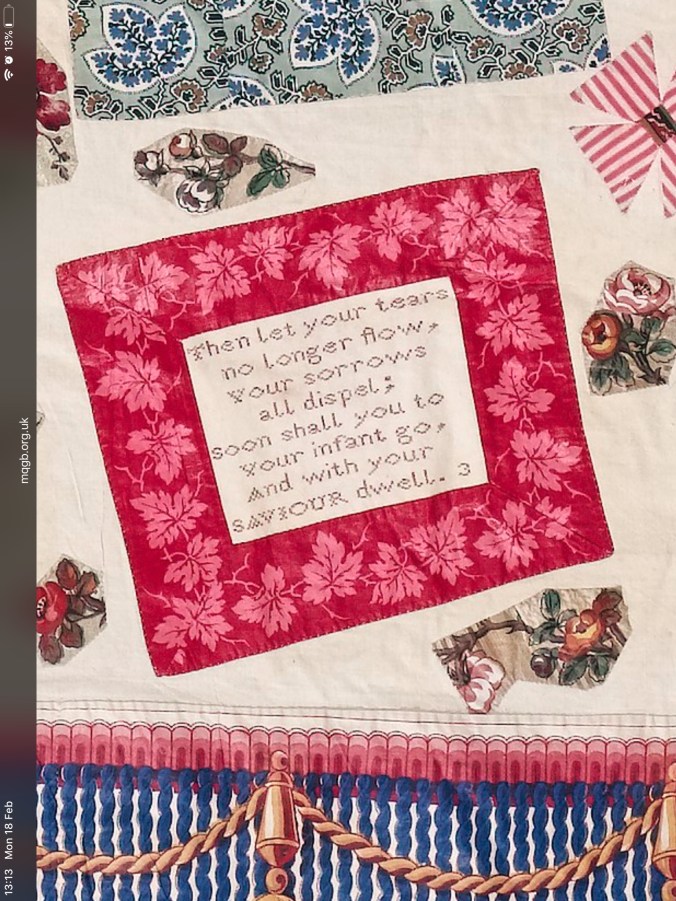
There is very little known about why it was made but because a number of the passages relate to the death of babies and young children it’s been assumed that it was made as a commemorative quilt in honour of such sad losses. But I wonder about that. If you look at the  poems about the passing of babies such as the two below they don’t strike me as being sewn by a grieving mother. They come across as, quite frankly, rather callous! Along with many many women  I have had a miscarriage and trust me even though I have a strong faith I would certainly not be putting my loss in these terms!

0C97C2DD-79E4-488B-8A53-5304B8449884D36B99BD-9056-48C5-8BA5-C9E6923F98F5

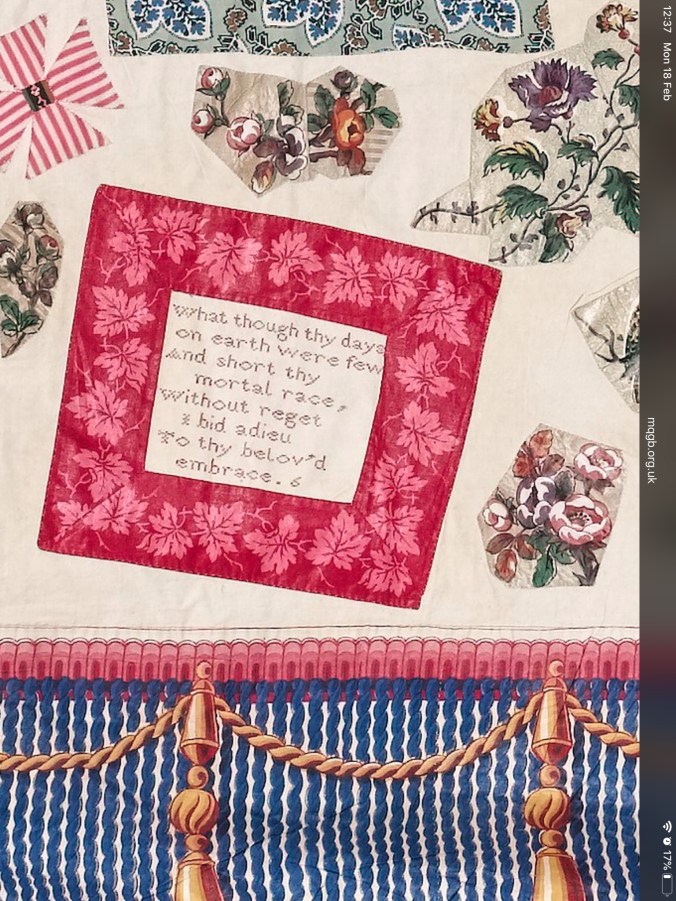
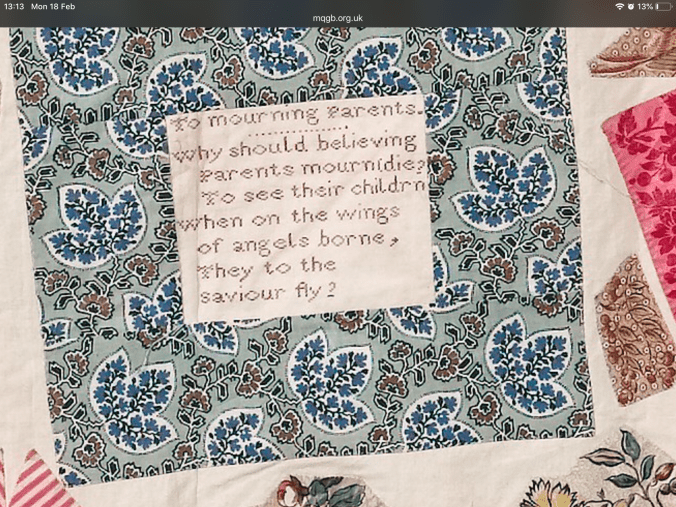
I wonder whether they were sampler embroidery pieces perhaps done on a Sunday where sewing had to be religious. I recall going on a family holiday to a Christian Guesthouse  and every Sunday the table tennis room was locked! My brother and I were deeply unimpressed. But it would have been seen as a typical Victorian virtue and maybe in later years the maker came across these samplers and then arrived at this  rather piecemeal  layout. Scattered across the quilt, to fill in the gaps, are appliquéd  fussy cut flowers and birds. Which even with the kindest eye look a little, shall we say, unsympathetically cut. Perhaps there wasn’t much of that material and the maker had to make it stretch.

Coming up with a modern interpretation was surprisingly difficult. In the end I decided to take from the quilt the things that I liked and then try and imagine a more modern  interpretation.

3FFE02BA-4208-4B21-AEB0-B81080E55CFD

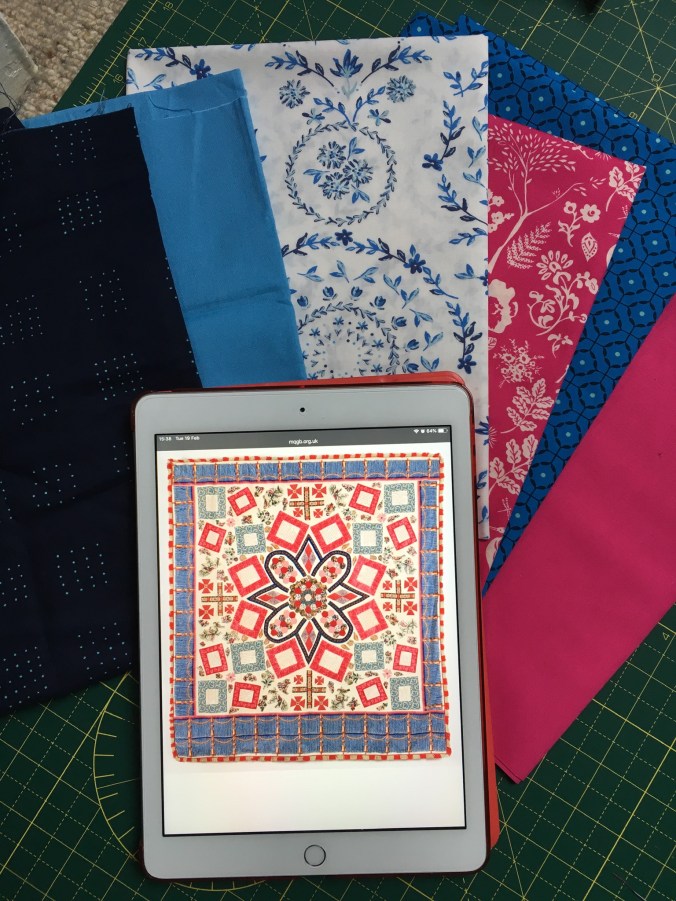
I like the circular nature of the overall design, its symmetrical, I like the darker parts as it gives a bit more depth and I rather like the red and white binding although it’s actually a fringe. I felt I had to stick with the main colours of blue, red/pink and cream as the design was going to be so different but I used a floral pink fabric to echo the flowers in the appliqué pieces between the embroidered passages and a balancing blue. And by sheer luck I had a red and white striped fabric in my stash for the binding. The text print (which replaced that other neutral in the picture above) was in lieu of the embroidered words  and of course what modern quilter doesn’t use text fabrics… I also chose a sentimental text print as you can see from the extract below.

0C60A0F0-A45F-4FC1-81B6-ECD802E31BB1

As to the design I love curved quilts and enjoy a bit of freehand curved sewing, in fact in a rather pleasing way it was Heather’s eccentric crosses  that taught me how to do this in the first place!  I had seen a design on Pinterest  that caught my fancy from a Fons and Porter magazine. I had no idea how to get hold of the pattern so just drew some curves….Because I wanted this to be symmetrical  I drew up a template out of freezer paper, cut the curves by hand and used that for the four sections which then got sewn together.

I wondered about introducing more neutrals  to give the quilt a paler background like the original quilt but in the end, taking my lead from the recent entries at Quiltcon, I chose big and bold.

47C52E94-74EB-451F-8B8B-2FCC190076B3

It will have to have a title if it’s going to be submitted for the challenge so I have chosen The Circle of Life.  It struck me that there is a sense of connection with the past quilter and previous lives let alone the rather morbid sayings in the original quotes representing birth and death. And of course it does contain a circle albeit a rather swirling one. I did toy with the rather facetious title  of Spot the Difference. Depending on how wicked I am feeling at the time I may choose that one!

I think Kate would have liked this quilt. She didn’t shy away from colour and as Helen said we should be making these quilts in memory of her as much as this vintage quilt.


Thread House Retreat Bee – March block

Yep another Bee block posted in the same month, this time for members of the Threadhouse Retreat Bee. This is not to be confused with any other Bee…. at least I’ve chosen a different colour way!

ED986822-A9B0-4E42-B4C0-C8B16F53EEDD

Now I hope you like these blocks, they are from a set of block cards given away  in a recent Love Patchwork and Quilting magazine and designed by Lynne of LilyQuilts. Very fitting as Lynne was in on the Thread house team  from the get go before other commitments meant she couldn’t attend the retreats. I rather liked this 12.5” unfinished block.

As you can see it is really very straightforward. To ring the changes I would like shades of pink. No novelty prints please or purple or red. These are perfect for scraps. Please put the darker pink across the middle and lighter pink as the outer pieces like my blocks. When I say darker pink it doesn’t have to be a dark pink!  I have probably thoroughly confused you now. What I mean is when you choose your two pinks  which ever is the darkest of the two put across the middle.  The white needs to be a bright white so no creams and even Kona snow is probably too off white as well. Thank you. I would like 2 blocks please.

You will need the following for one block

From the darker pink

1 x 4.5” square

1 x 5.5” square

From lighter pink

1 x 5.5” square

from bright white  for background

4 x 4.5” squares

2 x 5.5” squares

09B73111-62BB-4E3C-8CF5-E4B601439B80

First make the quarter square triangle (qst) units of both the darker pink and lighter pink .

Use any method that you like for this particular unit but my method is to first make half square triangles (hst) using a 5.5” white square paired up with one of the  pink 5.5” squares.  I ironed the white square diagonally corner from corner and then put that on top of the pink square right sides together and sewed a quarter inch either side of the line. I then cut it up the middle and you have created two half square triangles.

0107C704-1329-4401-88B0-64E871F80DEE

You then iron one of these  two hst  to create a diagonal line and then place them right sides together  ensuring that the two are correctly positioned ( I used a pin as in the picture to ensure they are aligned). Remember the dark side of the hst has to be facing the light side of the one underneath. You may think that’s obvious. However I still got one of mine wrong!!


DBD8FBAB-600E-4420-BBB6-F1B67F829331

Then just sew 1/4” either side of the line and cut up the centre. Then trim them to 4.5” square.

32C2B2E8-6B3C-49E7-AF82-7244DA4E780F

Make the other qst from the remaining pink 5.5” square paired with a 5.5” white square. Now assemble the pieces as below and sew together. Please trim to 12.5”.

F188727C-E760-4DB0-AAF1-7E216853A779755D098A-1605-4F21-B75B-0FBB6F22AC55

Quick and easy, no? Many thanks and if there are any problems please get in touch


Bee block for March Siblings Together Bee 7

01FB6A89-91E2-4150-862D-E6B99E09CCEB
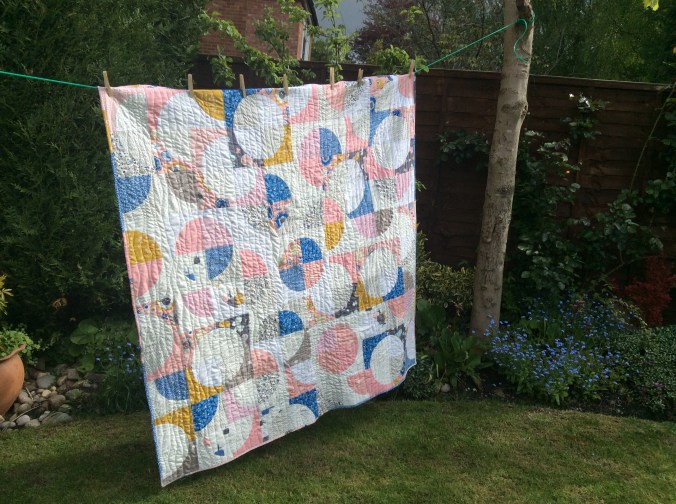
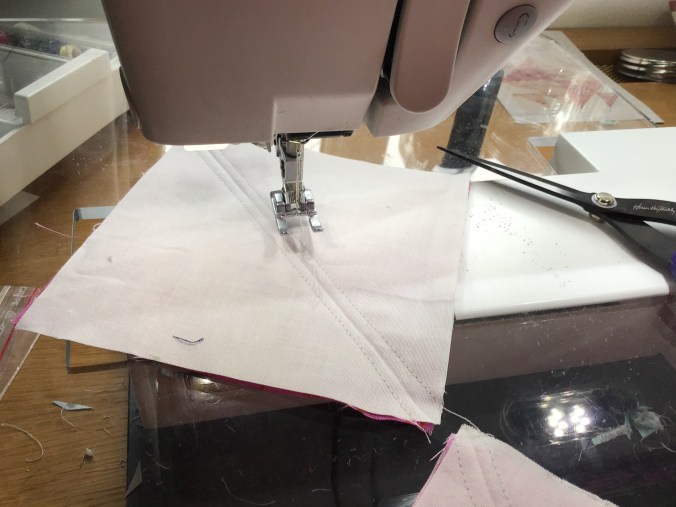
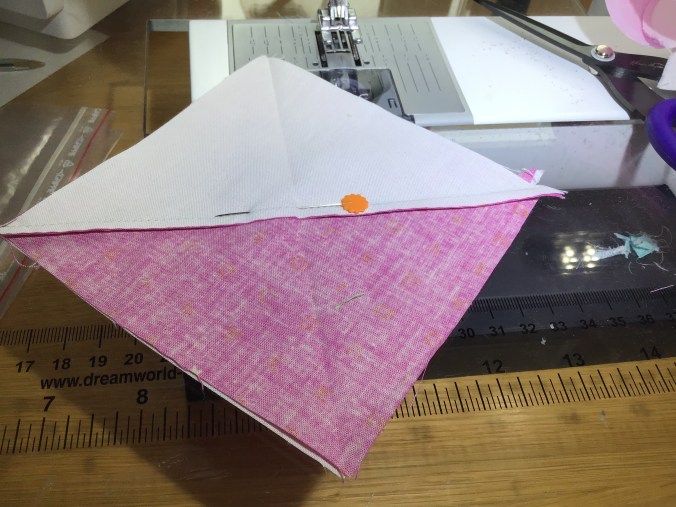
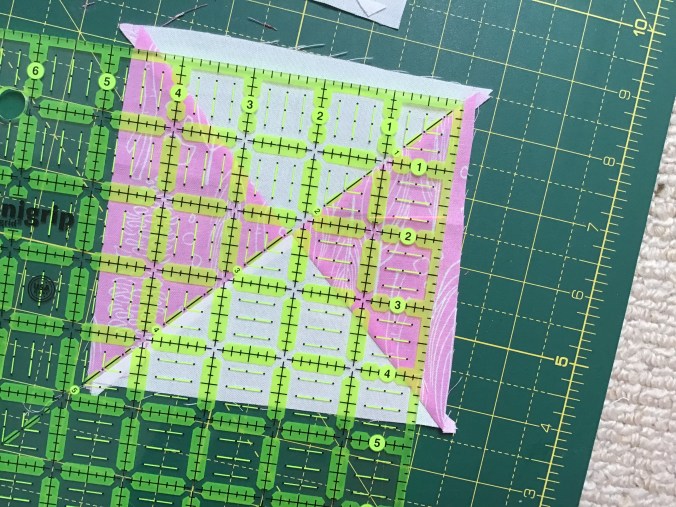
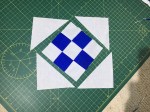
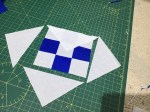
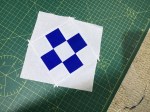
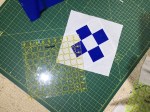
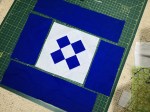
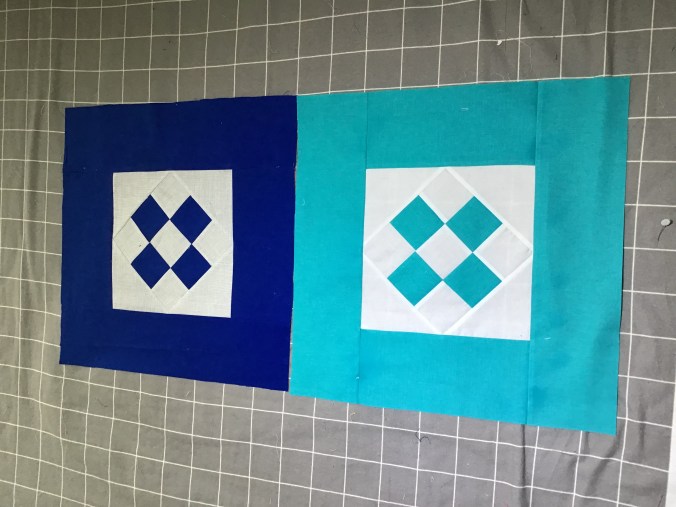
Just a quick disclaimer to start with. I know it does get confusing for those who follow me on my blog and who are in other Bees but not the Bee for whom the design is intended. Trust me it confuses me as well!!    So to be clear this is just for members of Bee 7.  Obviously if somebody else wants to jump in and add to these blocks I’m not going to stop them after all any block for  Siblings Together is another step towards another quilt .

So dear members of Bee 7 here is your block for March. Frankly it’s a bit of a mash up of a number of blocks but I want this quilt  to be simple and  graphic but not just plain squares.

In terms of colour choice, on the basis that blue/green quilts tend to be the ones that are very popular with this age group I would like you to use any solid or ‘reads as’ solid in those colours. And because I know that many of you agonise over your fabric choices I’ve put some here that I think would be fab and others on the left where maybe it’s too much white and not enough colour.

B2E817DC-9723-45D1-813C-32B82B972E9C
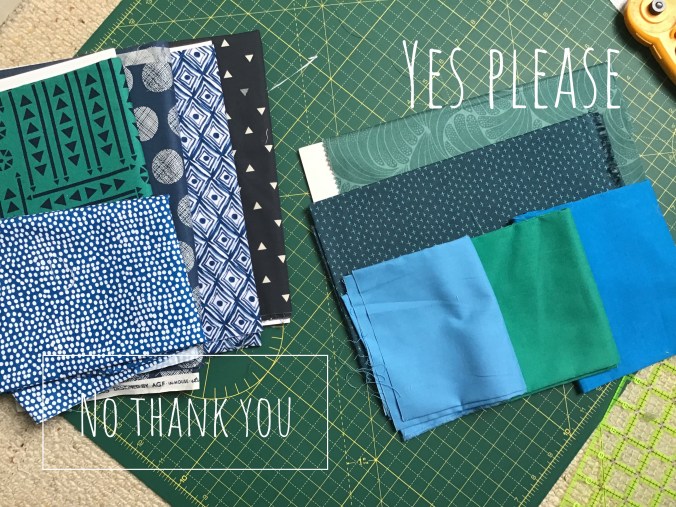
Furthermore for the colour element of this block you will need the best part of a fat quarter.

For the secondary colour can you please choose again something bright white, certainly not tan or cream but there could be a light pattern on it but I’d like a good contrast with the background colour.

Hopefully that helps and  I don’t come across too bossily!

So to how to make the block and given it’s a large one I only one block per Bee member  please.

you will need from the coloured fabric

2 x 17.5” by 4.5”

2 x 9” by 4.5”

4 x 2.5” by 2.5”

And then from the neutral

2 x 5.25”  by 5.25” square

Cut each square diagonally making 2 triangles per square and 4 in total from both squares

5 x 2.5” by 2.5”  squares

57323EC0-B742-40B6-853D-FF5F80819275

Use a scant 1/4” throughout.

Using the 2.5” squares make up a checkered square as below.  Please trim to 6.5” square.

3E3F0191-BBF5-48A4-8198-6F142E6F1612

Now sew the white corners on this checkered block thus.


Trim this block to 9” square and then add the coloured borders on as follows


Now do a final trim to 16.5” square. I know these larger sizes are tricky to size so feel free to leave the last trimming as I have a 16.5” square ruler for this.  I’ve allowed some wriggle room here so the actual square will be closer to 17”. This is because I find the bigger the block the greater the margin error! That might just be me!

I hope that is clear. Any problems please let me know.

Dressmaking Adventures

x Jenn S Nowood Hill copy
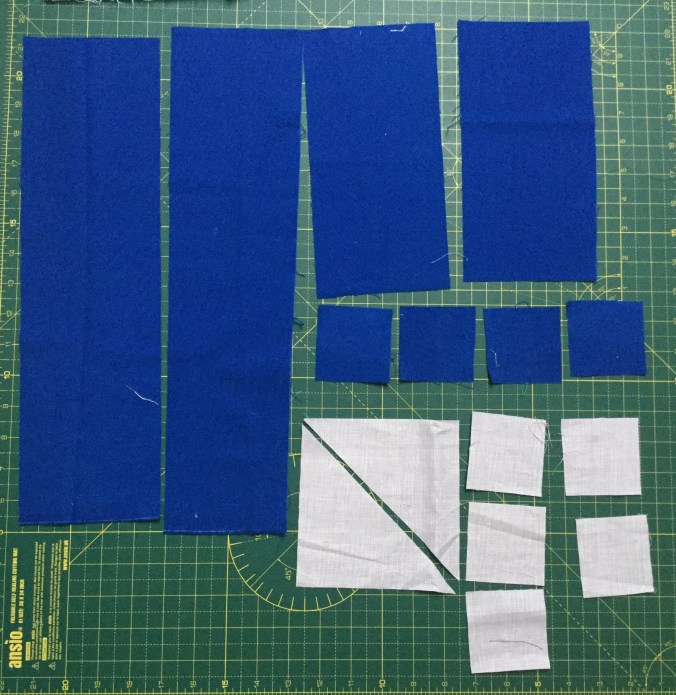
I once made a good chunk of my clothes. This was in the heady days in the 70’s when fast fashion and cheap imported clothing had yet to hit the UK. It was also what many women did to extend their range of clothing and it was genuinely cheaper than buying.  As a consequence a fabric shop and full haberdashery was typically found on most UK high streets. I even made my first work wardrobe when I started at a big UK corporate as a graduate trainee. Now that would certainly not happen today.

Although I wasn’t especially talented I had a mother who was and with her help the clothes generally fitted well. I only wish I had more pictures of what I made….. but the picture above survives and shows me wearing a blouse made from a perfect ‘made to fit’ pattern drafted by my Mum with even variant collars so I could ring the changes. Paired, of course, with the ubiquitous flared jeans c 1976?

As an aside please forgive the very non pc name of our cat back in the 70’s.  It could be worse. In the same batch of photos my Dad had compiled having  digitalised and labelled old prints/negatives was one of his childhood pet dog.  This dog was also black but his name started with an N…. I was genuinely shocked! My parents assured me that this was a completely normal colour reference in the 30’s and even my mother’s rather genteel girls school had n… brown as the colour on their uniform list. How times, mercifully, have changed….

Well inspired by bloggers like Kate I’ve been tempted to get back in the saddle and I signed up for the kimono class that Kerry did at the recent Threadhouse retreat.

26558BB8-B728-4CB1-9BC8-B73ADD1F3D41

Its a pattern by Sew Over It and a great choice for an open class, simple (only 4 pieces) and  fits any size. I chose to get it printed rather than construct it from A4 PDF sheets but at £10 I might try cutting and pasting next time. Bella is helpfully holding the pieces down. I cut out the medium pattern size which worked out fine. 

5613FF64-8606-4A54-BAFB-75287546BFF7

It needs a flowing fabric so that was a bit trickier than cotton us quilters are more used to but all, under the expert eye of Kerry and masses of pins, very doable. But I was a bit taken back by the price of viscose fabric. Branded would cost around £16 per metre and I needed 2.5m for the longer version. It was a far cry from the £2/3 cost of fabric to make the blouse in the picture above from the 70’s. Ok some 40 years have elapsed but with the help of Google on average there has been a four fold increase in prices since then so on that basis today it would still only cost me £8-£12. In fact not wanting to waste money on something which was experimental I only spent £15 on some drapey viscose which looked and felt fine.

1424EE32-FFCD-4535-8004-1FDD337E24AB

We were advised to wash the fabric first but I forgot…..but I did cut it out at home using our island unit and a rotary cutter and cutting board  which proved quick and easy and it was certainly easier than cutting it out with scissors on the old dining room table at home.

21410695-FB6F-47DE-82E6-713DAEA61F9C

The class was great fun, mostly seeing everyone’s else’s creations and fabric choices. Kerry got us to sew French seams which worked beautifully other than I  had a real mental barrier about sewing wrong sides together and had to unpick more than I should have done.

3939B484-FC8A-4347-AEB0-0D32F488F95F

We had 3 hours which for an experienced sewer would be ample but it took most of us longer but as you can see it got finished and I really like it. It skims more than clings which is good for me. I chose to curve the front rather than leaving it straight as it looked a bit like a house or lab coat! It’s too cold at the moment to wear it but on a nice day where a cover up is needed this will be perfect.

789C042C-BB2B-4518-A01F-AFBF11D05F52

I might even make another and I may even splash out more £ on the fabric or go sheer….. maybe even something braver inspired by the wonderful Great British Sewing Bee on BBC now which is similar to the Great British Bake Off in concept but so much more visual and fun….I shan’t be applying for the next season though.


Smorgasbord quilt – February block for Siblings Together Bee 2

E85641C2-B9B8-4C9B-9F88-9590883D7ACE
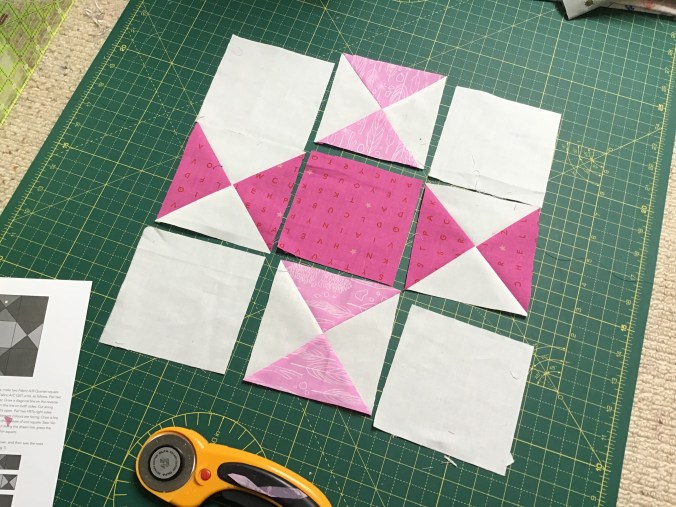
Do not be alarmed dear Bee member, the block above is not the one I’m asking you to make. I know this Bee is chockful of very talented and experienced quilters able to make this block its just it takes a lot of time and these Bees are about doing something fun, reasonably quick and fulfilling.  And preferably using scraps….

So my plan this month is to use the foundation pieced block above as the centre of a medallion quilt. Raiding my spare blocks project bag recently I found quite a few spare blocks that had been made for other quilts where  I had just made too many.  It then struck me it would be fun, with your help, to do another medallion quilt similar to this one I made from left over blocks from a couple of Bees.

D63962AE-5D55-4AB0-A84C-6B57C8A998F8

Bee Blocks for February

a7eb2abe-af87-44cf-99f4-3fd5e573bb44

Ok scene set; I’d like the following blocks, a smorgasbord of shapes/designs….. but mostly a square in a square.

I would like you to make 2 square in square blocks at unfinished 4.5″ size and 2 square in square blocks at unfinished 8.5″ size.  Then a strip block 6″ by 12″ with strips any size but no bigger than 4″. 

Colours/fabrics

The colours of the squares in the square need to be any blue or any green and the neutrals light grey/white/print or solid (but no tan or cream).

The strip block needs to be made of any blue or green fabric. 

No fabrics please overtly childish or flowery. 

Square in Sqare blocks

There are many methods and use the one you are familar with but  I saw on Stitched in Color, one of my favourite blogs, a new to me method which I’d  not come across before but I found really useful from this Hydde Ann’s blog.

Please follow the instructions given in the above link  for the 4.5″ unfinished block but I didn’t bother to cut the coloured square from the fabric diagonally.  For the 8.5″ unfinished block the corresponding sizes are from the coloured fabric cut 1 x 6 1/8″ square and from the neutrals cut a 2 x 5″ square. With the two 5″ squares cut diagonally to make 4 triangles.

Don’t forget please to trim the blocks to 4.5″/8.5″.  Do not worry if they are not perfect. As I’ve said  before perfection is overrated!

Here are  some pictures to make it clearer.

3530d234-2e03-4948-894e-1e8a032fa0d0975eab34-1426-4ba8-8626-119fe34e3dd3efef9c5d-d977-492a-97f4-e51e1e5c30319f64bc8c-98b2-4c47-b36e-e26a2de214ef


Strip block

For the strip block just sew together any green or blue strips of any width up to a maximum of 4″ and then cut to 6″ by 12″ as the picture below. If it’s wonky like mine that’s fine

a32cd13e-efe6-4caa-ade9-45c067765ce0


As always if there are any problems please let me know


2019 – what next

I like to have some sort of a plan for quilting if not, sadly, for anything else! It gives  me some idea of what I want to do and where the priorities lie at least at this point in time. It’s interesting to look back at last year‘s plan and have a laugh at what you thought you’d achieve!

My actual review for 2018 is here but recalling what I’d hoped to do in the year set out at the end of this post and its a mix of success and failure.

I did get to finish a number of quilts for Siblings Together, there is a lovely flannel backed quilt under which  I sit in our lounge which has become a family favourite and I did get to make a baby quilt for a friend but I think only 4 glitter blocks were added to the pile and no entry to the Festival of Quilts.

D63962AE-5D55-4AB0-A84C-6B57C8A998F8

AB7C8142-37F3-41A3-BEA5-BD2D489C81C8

7F1AC557-4482-4B49-BEB1-15FBB83C2114

So to this year in broad terms….

1) Yes I’d like to keep on with my glitter quilt. I’m going to have a go at sewing them. Yes I know handsewn blocks and machined blocks may well look different to the trained eye but mine is so not trained…

IMG_6375

2) Lots more quilts for Siblings Together. I’ve stepped back from making monthly blocks for a couple of the bees and only make for 2 now but as we are very short of quilt makers I do that for a number of bees.

3) I don’t think I’ve ever made a solids only quilt. I may try that this year.

4) keep on top of my scraps. My large scrap drawer is bulging….I’m wondering about a drunken path quilt…..

a198d915-ab55-4994-be55-fadbee06eb6c

5) I must do my son’s 21 st birthday quilt before he is 22!

6) Try to be really disciplined about keeping the sewing room tidy and the process more organised and less messy. I tend to leap in and start cutting when I haven’t cleared away the previous project.

As to immediate plans these are my Q1 targets

1. Assemble and finish off these blocks for Siblings Together there are a rather scary 7 quilts to assemble and quilt and 1 top that needs quilting


2. Quilt a top for Kate, another ST quilt. a beautiful strong design quilt perfect for an older boy.  Watch this space…

3. Do something with all the scraps in the picture above before the drawer breaks literally. It’s an old Victorian pine chest….

4. Experiment with sewing glitter blocks. I still love the design.

5. Don’t enter Festival of Quilts.  It’s GSCE year for the twins. The summer will be fraught enough!

6.There are a couple of items of secret sewing for friends.


Well before we slip into February I better get this post off.


Linking up with a great idea to encourage blogging with Helen at Archie the Wonderdog for some furtling…..

Nebbits and cat problems

F1E01D6B-8E21-4EB5-AF89-E8A78BDC8F8D

When I had an HR job in a factory many years ago, a sick note came in from a rather wiley shop steward with the reason for his sickness absence as  ‘Nebbits’.

Now no one could ever have describe this guy as a new age man and he made it very clear that having to deal with a woman in negotiations etc. was very demeaning and was  just against the proper order of things. So I knew that this was his way of throwing the gauntlet down and the very last thing I was going to do was ask him what nebbits meant.

I rang the site medical department. These were the days of huge industrial sites employing many thousands that had fully equipped medical facilities with doctors and nurses at hand. But despite their undoubted expertise they’d never heard of the condition. I checked with my team and rang other HR people but I continuously drew a blank and then determined to crack it, it struck me –  nebbits was short for  nether bits in other words rear end problems. Well poor Felix, our grey Tonkinese cat, had similar trouble and proceeded to lick the offending region, which I’m quite sure my shop steward couldn’t have done,  to such an extent that that region became quite bald of hair.  As a consequence Felix, aside from a course of pills, pain killers and a probiotic, had to wear the dreaded cone of shame. Does this picture remind anyone else of the handmaidens in The Handmaids Tale?

03E14DDF-1EF2-4957-ACC5-656F4E2741CC

6fcd5ccb-6c7d-4cdb-a20f-eb73894e867c


I’d made Skye a fabric cone when she was spayed a few years back using the cheap plastic cone she was given by the vet as a template. She didn’t like it but it worked and must have been more comfy. I tried that one on Felix but it was way too small. So it was just a case of making a new one and just extending the pattern to make it longer.  I used headliner as wadding to give it more structure. Then to secure it I added some buttonholes.

Now my machine does beautiful automatic button holes but it failed here. The extra thickness meant that the automatic buttonhole foot couldn’t cope so I made some pretty rough and ready ones just using a zig zag stitch. I certainly wouldn’t want anyone  to have a close look at the sewing but it worked a treat.

But it never rains but it pours because Bella having been spayed also had to wear a cone to stop her licking her wounds. But of course she fits Skye’s cone perfectly. I can’t work out whether she looks cross  because of the after-effects of the anaesthetic or she’s just cheesed off with the cone, I suspect the latter!

3D9F4AB7-24B5-4E87-84CF-05BC1FCC4727

But cross or not it does look comfy here doesn’t it

3222AEFE-AD6B-4029-8BAB-01761E4B4F46

In fact because of complications with the operation she had to wear the cone for 10 days poor thing.

If you have pets and want to make something similar then using a plastic cone as a template or make a cardboard version just to check the size, it’s really easy. I used the earlier cone I’d made.

DDD96E21-5E42-4520-82F2-030AA6FDD5FA

I just cut out a 2 pieces of fabric preferably something soft like flannel or fleece then a third piece as the wadding, chose the stiffest you have. Rather like a bag it needs to have some substance otherwise it will just drape over the head rather like a headscarf.

12CC94AD-8CA5-4FEF-BCFE-1B33C064924E

Sew round the outer edges leaving the neck unsewn so you can turn it out. With fleece in fact I left the outer curve unsewn and just oversewed the outer curve as you can see above.

For Felix’s flannel one I now had an open edge.  I guess you could hand sew this closed but I used shop bought bias binding.  I didn’t worry that it was all a bit rough and ready and the binding, because of the sharpish curve, was a bit twisty.  Needs must, but careful hand sewing might have given a neater finish. On the other hand I like the two tone finish it gives.

And then the need to secure it to your pet.  We found attaching it to a collar helped so I added a three straps to hold the collar. They need to big enough to allow the buckle to thread through.

52e75b8f-1755-4535-99fa-60cacd437434

And then the button holes. You can use safety pins although that would worry me and occasionally the cone has to come off as eating can sometimes be a challenge. Velcro strips can also work and that’s what I did on the fleece kitten version but with an adult cat or dog who will be stronger and more agile something stronger is needed. Well that’s been my experience.

9970c823-41cb-4432-8685-d8137dbfc3da

You can of course buy soft pet cones and I suspect they are very good but if you have the supplies and you like making things for the people and pets in your life then this can work very well.

I’d like to think my cats were grateful but I fear not….


Siblings Together Bee 4 – January block, clean and cool

1E02D604-FFC6-4920-B114-1D9FD10ECA8D

Happy New Year everyone and so sorry this is a day late. I thought I’d checked all my Mama commitments for January but this slipped through….

Anyway this  is a block I’ve wanted to play with for a while. It’s been sitting in my Pinterest quilt pictures for a few months and it always struck me as a great design for an older teen boy provided the colours were kept cool and clean. So in effect I have minimised the colours and kept it to a very restricted palette  and mixed in lots of greys and whites.

Do feel free to play with the contrast between the two fabrics  in each block. You can see from examples in the top picture in one I’ve gone for minimal contrast in others fairly strong contrast.

In terms of that restricted palette…. just dark, medium or light grey, white, they can be prints or solids. If you do want to mix in a bit of colour as I have done then can you please keep to yellowy greens. The colour of the fabric in the block I’ve made is an olive.  Knowing how subjective colours are I’ve put a picture below showing on the left bluey greens that  I definitely don’t want and over on the right yellowy greens that I do. In the bottom picture I’ve even put a muddy gold colour  which I think works well.

02CA5310-DE81-413E-AE59-05317A129A47

B58CAF7B-FFCD-4067-9DFC-01A5EB03FDCA

It is the simplest of blocks, but certainly when road testing designs  with my teens  they like very simple graphic  designs  more than complex blocks ! Well if you are like me trying to restore the house to some sort of normality after Christmas then simple is good….

Anyway for each block you will need

4 rectangles   5.5” by 4” in one fabric

4 rectangles 5.5” by 4” in another fabric.

Arrange in a chequerboard fashion and sew together with a scant 1/4” seam.

CAB2CEE0-0EE2-42C5-A740-7A1EFF03D318

You should end up with a block 14.5” by 10.5” . Please trim to this size

Any problems or concerns please get in touch.

Many thanks

Review of 2018

Its that time of year to look back given the watershed that a New Year presents. I’m joining Cheryl for the Best of 2018 linky party for her annual link up of a review of the year and will grapple with the future in another post.

It’s been a year of two halves sewing wise.  First year pretty full on, second half rather arid.  Through circumstance and the vagaries of life sewing got pushed to the back burner in the summer. And once on the back burner I found it hard to bring it to the fore with time and brain deficiencies!

Looking backwards, and I hope Cheryl doesn’t mind but I’m not just going to focus on the best as I like to be a bit more retrospective so I will be looking at the good, the bad and the ugly. Lets start with the Good.

The Good

1.My favourite finish

I’ve chosen two.

D63962AE-5D55-4AB0-A84C-6B57C8A998F8

This one above I love because of the colours and while I suppose it’s my own design in reality I made it up as I went along. Yes I did start with some graph paper and realised that for a medallion quilt multiples of 3 worked well but as to the rest it was a bit of a gamble but it paid off and this one will be heading to Siblings Together. Most of the corner and centre blocks were made by ST bee members.

93F326B1-9FD3-4135-8FA0-6C6E3F0E7527

The next one is the table topper I made my Mum for her birthday. I saw it in place when we were down at their’s for Christmas and I have to say it looked very good.

2. The blog post with the most comments

6F9976C7-20C7-484B-BDCC-D8E616EFB537

This post with a Royal title I’m guessing  might have been the key here. Perhaps it attracted more viewers? Anyway lots of insightful comments and again much interest in the design. This is the third quilt I have made using the block from the free quilt design Fieldcrossing by Elizabeth Olwen – more details in the post.

3. The post with the most views

3349461F-0AC7-413D-86E3-2980A0CCF843

I suspect it was the hint of wickedness in the title of this post.  It reminds me of trying to get the attention of our in-house lawyer on a particularly boring share plan question. After many emails, which he completely ignored, I sent one with ‘Sex Scandal’ in the title of the email and he answered it  instantly!

4. My most useful make

D0A2A76D-5118-4E72-BA9F-BEC06F398E04

1936383A-EE9A-4DD5-B6BE-5F6FD5CC8F86

After yet another request to look into my bags at airport security this was made. Mind you it’s  yet to be tested. I may just get stopped because I look dodgy.

5. The quilt my family like the best

2CCEBC58-F735-4ABF-8B4A-FBAF53C19785

This lives in our lounge and being large, backed with flannel its a favourite with all of us as I am forever having to refold it.  Obviously re-folding is a skill my children have yet to learn.


The Bad

6. My greatest failure

7CD3543B-6F8C-47B5-9F1D-B94F47EAAE74641B7705-7597-487D-8301-603595E8B176

This was the triple pouch from Aneela Hooey’s book Stitched Sewing Organisers. Don’t let me put you off the book, it’s excellent but this one defeated me.  Yes it got finished but I had to hand sew a raw edge and discovered a fourth pocket, which apparently wasn’t a mistake. It takes masses of material and is useful but, and its a pet hate with me, not all the pouches are  secured with a zip so things can slip out.

The Ugly

7. My least favourite quilt.

842DCFB0-CD9C-49C9-81D5-E5F556BDF1E8

This is a good example of both the highs and lows of quilting.  I loved the experimentation and in many ways I liked the final top but dislike the quilting which is underwhelming. Now I could add more quilting lines but I used a variegated thread which on the plain fabric looks like it’s  marked or stained! I could unpick it but can’t be bothered and I’m not sure I like that strong blue colour anyway.  But on the plus side I learned loads but I wish I knew what to do with it!

8. The quilts I would have like to have made

And finally a tribute to two very prolific, talented and inspirational quilters whose originality and creativity have produced these beauties which are deservedly heading off to QuiltCon, the juried modern quilt show. They each have multiple entries but these are my favourites.  Eclat by Sophie of Luna Quilts, is simply stunning it was at the UK Festival of Quilts this year and Geometry by Jayne of Twiggy and Opal, beautiful, clever and entirely made in solids which I find a challenge.  I can’t recommend their blogs enough.

2019

I’m back to sewing which sounds vaguely like a threat. But with a month of being limited in what I can do because of eye surgery and then the frantic run up to and then post Christmas switch off I’m determined to crack on and a baby quilt is on its way for a prem baby born just before Christmas. I will give some though to what next….